Posted on Leave a comment

Gauge Chart JS – Speedometer Example

A gauge chart is a scale to measure performance amid the target. Yeah! My attempt at defining ‘Gauge.’ This article uses the ChartJS JavaScript library to create a gauge chat.

The below example creates a speedometer in the form of a gauge change. It achieves this with type=doughnut. The other options, cutout, rotation, and circumference, make the expected gauge chart view.
View Demo

<!DOCTYPE html>
<html> <head> <title>Gauge Chart Example using Chart.js</title> <script src="https://cdn.jsdelivr.net/npm/chart.js"></script>
</head> <body> <canvas id="gaugeChart"></canvas> <script> // data for the gauge chart // you can supply your own values here // max is the Gauge's maximum value var data = { value: 200, max: 300, label: "Progress" }; // Chart.js chart's configuration // We are using a Doughnut type chart to // get a Gauge format chart // This is approach is fine and actually flexible // to get beautiful Gauge charts out of it var config = { type: 'doughnut', data: { labels: [data.label], datasets: [{ data: [data.value, data.max - data.value], backgroundColor: ['rgba(54, 162, 235, 0.8)', 'rgba(0, 0, 0, 0.1)'], borderWidth: 0 }] }, options: { responsive: true, maintainAspectRatio: false, cutoutPercentage: 85, rotation: -90, circumference: 180, tooltips: { enabled: false }, legend: { display: false }, animation: { animateRotate: true, animateScale: false }, title: { display: true, text: data.label, fontSize: 16 } } }; // Create the chart var chartCtx = document.getElementById('gaugeChart').getContext('2d'); var gaugeChart = new Chart(chartCtx, config); </script>
</body> </html>

The above quick example script follows the below steps to render a gauge chart with the data and the options.

Many of the steps are similar to that of creating any other chart using this library. We have seen many examples in the ChartJS library. You can start with the ChartJS bar chart example if you are new to this JavaScript library.

The data and options are the main factors that change the chart view. This section has short notes for more information about the data and the options array created in JavaScript.

This JavaScript example uses an array of static data to form a gauge chart. You can supply dynamic data from the database or any external source instead.

The data array has the chart label, target, and current value. The target value is the maximum limit of the gauge chart scale. The current value is an achieved point to be marked.

Using these values, this script prepares the gauge chart dataset.

The options array is a configuration that affects the chart’s appearance.

The ChartJS allows featured configurations to experience the best chart views. Some of those options exclusive to the gauge chart are listed below.

Posted on Leave a comment

JavaScript – How to Open URL in New Tab

by Vincy. Last modified on June 25th, 2023.

Web pages contain external links that open URLs in a new tab. For example, Wikipedia articles show links to open the reference sites in a new tab. This is absolutely for beginners.

There are three ways to open a URL in a new tab.

  1. HTML anchor tags with target=_blank  attribute.
  2. JavaScript window.open() to set hyperlink and target.
  3. JavaScript code to create HTML link element.

HTML anchor tags with target=_blank  attribute

This is an HTML basic that you are familiar with. I added the HTML with the required attributes since the upcoming JavaScript example works with this base.

<a href="https://www.phppot.com" target="_blank">Go to Phppot</a>

Scenarios of opening URL via JavaScript.

When we need to open a URL on an event basis, it has to be done via JavaScript at run time. For example,

  1. Show the PDF in a new tab after clicking generate PDF link. We have already seen how to generate PDFs using JavaScript.
  2. Show product page from the gallery via Javascript to keep track of the shopping history.

The below two sections have code to learn how to achieve opening URLs in a new tab using JavaScript.

javascript open in new tab

JavaScript window.open() to set hyperlink and target

This JavaScript one-line code sets the link to open the window.open method. The second parameter is to set the target to open the linked URL in a new tab.

window.open('https://www.phppot.com', '_blank').focus();

The above line makes opening a URL and focuses the newly opened tab.

JavaScript code to create HTML link element.

This method follows the below steps to open a URL in a new tab via JavaScript.

  • Create an anchor tag (<a>) by using the createElement() function.
  • Sets the href and the target properties with the reference of the link object instantiated in step 1.
  • Trigger the click event of the link element dynamically created via JS.
var url = "https://www.phppot.com";
var link = document.createElement("a");
link.href = url;
link.target = "_blank";
link.click();

Browsers support: Most modern browsers support the window.open() JavaScript method.

↑ Back to Top

Share this page

Posted on Leave a comment

File Upload using Dropzone with Progress Bar

by Vincy. Last modified on June 30th, 2023.

Most of the applications have the requirement to upload files to the server. In previous articles, we have seen a variety of file upload methods with valuable features.

For example, we learned how to upload files with or without AJAX, validate the uploaded files, and more features.

This tutorial will show how to code for file uploading with a progress bar by Dropzone.

View demo

If the file size is significant, it will take a few nanoseconds to complete. Showing a progress bar during the file upload is a user-friendly approach.

To the extreme, websites start showing the progressing percentage of the upload. It is the best representation of showing that the upload request is in progress.

dropzone progress bar

About Dropzone

The Dropzone is a JavaScript library popularly known for file uploading and related features. It has a vast market share compared to other such libraries.

It provides a massive list of features. Some of the attractive features are listed below.

  • It supports multi-file upload.
  • It represents progressing state and percentage.
  • It allows browser image resizing. It’s a valuable feature that supports inline editing of images.
  • Image previews in the form of thumbnails.
  • It supports configuring the uploaded file’s type and size limit.

How to integrate dropzone.js to upload with the progress bar

Integrating Dropzone into an application is simple. It is all about keeping these two points during the integration.

  1. Mapping the UI element with the Dropzone initiation.
  2. Handling the upload event callbacks effectively.

Mapping the UI element with the Dropzone initiation

The below code has the HTML view to show the Dropzone file upload to the UI. It includes the Dropzone JS and the CSS via a CDN URL.

<!DOCTYPE html>
<html> <head> <title>File Upload using Dropzone with Progress Bar</title> <link rel="stylesheet" type="text/css" href="https://cdnjs.cloudflare.com/ajax/libs/dropzone/5.9.2/dropzone.min.css"> <style> .progress { width: 300px; border: 1px solid #ddd; padding: 5px; } .progress-bar { width: 0%; height: 20px; background-color: #4CAF50; } </style> <link rel="stylesheet" type="text/css" href="style.css" /> <link rel="stylesheet" type="text/css" href="form.css" />
</head> <body> <div class="phppot-container tile-container text-center"> <h2>File Upload using Dropzone with Progress Bar</h2> <form action="upload.php" class="dropzone" id="myDropzone"></form> </div> <script src="https://cdnjs.cloudflare.com/ajax/libs/dropzone/5.9.2/min/dropzone.min.js"></script>
</body> </html>

The file upload form element is mapped to the DropzoneJS while initiating the library.

The form action targets the PHP endpoint to handle the file upload.

Dropzone.options.myDropzone = { //Set upload properties init: function () { // Handle upload event callback functions }; };

Handling the upload event callbacks

This section has the Dropzone library script to include in the view. This script sets the file properties and limits to the upload process. Some of the properties are,

  • maxFilesize – Maximum size allowed for the file to upload.
  • paramName – File input name to access like $_FILE[‘paramName here’].
  • maxFiles – File count allowed.
  • acceptedFiles – File types or extensions allowed.

The init property of this script allows handling the upload event. The event names are listed below.

  • uploadprogress – To track the percentage of uploads to update the progress bar.
  • success – When the file upload request is completed. This is as similar to a jQuery AJAX script‘s success/error callbacks.

Dropzone options have the upload form reference to listen to the file drop event. The callback function receives the upload status to update the UI.

The dropzone calls the endpoint action when dropping the file into the drop area.

The drop area will show thumbnails or a file preview with the progress bar.

Dropzone.options.myDropzone = { paramName: "file", // filename handle to upload maxFilesize: 2, // MB maxFiles: 1, // number of files allowed to upload acceptedFiles: ".png, .jpg, .jpeg, .gif", // file types allowed to upload init: function () { this.on("uploadprogress", function (file, progress) { var progressBar = file.previewElement.querySelector(".progress-bar"); progressBar.style.width = progress + "%"; progressBar.innerHTML = progress + "%"; }); this.on("success", function (file, response) { var progressBar = file.previewElement.querySelector(".progress-bar"); progressBar.classList.add("bg-success"); progressBar.innerHTML = "Uploaded"; }); this.on("error", function (file, errorMessage) { var progressBar = file.previewElement.querySelector(".progress-bar"); progressBar.classList.add("bg-danger"); progressBar.innerHTML = errorMessage; }); } };

PHP file upload script

This a typical PHP file upload script suite for any single file upload request. But, the dependent changes are,

  1. File handle name ($_FILES[‘File handle name’]).
  2. Target directory path for $uploadDir variable.
<?php if ($_SERVER['REQUEST_METHOD'] === 'POST' && isset($_FILES['file'])) { $file = $_FILES['file']; // file to be uploaded to this directory // should have sufficient file permissions $uploadDir = 'uploads/'; // unique file name generated for the uploaded file $fileName = uniqid() . '_' . $file['name']; // moving the uploaded file from temp directory to uploads directory if (move_uploaded_file($file['tmp_name'], $uploadDir . $fileName)) { echo 'File uploaded successfully.'; } else { echo 'Failed to upload file.'; }
}

How to hide the progress bar of uploaded files

By default, the Dropzone JS callback adds a dz-complete CSS class selector to the dropzone element. It will hide the progress bar from the preview after a successful upload.

This default behavior is by changing the progress bar opacity to 0. But the markup will be there in the source. Element hide and show can be done in various ways.

If you want to remove the progress bar element from the HTML preview, use the JavaScript remove() function. This script calls it for the progress bar element on the success callback.

Dropzone.options.myDropzone = { ... ... init: function () { ... ... this.on("success", function (file, response) { var progressBar = file.previewElement.querySelector(".progress-bar"); progressBar.remove(); }); ... ... }
};

View demo Download

↑ Back to Top

Posted on Leave a comment

AJAX File Upload with Progress Bar using JavaScript

by Vincy. Last modified on June 30th, 2023.

If you want to upload a file using AJAX and also need to show a progress bar during the upload, you have landed on the right page.

This article has an example code for JavaScript AJAX file upload with a progress bar.

An AJAX-based file upload is a repeatedly needed requirement for a web application.

It is for providing an inline editing feature with the uploaded file content. For example, the following tasks can be achieved using the AJAX file upload method.

  1. Photo or banner update on the profile page.
  2. Import CSV or Excel files to load content to the data tables.

View demo
ajax file upload with progress bar javascript

HTML upload form

This HTML shows the input to choose a file. This form has a button that maps its click event with an AJAX handler.

In a previous tutorial, we have seen a jQuery example for uploading form data with a chosen file binary.

But in this example, the HTML doesn’t have any form container. Instead, the form data is created by JavaScript before processing the AJAX.

This HTML has a container to show the progress bar. Once the progress is 100% complete, a success message is added to the UI without page refresh.

<div class="phppot-container tile-container text-center"> <h2>AJAX File Upload with Progress Bar using JavaScript</h2> <input type="file" id="fileUpload" /> <br> <br> <button onclick="uploadFile()">Upload</button> <div class="progress"> <div class="progress-bar" id="progressBar"></div> </div> <br> <div id="uploadStatus"></div>
</div>

AJAX file upload request with progress bar

This section is the core of this example code. This example’s HTML and PHP files are prevalent, as seen in other file upload examples.

The script below follows the steps to achieve the AJAX file upload.

  1. It reads the file binary chosen in the file input field.
  2. It instantiates JavaScript FormData and appends the file binary into it.
  3. It creates an XMLHttpRequest handle.
  4. This handle uses the ‘upload’ property to get XMLHttpRequestUpload object.
  5. This XMLHttpRequestUpload object tracks the upload progress in percentage.
  6. It creates event listeners to update the progressing percentage and the upload status.
  7. Then finally, it posts the file to the PHP endpoint like usual AJAX programming.
function uploadFile() { var fileInput = document.getElementById('fileUpload'); var file = fileInput.files[0]; if (file) { var formData = new FormData(); formData.append('file', file); var xhr = new XMLHttpRequest(); xhr.upload.addEventListener('progress', function (event) { if (event.lengthComputable) { var percent = Math.round((event.loaded / event.total) * 100); var progressBar = document.getElementById('progressBar'); progressBar.style.width = percent + '%'; progressBar.innerHTML = percent + '%'; } }); xhr.addEventListener('load', function (event) { var uploadStatus = document.getElementById('uploadStatus'); uploadStatus.innerHTML = event.target.responseText; }); xhr.open('POST', 'upload.php', true); xhr.send(formData); }
}

PHP endpoint to move the uploaded file into a directory

This PHP  has a standard code to store the uploaded file in a folder using the PHP move_uploaded_file(). The link has the code if you want to store the uploaded file and save the path to the database.

This endpoint creates a unique name for the filename before upload. It is a good programming practice, but the code will work without it, also.

It is for stopping file overwriting in case of uploading different files in the same name.

Note: Create a folder named “uploads” in the project root. Give sufficient write permissions.

<?php if ($_SERVER['REQUEST_METHOD'] === 'POST' && isset($_FILES['file'])) { $file = $_FILES['file']; // file will be uploaded to the following folder // you should give sufficient file permissions $uploadDir = 'uploads/'; // unique file name generated $fileName = uniqid() . '_' . $file['name']; // moving the uploaded file from temp location to our target location if (move_uploaded_file($file['tmp_name'], $uploadDir . $fileName)) { echo 'File uploaded successfully.'; } else { echo 'Failed to upload file.'; }
}

View demo Download

↑ Back to Top

Posted on Leave a comment

PHP QR Code Generator with chillerlan-php-qrcode Library

by Vincy. Last modified on June 15th, 2023.

This tutorial will create an example for generating a QR code using PHP. This example uses the Chillerlan QR code library. It is a PHP library with advanced features for creating QR codes, bar codes, and more.

There are two examples in this project. The first is a basic use-case scenario, and the second is an advanced example.

Both will help familiarize this library to send data for QR code rendering.

Quick Example

<?php
require_once '../vendor/autoload.php'; use chillerlan\QRCode\QRCode; // Core class for generating the QR code
$qrCode = new QRCode(); // data for which the QR code will be generated
$data = 'www.phppot.com'; // QR code image generation using render function
// it returns the an image resource.
$qrCodeImage = $qrCode->render($data); // Show the generated QR code image on screen
// following header is necessary to show image output
// in the browser
header('Content-Type: image/png');
imagepng($qrCodeImage);
imagedestroy($qrCodeImage);

The above code is a quick example of generating a Chillerlan QR code. You should use Composer to download the chillerlan dependency.

This example imports the library class and gives the data to generate the QR code.

The render() function passes the data to the library with which it will output the QR code image. This output can be returned to a browser or can be saved as a file.

In a previous article, we learned how to render the generated QR code to the browser.

chillerlan php qrcode

Download via composer

Run the following command in your terminal to install this Chillerlan PHP library.

composer require chillerlan/php-qrcode

qrcode project structure

Example 2 – How to configure size, EC level, scale

More configurations help to adjust the QR code quality without affecting readability.  The below parameters are used, which override the default configurations.

  • The version is to set the size of a QR code.
  • ECC level to set the possible values(L, M, Q, H). It is the damage tolerance percentage. We have seen it when coding with phpqrcode library.
  • Scale sets the size of a QR code pixel. The maximum size increases the QR code’s quality.

This library has the QROptions class to set the configurations explicitly. When initiating this class, the code below prepares an array of {version, eccLeverl …} options.

This QROptions instance generates the QRCode object to call the render() action handler. As in the above example, the render() uses the data and bundles it into the QR code binary.

<?php
require_once '../vendor/autoload.php'; use chillerlan\QRCode\QRCode;
use chillerlan\QRCode\QROptions; // data to embed in the QR code image
$data = 'www.phppot.com'; // configuration options for QR code generation
// eccLevel - Error correction level (L, M, Q, H)
// scale - QR code pixe size
// imageBase64 - output as image resrouce or not
$options = new QROptions([ 'version' => 5, 'eccLevel' => QRCode::ECC_H, 'scale' => 5, 'imageBase64' => true, 'imageTransparent' => false, 'foregroundColor' => '#000000', 'backgroundColor' => '#ffffff'
]); // Instantiating the code QR code class
$qrCode = new QRCode($options); // generating the QR code image happens here
$qrCodeImage = $qrCode->render($data); header('Content-Type: image/png');
imagepng($qrCodeImage);
imagedestroy($qrCodeImage);

Chillerlan PHP library

This is one of the popular QR Code generators in PHP. It has clean and easily understandable code with proper modularity.

Some of its features are listed below. This feature list represents the capability of being a component of a PHP application.

Features

  • Creates QR Codes with an improved Model, Version, ECC level, and more configuration
  • It supports encoding numeric, alphanumeric, 8-bit binary, and more.
  • It supports QR code output in GD, ImageMagick, SVG markup, and more formats.
  • It provides QR code readers using GD and ImageMagick libraries.

More about QR code

Hereafter we will see more about the QR code and its evolution,  advantages, and usage scenarios.

The QR code, or the quick response code, is a two-dimensional (2D) bar code. The linked article has the code to generate a barcode using PHP.

The QR code is a Japanese invention for the automotive industry. Later it spreads to more domains. Some of the commonly used places are,

  • Marketing
  • Linking to service providers
  • Information sharing
  • Online payments.

It provides easy access to online information through digital scanners. The QR code contains encoded data that can be decoded with digital scanning. It shares the information, links the service provider or prompts for the payment initiation after scanning.

Example usages of QR code generation and scanning

  • It shows payee details to ensure and allows one to enter the amount to make a mobile payment.
  • It facilitates storing location and contact details. It is for marking locations in the Google map while scanning.
  • When reading the QR code, the application will download v-cards using the contact details stored.
  • The app developing company shows QR codes in the app store to download mobile apps.

Download

↑ Back to Top

Posted on Leave a comment

Web Scraping with PHP – Tutorial to Scrape Web Pages

by Vincy. Last modified on July 21st, 2023.

Web scraping is a mechanism to crawl web pages using software tools or utilities. It reads the content of the website pages over a network stream.

This technology is also known as web crawling or data extraction. In a previous tutorial, we learned how to extract pages by its URL.
View Demo

There are more PHP libraries to support this feature. In this tutorial, we will see one of the popular web-scraping components named DomCrawler.

This component is underneath the PHP Symfony framework. This article has the code for integrating and using this component to crawl web pages.

web scraping php

We can also create custom utilities to scrape the content from the remote pages. PHP allows built-in cURL functions to process the network request-response cycle.

About DomCrawler

The DOMCrawler component of the Symfony library is for parsing the HTML and XML content.

It constructs the crawl handle to reach any node of an HTML tree structure. It accepts queries to filter specific nodes from the input HTML or XML.

It provides many crawling utilities and features.

  1. Node filtering by XPath queries.
  2. Node traversing by specifying the HTML selector by its position.
  3. Node name and value reading.
  4. HTML or XML insertion into the specified container tag.

Steps to create a web scraping tool in PHP

  1. Install and instantiate an HTTP client library.
  2. Install and instantiate the crawler library to parse the response.
  3. Prepare parameters and bundle them with the request to scrape the remote content.
  4. Crawl response data and read the content.

In this example, we used the HTTPClient library for sending the request.

Web scraping PHP example

This example creates a client instance and sends requests to the target URL. Then, it receives the web content in a response object.

The PHP DOMCrawler parses the response data to filter out specific web content.

In this example, the crawler reads the site title by parsing the h1 text. Also, it parses the content from the site HTML filtered by the paragraph tag.

The below image shows the example project structure with the PHP script to scrape the web content.

web scraping php project structure

How to install the Symfony framework library

We are using the popular Symfony to scrape the web content. It can be installed via Composer.
Following are the commands to install the dependencies.

composer require symfony/http-client symfony/dom-crawler
composer require symfony/css-selector

After running these composer commands, a vendor folder can map the required dependencies with an autoload.php file. The below script imports the dependencies by this file.

index.php

<?php require 'vendor/autoload.php'; use Symfony\Component\HttpClient\HttpClient;
use Symfony\Component\DomCrawler\Crawler; $httpClient = HttpClient::create(); // Website to be scraped
$website = 'https://example.com'; // HTTP GET request and store the response
$httpResponse = $httpClient->request('GET', $website);
$websiteContent = $httpResponse->getContent(); $domCrawler = new Crawler($websiteContent); // Filter the H1 tag text
$h1Text = $domCrawler->filter('h1')->text();
$paragraphText = $domCrawler->filter('p')->each(function (Crawler $node) { return $node->text();
}); // Scraped result
echo "H1: " . $h1Text . "\n";
echo "Paragraphs:\n";
foreach ($paragraphText as $paragraph) { echo $paragraph . "\n";
}
?>

Ways to process the web scrapped data

What will people do with the web-scraped data? The example code created for this article prints the content to the browser. In an actual application, this data can be used for many purposes.

  1. It gives data to find popular trends with the scraped news site contents.
  2. It generates leads for showing charts or statistics.
  3. It helps to extract images and store them in the application’s backend.

If you want to see how to extract images from the pages, the linked article has a simple code.

Caution

Web scraping is theft if you scrape against a website’s usage policy.  You should read a website’s policy before scraping it. If the terms are unclear, you may get explicit permission from the website’s owner. Also, commercializing web-scraped content is a crime in most cases. Get permission before doing any such activities.

Before crawling a site’s content, it is essential to read the website terms. It is to ensure that the public can be subject to scraping.

People provide API access or feed to read the content. It is fair to do data extraction with proper API access provision. We have seen how to extract the title, description and video thumbnail using YouTube API.

For learning purposes, you may host a dummy website with lorem ipsum content and scrape it.
View Demo

↑ Back to Top

Posted on Leave a comment

jQuery AJAX AutoComplete with Create-New Feature

by Vincy. Last modified on July 25th, 2023.

Autocomplete textbox feature shows the suggestion list when the user enters a value. The suggestions are, in a way, related to the entered keyword.

For example, when typing in a Google search box, it displays auto-suggested keywords in a dropdown.

View Demo

This tutorial will show how to add this feature to a website. The code uses the JQuery library with PHP and MySQL to show dynamic auto-suggestions on entering the search key.

It allows typing the start letter of the country name to get suggested with the list of country names accordingly. See the linked code for enabling autocomplete using the jQuery-Ui library.

The specialty of this example is that it also allows adding a new option that is not present in the list of suggestions.

jquery ajax autocomplete create new

On key-up, a function executes the Jquery Autocomplete script. It reads suggestions based on entered value. This event handler is an AJAX function. It requests PHP for the list of related countries from the database.

When submitting a new country, the PHP will update the database. Then, this new option will come from the next time onwards.

Steps to have a autocomplete field with a create-new option

  1. Create HTML with a autocomplete field.
  2. Integrate jQuery library and initialize autocomplete for the field.
  3. Create an external data source (database here) for displaying suggestions.
  4. Fetch the autocomplete suggestions from the database using PHP.
  5. Insert a newly created option into the database.

1. Create HTML with a autocomplete field

This HTML is for creating an autocomplete search field in a form. It is a suggestion box that displays dynamic auto-suggestions via AJAX.

On the key-up event of this input field, the AJAX script sends the request to the PHP.  The PHP search performs database fetch about the entered keyword.

This HTML form also posts data not chosen from the suggestions. This feature allows adding new options to the source of the search suggestions.

index.php

<!DOCTYPE html>
<html>
<head>
<meta name="viewport" content="width=device-width, initial-scale=1">
<link rel="stylesheet" type="text/css" href="style.css" />
</head>
<body> <div class="outer-container"> <div class="row"> <form id="addCountryForm" autocomplete="off" method="post"> <div Class="input-row"> <label for="countryName">Country Name:</label><input type="text" id="countryName" name="countryName" required> <div id="countryList"></div> </div> <input type="submit" class="submit-btn" value="Save Country"> <div id="message"></div> </form> </div> </div>
</body>
</html>

2. Integrate the jQuery library and initialize autocomplete for the field

This code uses AJAX to show the dynamic autocomplete dropdown. This script sends the user input to the PHP endpoint.

In the success callback, the AJAX script captures the response and updates the auto-suggestions in the UI. This happens on the key-up event.

The suggested options are selectable. The input box will be filled with the chosen option on clicking each option.

Then, the form input is posted to the PHP via AJAX on the form-submit event.

This jQuery script shows the fade-in fade-out effect to display and hide the autocomplete dropdown in the UI.

index.php(ajax script)

$(document).ready(function() { $('#countryName').keyup(function() { var query = $(this).val(); if (query != '') { $.ajax({ url: 'searchCountry.php', type: 'POST', data: { query: query }, success: function(response) { $('#countryList').fadeIn(); $('#countryList').html(response); } }); } else { $('#countryList').fadeOut(); $('#countryList').html(''); } }); $(document).on('click', 'li', function() { $('#countryName').val($(this).text()); $('#countryList').fadeOut(); }); $('#addCountryForm').submit(function(event) { event.preventDefault(); var countryName = $('#countryName').val(); $.ajax({ type: 'POST', url: 'addCountry.php', data: { countryName: countryName }, success: function(response) { $('#countryList').hide(); $('#message').html(response).show(); } }); });
});

3. Create an external data source (database here) for displaying suggestions

Import this SQL to create to database structure to save the autocomplete suggestions. It has some initial data that helps to understand the autocomplete code during the execution.

database.sql

CREATE TABLE IF NOT EXISTS `democountries` (
`id` int NOT NULL AUTO_INCREMENT, `countryname` varchar(255) NOT NULL, PRIMARY KEY (id)
); INSERT INTO `democountries` (`countryname`) VALUES
('Afghanistan'),
('Albania'),
('Bahamas'),
('Bahrain'),
('Cambodia'),
('Cameroon'),
('Denmark'),
('Djibouti'),
('East Timor'),
('Ecuador'),
('Falkland Islands (Malvinas)'),
('Faroe Islands'),
('Gabon'),
('Gambia'),
('Haiti'),
('Heard and Mc Donald Islands'),
('Iceland'),
('India'),
('Jamaica'),
('Japan'),
('Kenya'),
('Kiribati'),
('Lao Peoples Democratic Republic'),
('Latvia'),
('Macau'),
('Macedonia');

4. Fetch the autocomplete suggestions from the database using PHP

The PHP code prepares the MySQL select query to fetch suggestions based on the search keyword.

It fetches records by searching for the country names that start with the keyword sent via AJAX.

This endpoint builds the HTML lists of autocomplete suggestions. This HTML response is used to update the UI to render relevant suggestions.

searchCountry.php

<?php
$conn = new mysqli('localhost', 'root', '', 'db_autocomplete'); if (isset($_POST['query'])) { $query = "{$_POST['query']}%"; $stmt = $conn->prepare("SELECT countryname FROM democountries WHERE countryname LIKE ? ORDER BY countryname ASC"); $stmt->bind_param("s", $query); $stmt->execute(); $result = $stmt->get_result(); if ($result->num_rows > 0) { while ($row = $result->fetch_assoc()) { echo '<li>' . $row['countryname'] . '</li>'; } }
}
?>

5. Insert a newly created option into the database

The expected value is not in the database if no result is found for the entered keyword. This code allows you to update the existing source with your new option.

The form submits action calls the below PHP script. It checks if the country name sent by the AJAX form submit is existed in the database. If not, it inserts that new country name.

After this insert, the newly added item can be seen in the suggestion box in the subsequent autocomplete search.

addCountry.php

<?php
$conn = new mysqli('localhost', 'root', '', 'db_autocomplete'); if (isset($_POST['countryName'])) { $countryName = "{$_POST['countryName']}"; $stmt = $conn->prepare("SELECT * FROM democountries WHERE countryname =?"); $stmt->bind_param("s", $countryName); $stmt->execute(); $result = $stmt->get_result(); if ($result->num_rows > 0) { echo '<p>Country Selected: ' . $countryName . '</p>'; } else { $stmt = $conn->prepare("INSERT INTO democountries (countryname) VALUES (?)"); $stmt->bind_param("s", $countryName); $stmt->execute(); $result = $stmt->insert_id; if (! empty($result)) { echo $countryName . ' saved to the country database.</br>'; } else { echo '<p>Error adding ' . $countryName . ' to the database: ' . mysqli_error($conn) . '</p>'; } }
}
?>

Different libraries providing Autocomplete feature

In this script, I give a custom autocomplete solution. But, many libraries are available to provide advanced feature-packed autocomplete util for your application.

  1. The jQueryUI provides autocomplete feature to enable an HTML field.
  2. One more library is the jQuery Autocompleter plugin that captures more data from the options to be chosen.

These libraries give additional features associated with the autocomplete solution.

  1. It allows to select single and multiple values from the autocomplete dropdown.
  2. It reads the option index or the key-value pair of the chosen item from the list.

Advantages of autocomplete

Most of us experience the advantages of the autocomplete feature. But, this list is to mention the pros of this must-needed UI feature intensely.

  1. It’s one of the top time-saving UI utilities that saves users the effort of typing the full option.
  2. It’s easy to search and get your results by shortlisting and narrowing. This is the same as how a search feature of a data table narrows down the result set.
  3. It helps to get relevant searches.

View Demo Download

↑ Back to Top

Posted on Leave a comment

Chart JS Candlestick

by Vincy. Last modified on March 30th, 2023.

The ChartJS library provides modules for creating candlestick charts. It also supports generating OHLC (Open High Low Close) charts.

The candlestick and OHLC charts are for showing financial data in a graph. Both these charts look mostly similar but differ in showing the ‘open’ and ‘close’ points.

In this article, we will see JavaScript code for creating a candlestick chart using ChartJs.

This example generates the random data for the candlestick graph on loading the page.

We have seen many examples of creating ChartJS JavaScript charts. If you are new to the ChartJS library, how to create a bar chart is a simple example for getting started.

View Demo

What is a Candlestick chart?

The candlestick chart represents the price movement between Open, High, Low, and Close points.

The candlestick chart shows these 4 points as described below. See the screenshot below to get more clarity.

  • Open and Close – in the two top and the bottom extreme of the candle body.
  • High and Low- in the two top and the bottom extreme of the candlewick.

candlestick price movement
chart js candlestick

HTML target to include ChartJs plugin to show a candlestick chart

This HTML code imports the following libraries for accessing the ChartJS candlestick module.

  • Luxon
  • ChartJS
  • ChartJS adaptor luxon

It also includes the chartjs-chart-finanicial.js JavaScript that inherits the required financial chart controller and elements classes.

An HTML canvas layer has been created to render the output candlestick chart.

JavaScript initiates the financial class instance to generate a candlestick chart by pointing to this canvas as a target.

index.html

<html> <head> <meta charset="utf-8"> <meta name="viewport" content="width=device-width, initial-scale=1"> <title>Chart JS Candlestick</title> <script src="https://cdn.jsdelivr.net/npm/[email protected]"></script> <script src="https://cdn.jsdelivr.net/npm/[email protected]/dist/chart.js"></script> <script src="https://cdn.jsdelivr.net/npm/[email protected]"></script> <script src="chartjs-chart-financial.js"></script> <link rel="stylesheet" type="text/css" href="style.css"> <link rel="stylesheet" type="text/css" href="form.css">
</head> <body> <div class="phppot-container"> <h1>Chart.js - CandleStick chart</h1> <canvas id="candlestick-chart"></canvas> <div> Overlap with line chart: <select id="mixed"> <option value="true">Yes</option> <option value="false" selected>No</option> </select> <button id="update">Update</button> <button id="randomizeData">Render random data</button> </div> </div> <script type="text/javascript" src="chart-data-render.js"></script>
</body> </html>

How to get and plot candlestick random data via JavaScript?

This JavaScript code uses the chartjs.chart.financial.js script functions to create a candlestick chart.

It generates and uses random bar data for the chart. The random data of each bar includes a horizontal coordinate, x, and four vertical coordinates, o, h, l, and c (open, high, low, close).

It performs the below steps during the chart generation process.

  1. It makes random bar data by taking the initial date and the number of samples.
  2. It makes ChartJS line chart data using each bar element’s close points.
  3. It initiates the ChartJS class to set the chart type, dataset, and options as we did in other ChartJS examples.
  4. It sets the random bar data to the ChartJS dataset property and updates the chart instance created in step 3.
  5. It checks if the user sets the “Mixed” option and adds the close points to the dataset if yes.

Step 5 overlaps a line chart of close points on the rendered candlestick chart.

chart-data-render.js

var barCount = 60;
var initialDateStr = '01 Apr 2017 00:00 Z'; var ctx = document.getElementById('candlestick-chart').getContext('2d');
ctx.canvas.width = 800;
ctx.canvas.height = 400; var barData = getRandomData(initialDateStr, barCount);
function lineData() { return barData.map(d => { return { x: d.x, y: d.c } }) }; var chart = new Chart(ctx, { type: 'candlestick', data: { datasets: [{ label: 'Random Curve', data: barData }] }
}); function randomNumber(min, max) { return Math.random() * (max - min) + min;
} function randomBar(date, lastClose) { var open = +randomNumber(lastClose * 0.95, lastClose * 1.05).toFixed(2); var close = +randomNumber(open * 0.95, open * 1.05).toFixed(2); var high = +randomNumber(Math.max(open, close), Math.max(open, close) * 1.1).toFixed(2); var low = +randomNumber(Math.min(open, close) * 0.9, Math.min(open, close)).toFixed(2); return { x: date.valueOf(), o: open, h: high, l: low, c: close }; } function getRandomData(dateStr, count) { var date = luxon.DateTime.fromRFC2822(dateStr); var data = [randomBar(date, 30)]; while (data.length < count) { date = date.plus({ days: 1 }); if (date.weekday <= 5) { data.push(randomBar(date, data[data.length - 1].c)); } } return data;
}
var update = function () { var mixed = document.getElementById('mixed').value; var closePrice = { label: 'Close Price', type: 'line', data: null }; // put data in chart if (mixed === 'true') { closePrice = { label: 'Close Price', type: 'line', data: lineData() }; } else { } chart.config.data.datasets = [ { label: 'Random Curve', data: barData }, closePrice ] chart.update();
};
document.getElementById('update').addEventListener('click', update); document.getElementById('randomizeData').addEventListener('click', function () { barData = getRandomData(initialDateStr, barCount); update();
});

More functionalities and features are there in the ChartJS module. It allows customizing the output candlestick chart.  This example enables two of them.

  • Overlap line data over the close points of the candlestick bars.
  • I am reloading the candlestick with a new set of random bar data.

ChartJS candlestick functionalities

Some possible customization options for the candlestick chart are listed below.

  • To change the bar type between candlestick and OHLC. The OHLC chart will display the ‘open’ and ‘close’ points by horizontal lines on the candle body.
  • To change the scale type, border, and color.
  • To allow overlapping line charts with the rendered candlestick chart to highlight the close points of the bar data.

View DemoDownload

↑ Back to Top

Posted on Leave a comment

PHP QR Code Generator with phpqrcode Library

by Vincy. Last modified on March 28th, 2023.

QR code (Quick Response code) is a machine-readable pictorial format containing black and white squares. It is used for storing information like URLs, product ID, etc. It is a type of matrix barcode or a two-dimensional barcode.

It is a convenient form of storing and retrieving simple data and has become even more popular with the advent of smartphones. The camera in the smartphone can act as a reader and read the QR code and help to decipher the data stored in it.

This article gives many examples if you want a solution to generate QR codes in PHP. There are a lot of PHP libraries available to generate QR codes. This article uses the PHP QR code library.

1. Quick example

This quick example returns the QR code to the browser in one line. It produces the output as a PNG stream.

<?php
require_once __DIR__ . '/vendor/phpqrcode/qrlib.php'; // Displays QR Code image to the browser
QRcode::png('PHP QR Code :)');

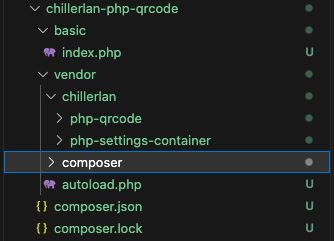
Installing PHP QR code library

Download the latest library version and extract it into your application vendor folder. The source code downloadable in this article has the library.

All the examples in this article have the code to include the suitable library file to use its feature.

In a previous article, we have seen code for a PHP QR code generator using the tc-lib-barcode library.

qr code data

2. Display the QR code using an HTML image

To display the QR code using an HTML image tag, link the HTML image source to the PHP file that returns the QR code PNG data.

The generate.php file returns the QR code in the below code using the PHP QrCode library. The HTML image refers to this file to show the QR code in the browser.

show-qr-code-in-HTML-img/generate.php

<?php
require_once __DIR__ . '/vendor/phpqrcode/qrlib.php'; // Displays QR Code image to the browser
QRcode::png('PHP QR Code :)');
<?php
require_once __DIR__ . '/../vendor/phpqrcode/qrlib.php'; // outputs image as PNG that can be refered to a HTML image 'src'
QRcode::png('PHP QR Code :)');
?>

show-qr-code-in-HTML-img/view.php

<img src="generate.php" />

2. Passing arguments to the QR code generator

Passing parameters to a QR code generator helps to perform dynamic processing about the parameter.

For example, we can pass a contact id to retrieve contact information to bundle it with the QR code output.

This example shows how to send parameters and process them in the QR generator.

The view.php file prepares the QR code parameter in PHP. Then, it sends it to the generate.php in query. This URL with the QR code parameter is specified to an HTML image source.

show-qr-code-in-html-img/view.php

<?php
// initialize PHP parameter to send to the QR code generator
$QRParameter = 1234;
?>
<img src="generate.php?id=<?php echo $QRParameter; ?>" />

In this generate.php file, it does simple manipulation to the passed argument. It prefixes a string with the GET parameter received and bundles the manipulated line to the QR code PNG.

show-qr-code-in-html-img/generate.php

<?php
if (empty($_GET['id'])) { echo "<b>ERROR:</b> Bad request. Required parameters are missing."; exit;
} else { require_once __DIR__ . '/../vendor/phpqrcode/qrlib.php'; $inputString = $_GET['id']; // Do not return anything to the browser ob_start("callback"); // Process the input string $codeText = 'DEMO - ' . $inputString; // end of processing $debugLog = ob_get_contents(); ob_end_clean(); // outputs QR code as a PNG data QRcode::png($codeText);
}
?>

3. Save the QR code on the server

This example saves the generated QR code on the server.

It defines the QR code data and the png file name suffix in an array. Then, it uses them while creating the target to save the QR code.

save-qr-code-in-server.php

<?php
require_once __DIR__ . '/vendor/phpqrcode/qrlib.php'; // how to configure silent zone (frame) size
$qrContent = array('content' => 'Contact information', 'slug' => 'contact-info'); $target = "uploads/qr-code-dir/";
$filePath = $target . 'ouput-qr-code-' . $qrContent['slug'] . '.png'; if (!file_exists($filePath)) { QRcode::png($qrContent['content'], $filePath);
}
?>
<img src="<?php echo $filePath; ?>" />

4. Configure QR code ECC Level, Zoom factor, and Frame size

The PHP QRCode Library defines constants for different ECC levels, Zoom factor, and Frame size. These factors are used for the following purposes when generating a QR code.

This program creates QR codes in L, M, Q, and H levels with appropriate QR constants.

  • ECC level is the allowed percentage of damage without affecting reading data.
  • Zoom factor is the allowed resolution that can be changed based on the use cases.
  • Silent zone Frame size – The silent or quiet zone frame size varies based on different matrices. Setting the QR code above or equal to 4 blocks is recommended.

qr-code-ecc-level.php

<?php
require_once __DIR__ . '/vendor/phpqrcode/qrlib.php';
require_once __DIR__ . '/vendor/phpqrcode/qrconst.php'; $qrContent = 'Demo data to bundle into a QR code'; $target = "uploads/ecc-level/"; // generating QR code in the 4 ECC level
QRcode::png($qrContent, $target . 'l.png', QR_ECLEVEL_L);
QRcode::png($qrContent, $target . 'm.png', QR_ECLEVEL_M);
QRcode::png($qrContent, $target . 'q.png', QR_ECLEVEL_Q);
QRcode::png($qrContent, $target . 'h.png', QR_ECLEVEL_H); ?>
<img src="<?php echo $target; ?>l.png" />
<img src="<?php echo $target; ?>m.png" />
<img src="<?php echo $target; ?>q.png" />
<img src="<?php echo $target; ?>h.png" />

This program adds the zoom factor 1 to 4 with the QR_ECLEVEL_L ECC constant.

qr-code-pixel-zoom-factor.php

<?php
require_once __DIR__ . '/vendor/phpqrcode/qrlib.php'; $qrContent = 'Demo data to bundle into a QR code with zoom factor'; $target = "uploads/pixel-zoom-qr-code/"; // generating QR code with 4 ECC level and zoom factor
QRcode::png($qrContent, $target . 'l_1.png', QR_ECLEVEL_L, 1);
QRcode::png($qrContent, $target . 'l_2.png', QR_ECLEVEL_L, 2);
QRcode::png($qrContent, $target . 'l_3.png', QR_ECLEVEL_L, 3);
QRcode::png($qrContent, $target . 'l_4.png', QR_ECLEVEL_L, 4); ?>
<img src="<?php echo $target; ?>l_1.png" />
<img src="<?php echo $target; ?>l_2.png" />
<img src="<?php echo $target; ?>l_3.png" />
<img src="<?php echo $target; ?>l_4.png" />

This program creates QR codes with all these factors ECC, Zoom, and Frame constants of the library.

silent-zone-frame-size.php

<?php
require_once __DIR__ . '/vendor/phpqrcode/qrlib.php'; $qrContent = 'Demo data to bundle into a QR code with frame size'; $target = "uploads/pixel-zoom-qr-code/"; // generating // frame config values below 4 are not recommended !!!
QRcode::png($qrContent, $target . 'l_3_4.png', QR_ECLEVEL_L, 3, 4);
QRcode::png($qrContent, $target . 'l_3_6.png', QR_ECLEVEL_L, 3, 6);
QRcode::png($qrContent, $target . 'l_3_10.png', QR_ECLEVEL_L, 3, 10); // displaying
?>
<img src="<?php echo $target; ?>l_3_4.png" />
<img src="<?php echo $target; ?>l_3_6.png" />
<img src="<?php echo $target; ?>l_3_10.png" />

5. Add phone, email, and contact info to a QR code

This section has PHP examples to create QR codes to attach contact information.  It prepares the QR code content with the “tel:”. “sms:” and “mail:” links and attaches it to the QR code.

add-phone-to-call.php

<?php
require_once __DIR__ . '/vendor/phpqrcode/qrlib.php';
$target = "uploads/qr-code-phone/";
$phone = '(091)700-001-710';
// attache phone to call
$qrContent = 'tel:' . $phone;
QRcode::png($qrContent, $target . 'phone-to-call.png', QR_ECLEVEL_L, 3);
?>
<img src="<?php echo $target; ?>phone-to-call.png" /> 

add-phone-to-text.php

<?php
require_once __DIR__ . '/vendor/phpqrcode/qrlib.php';
$target = "uploads/qr-code-phone/";
$phone = '(091)700-001-710';
// Attach the phone to text
$qrContent = 'sms:' . $phone;
// generating
QRcode::png($qrContent, $target. 'phone-to-text.png', QR_ECLEVEL_L, 3);
?>
<img src="<?php echo $target; ?>phone-to-text.png" />

Attaching an email adds the mail subject and body as part of the mail recipient data. But the subject and the body parameters are optional.

add-recipient-to-send-mail.php

<?php
require_once __DIR__ . '/vendor/phpqrcode/qrlib.php';
$target = "uploads/qr-code-phone/";
$recipient = '[email protected]';
$mailSubject = 'Enquiry';
$mailBody = 'Post enquiry content';
// Prepare QR content with email recipient, subject and body
$qrContent = 'mailto:' . $recipient . '?subject=' . urlencode($mailSubject) . '&body=' . urlencode($mailBody);
// Attach maileto link to the QRCode
QRcode::png($qrContent, $target. 'mail.png', QR_ECLEVEL_L, 3);
?>
<img src="<?php echo $target; ?>mail.png" /> 

This QR code example creates a v-card to bundle with the QR code. It includes basic details with the v-card.

This library allows adding more details to the QR code. For example, it can attach a contact avatar to a QR code.

In a previous article, we have seen how to generate and download a v-card for contact information.

save-vcard-to-qr-code.php

<?php
require_once __DIR__ . '/vendor/phpqrcode/qrlib.php';
$target = "uploads/qr-code-phone/";
// Contact details
$name = 'Example1';
$phone = '(091)700-001-711';
// QR code content with VACARD
$qrCode = 'BEGIN:VCARD' . "\n";
$qrCode .= 'FN:' . $name . "\n";
$qrCode .= 'TEL;WORK;VOICE:' . $phone . "\n";
$qrCode .= 'END:VCARD';
// Attaching VCARD to QR code
QRcode::png($qrCode, $target. 'vcard-qr-code.png', QR_ECLEVEL_L, 3);
?>
<img src="<?php echo $target; ?>vcard-qr-code.png" /> 

Download

↑ Back to Top

Posted on Leave a comment

Contact Us Page Design – HTML Form

by Vincy. Last modified on March 23rd, 2023.

This article has HTML templates for contact form pages. All these templates are responsive to fit any viewports.

On a responsive page, the site header menu can be toggled. Template 1 and 2 of this example has JavaScript function to perform the toggle events for a sliding menu in the mobile view.

Contact Form Template 1

This template has the contact form in the site footer. The footer contains three columns to show the contact form details.

If you are creating a contact form page, it should clearly show the location and the contact details.

In this template, the footer columns show these details with a contact form.

The site header contains menu links and a hamburger icon. The hamburger icon can be seen in the mobile view only.

The header dropdown menu will be shown on clicking that icon in the site banner.

contact form template1

template-1/index.html

<html>
<head>
<meta name="viewport" content="width=device-width, initial-scale=1">
<link href="style.css" rel="stylesheet" type="text/css">
</head>
<body> <div class="container"> <div class="site-banner"> <div class="header-menu"> <a href="">Logo</a> <span id="menu-icon" onClick="toggleMenu()"><img src="images/menu.svg" /></span> <span id="header-right-menu"> <a href="#">Our work</a> <a href="#">About</a> <a href="#">News</a> <a href="#" class="header-active">Contact</a> </span> </div> <h1 class="heading">Contact Us</h1> </div><div class="footer"> <div class="footer-column"><img class="map-image" src="images/location.jpg" /></div> <div class="footer-column"> <div class="tile-content"> <h1>Meet Us</h1> <div class="contact-row"> <img src="images/phone.svg"><span class="tile-field">+466723723666</span> </div> <div class="contact-row"> <img src="images/at-sign.svg"><span class="tile-field">[email protected]</span> </div> <div class="contact-row"> <img src="images/map-pin.svg"><span class="tile-field">1784 Griffin Street, Alabama</span> </div> </div> </div> <div class="footer-column contact-form-container"> <div class="tile-content"> <form method="POST"> <h1>Contact</h1> <div class="contact-row"> <input type="text" class="form-field" placeholder="Name"> </div> <div class="contact-row"> <textarea rows="5" class="form-field" placeholder="Message"></textarea> </div> <button class="button">Send</button> </form> </div> </div> </div> </div> <script> function toggleMenu() { var menuElement = document.getElementById("header-right-menu"); if (menuElement.style.display === "block") { menuElement.style.display = "none"; } else { menuElement.style.display = "block"; } } </script>
</body>
</html>

The below CSS is created for this contact form template. It contains media queries for the responsiveness of the contact form page.

template-1/style.css

body { font-family: Arial;
} .container { max-width: 1180px; margin: 0 auto; line-height: 1.5;
}
/* header style starts */
.site-banner { min-height: 400px; background-image: url('images/header-image.jpg'); background-size: cover; background-position: center; color: #ffffff;
} .site-banner a { color: #ffffff; text-decoration: none; font-weight: bold; padding: 12px;
} .header-menu { padding: 40px 20px;
} #header-right-menu { float: right;
} .header-active { background: rgba(0, 0, 0, 0.5); border-radius: 25px;
} .heading { color: #ffffff; text-align: center; font-family: cursive; padding: 40px 0px; font-size: 3em; margin: 0px;
}
/* header style ends */ .footer { display: flex;
} .footer-column { width: 33.3%; float: left;
} .map-image { width: 100%;
} .contact-form-container { background-color: #eaeaea;
} img { vertical-align: middle;
} .tile-content { padding: 20px 40px;
} .tile-content .contact-row { margin-bottom: 20px;
} .tile-field { margin-left: 20px;
} .form-field { width: 100%; padding: 10px 8px; border-radius: 4px; border: #d9d8d8 1px solid;
} .button { color: #ffffff; padding: 10px 30px 10px 30px; border-radius: 20px; background: linear-gradient(to right, #08a9df, #12054a); border: 0px;
} #menu-icon { display: none; float: right;
} @media screen and (max-width: 1000px) { .footer-column { width: 50%; } .contact-form-container { width: 100%; } .footer { display: block; }
} @media screen and (max-width: 540px) { #header-right-menu { float: none; display: none; } #header-right-menu a { display: block; } .heading { padding: 0px; } .tile-content { padding: 0px 20px; } .footer-column { width: 100%; } #menu-icon { display: block; float: right; }
}

Contact Form Template 2

This contact template shows the contact details, address, phone, and email. It offers a form with primary fields to let the user communicate with the site owner.

This template has two columns in the site content area. The contact details and the contact form are shown in these two columns, respectively.

contact form template2

template-2/index.html

<!DOCTYPE html>
<html>
<head>
<title>Contact - Form</title>
<meta name="viewport" content="width=device-width, initial-scale=1">
<link rel="stylesheet" type="text/css" href="style.css">
</head>
<body> <div class="container"> <div class="text-center"> <h1>Contact Us</h1> <div> Lorem ipsum dolor sit amet, consectetur adipisicing elit, sed do eiusmod tempor incididunt ut labore <div>et dolore magra aliqua. Ut enim ad minim veniam.</div> </div> </div> <div class="content"> <div class="col-1"> <div class="address-line"> <img alt="location" src="image/marker.png" class="icon"> <div class="contact-info"> <div class="contact-info-title">Address</div> <div>1002 West 5th Ave,</div> <div>Alaska, New York,</div> <div>55060.</div> </div> </div> <div class="address-line"> <img alt="location" src="image/phone.png" class="icon"> <div class="contact-info"> <div class="contact-info-title">Phone</div> <div>12523-4566-8954-8956.</div> </div> </div> <div class="address-line"> <img alt="location" src="image/mail.png" class="icon"> <div class="contact-info"> <div class="contact-info-title">Email</div> <div>[email protected]</div> </div> </div> </div> <div class="col-2"> <form> <div class="form-container"> <h2>Send Message</h2> <div class="form-row"> <label>Full Name</label> <div> <input type="text" class="form-field"> </div> </div> <div class="form-row"> <label>Email</label> <div> <input type="text" class="form-field"> </div> </div> <div class="form-row"> <label>Type your message...</label> <div> <input type="text" class="form-field"> </div> </div> <input type="button" class="send-btn" value="Send"> </div> </form> </div> </div> </div>
</body>
</html>

See the below CSS and include it in the template 2 HTML.

template-2/style.css

body { font-family: Arial; background-image: url('image/bg.png'); background-size: cover; background-position: center; background-repeat: no-repeat; background-attachment: fixed;
} .container { width: 950px; margin: 80px auto; color: white; line-height: 1.5;
} .text-center { text-align: center;
} .content { display: flex; margin-top: 40px;
} .icon { background-color: white; border-radius: 30px; padding: 15px; vertical-align: top;
} .contact-info { display: inline-block; padding: 4px 20px 0px 20px;
} .address-line { margin-top: 40px;
} .col-1 { width: 530px;
} .col-2 { flex: 1 1 auto; background-color: white;
} .form-container { color: #000; padding: 30px;
} .contact-info-title { color: #01bdd4;
} .form-row { padding-bottom: 30px;
} .form-field { width: 100%; border: none; border-bottom: 1px solid #000;
} .send-btn { border: 0px; padding: 12px 26px; background-color: #01bdd4; color: white;
} @media all and (max-width: 1024px) { .container { width: auto; padding: 30px; } .col-1 { width: 360px; } } @media all and (max-width: 700px) { .content { display: block; } .col-2 { margin-top: 40px; } .col-1{ width:100%; }
} @media all and (max-width: 500px) { .container { padding: 10px; }
}

Contact Form Template 3

Template 3 is a simple and clean theme for a contact form page. It displays a contact form with a few primary fields. Also, it shows only the vital contact details on the page.

A simple contact template will encourage the end user to connect with you and increase the conversion rate.

contact form template3

template-3/index.html

<html> <head> <meta name="viewport" content="width=device-width, initial-scale=1"> <link href="style.css" rel="stylesheet" type="text/css">
</head> <body> <div class="container"> <div class="header-content"> <a href="">Logo</a> <span id="menu-icon" onClick="toggleMenu()"><img src="images/menu.svg" /></span> <span id="header-right-menu"> <a href="#">Services</a> <a href="#">Products</a> <a href="#">Pricing</a> <a href="#" class="header-active">Contact Us</a> </span> </div> <div class="inner-container"> <div class="tile1"> <div class="tile1-heading">Get in touch</div> <div class="form-row">We are here for you! How can we help?</div> <form> <div class="form-row"> <input type="text" class="form-field" placeholder="Enter your name"> </div> <div class="form-row"> <input type="text" class="form-field" placeholder="Enter your email address"> </div> <div class="form-row"> <textarea class="form-field" placeholder="Go ahead we are listening..."></textarea> </div> <div class="form-row"> <input type="button" class="form-field btn" value="Submit"> </div> </form> </div> <div class="tile2"> <div class="tile2-image"> <img src="images/contact.png"> </div> <div> <div class="form-row"> <img src="images/loaction.png" class="contact-image"><span>564 Alabama Avenue</span> </div> <div class="form-row"> <img src="images/phone.png" class="contact-image"><span>+466723723666</span> </div> <div class="form-row"> <img src="images/mail.png" class="contact-image"><span>[email protected]</span> </div> </div> </div> </div> </div> <script> function toggleMenu() { var menuElement = document.getElementById("header-right-menu"); if (menuElement.style.display === "block") { menuElement.style.display = "none"; } else { menuElement.style.display = "block"; } } </script> </body> </html>

And the styles of this template three are shown below.

template-3/style.css

body { font-family: Arial; background-image: url('images/bg.jpg'); background-position: center; background-size: cover; background-repeat: no-repeat; background-attachment: fixed;
} .container { border-radius: 16px; max-width: 1180px; margin: 0 30px;
} a { color: #ffffff; text-decoration: none;
} .header-content { font-weight: bold; width: 800px; margin: 20px auto;
} #header-right-menu { float: right;
} #header-right-menu a { padding: 12px;
} .header-active{ color:#000;
} .inner-container { width: 750px; margin: 80px auto; display: flex; background-color: white; border-radius: 12px; padding: 30px
} .tile1 { width: 350px;
} .tile2 { flex: 1 1 auto; padding: 0px 40px;
} .tile1-heading { background: -webkit-linear-gradient(#0aa6bd, #f126bd); -webkit-background-clip: text; -webkit-text-fill-color: transparent; font-weight: bold; font-size: 1.5em;
} .form-row { padding: 20px 0px 0px 0px;
} .form-field { border-radius: 4px; width: 100%; padding: 15px; background-color: #f5f4fa; border: 0px;
} .contact-image { padding: 10px; border-radius: 35px; border: 1px solid #a8a4a4; vertical-align: middle; margin-right: 20px; width: 16px; height: 16px;
} textarea { height: 100px; font-family: Arial;
} .btn { color: white; background: linear-gradient(to right, #0aa6bd, #f126bd);
} .tile2-image img { width: 321px; height: 211px;
} #menu-icon { display: none; float: right;
} @media all and (max-width: 900px) { .inner-container { width: auto; display: block; margin: 30px auto; } .header-content { width: auto; } .tile1 { width: 100%; } .tile2 { padding: 0px; } .tile2-image img { width: 100%; height: auto; }
} @media all and (max-width: 540px) { #header-right-menu { float: none; display: none; } #header-right-menu a { display: block; padding: 10px 0px; } #menu-icon { display: block; float: right; }
} @media all and (max-width: 400px) { .container { padding: 10px; }
}

Download

↑ Back to Top