Here’s Your First Look At Isabelle’s Super Smash Bros. Ultimate amiibo Boxart
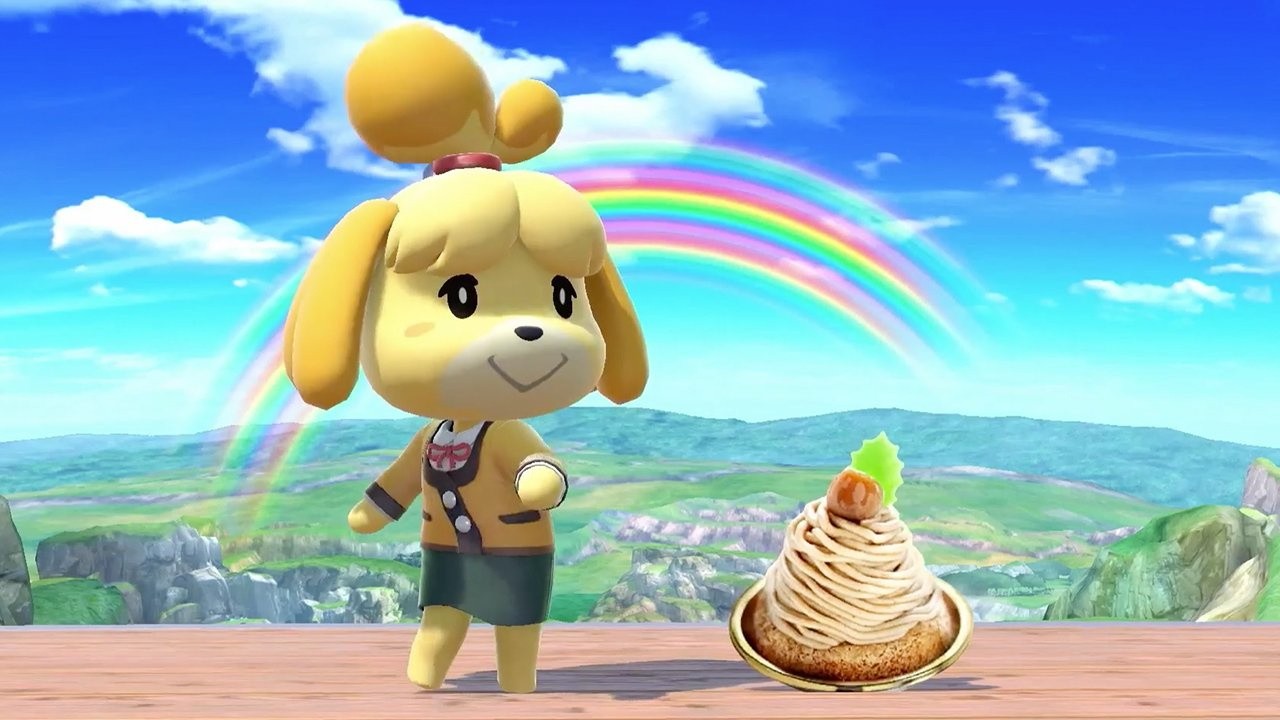
Super Smash Bros. Ultimate‘s promise to bring back all characters as playable fighters will extend to its amiibo figure line, making collectors all around the world both incredibly excited and terrified for the future of their bank balance in equal measure. As well as old favourites, all new additions are getting their own amiibo, too, including none other than Animal Crossing‘s Isabelle.
Strangely, despite it being revealed alongside the likes of King K. Rool, Piranha Plant, and Ice Climbers, we were never treated to a quick glimpse of the Isabelle figure’s packaging. If you’re the sort who likes to keep your amiibo collection boxed for display purposes, you’ll be happy to know that we can now see exactly how it’ll look thanks to an updated product listing on Amazon Japan.
The boxes and designs for the other three fighters mentioned above, as well as Young Link, Daisy, Pichu, and Ken, were revealed back in November. King K. Rool, Ice Climbers and Piranha Plant are all being released in just over a week’s time (the first two of which can still be pre-ordered through Nintendo UK), although no specific date for Isabelle has been shared just yet.
Will you be adding any of these to your collection? Do you already have many Super Smash Bros. series amiibo? Tell us below.
Plenty of cultures are celebrating the Lunar New Year at the moment, and since we’re having a break between content drops why not mark the occasion ourselves with some excellent mobile sales! Happy New Year! (Again!)
Ironhide’s latest addition to their iconic Tower-Defence RTS series is on sale for the second time since it launched late last year. It’s dropped to the same price as last time, and the discount is on both iTunes and Google Play.
Acram Digital
The digital boardgames publisher is having a sale across their entire catalogue at the moment… the fact that catalogue is only three games is made up by the fact that they’re three pretty excellent games. This sale is live on both iTunes and Google Play
Monster Energy Supercross: The Official Videogame 2
All the thrills of the Monster Energy AMA Supercross 2018 Championship. Live the life of a pro, put yourself to the test in the Compound, tackle challenges, manage your events and attract new sponsors to earn fame and unlock new content.
Design and build ski lifts, jumps and bridges in this physics based sandbox. Carried Away flips the classic bridge building genre upside down to create hours of new challenges! Watch with amusement as the fearless skiers put your creations to the test.
Explore and reshape distant worlds. Astroneer is set during the 25th century?s Intergalactic Age of Discovery, where Astroneers explore the frontiers of outer space, risking their lives in harsh environments to unearth rare discoveries and unlock the mysteries of the universe. On this adventure, players can work together to build custom bases above or below ground, create vehicles to explore a vast solar system, and use terrain to create anything they can imagine. A player?s creativity and ingenuity are the key to seeking out and thriving while on exciting planetary adventures.
Upgrade an existing Ubuntu installation to 18.04 Bionic Beaver
Distributions
You need an existing Ubuntu 16.04 LTS or 17.10 install.
Requirements
An existing Ubuntu 16.04 LTS or 17.10 install with root privileges.
Difficulty
Easy
Conventions
# - requires given linux commands to be executed with root privileges either directly as a root user or by use of sudo command
$ - requires given linux commands to be executed as a regular non-privileged user
Introduction
The latest Ubuntu release, 18.04, marks an opportunity for both LTS users and people on the previous 17.10 release to update Ubuntu and take advantage of the latest features. Thanks to Debian's upgrade process, it should be relatively simple to either upgrade Ubuntu 16.04 to 18.04 (both LTS) or to upgrade Ubuntu 17.10 to 18.04 LTS Bionic Beaver.
Note also that you can check your Ubuntu version following our guide on this topic: How to check Ubuntu version
Run your Ubuntu Update
Before you do anything, make sure that your system is already up-to-date. Run a full Ubuntu update and upgrade with Apt.
This will help to ensure that the difference between packages is as small as possible. It also will be the way that Canonical has most likely tested the upgrade themselves, so it's least likely to encounter bugs. Lastly, before you begin to upgrade Ubuntu to 18.04 LTS you may also want to remove all no longer required packages using:
$ sudo apt autoremove
How to Upgrade Ubuntu The Ubuntu Way
Ubuntu have developed their own automatic way of upgrading between releases. It essentially scripts the traditional Debian approach. This way, you can set it up to upgrade and walk away. Ubuntu will handle the rest.
Upgrades from 17.10 will not be enabled until a few days after 18.04's release. Upgrades from 16.04 LTS will not be enabled until a few days after the 18.04.1 release expected in late July. There are no offline upgrade options for Ubuntu Desktop and Ubuntu Server.
SOURCE: wiki.ubuntu.com
If you want to take this route, you're going to need to install one package first. So, do that.
$ sudo apt install update-manager-core
When that finishes, run the Ubuntu upgrade utility.
$ sudo do-release-upgrade
If you're doing this too soon, it will tell you that there is No new release found. In that case, and at your own risk, add the -d flag at the end of the command to force the upgrade. For more information read the below "No new release found" section.
$ sudo do-release-upgrade -d
Ubuntu release upgrade tool
Ubuntu will ask you a couple of questions about how you want to handle the upgrade, and it'll start off upgrading your system.
No new release found
As already mentioned above, upgrades from 17.10 will not be enabled until a few days after 18.04's release and upgrades from 16.04 LTS will not be enabled until a few days after the 18.04.1 release which is expected in late July 2018.
As a result, your upgrade attempt may result in a message No new release found while trying to upgrade your Ubuntu system by using sudo do-release-upgrade command. In this case read the following sections.
Upgrading from Ubuntu 16.04 LTS
Start by executing the sudo do-release-upgrade command. In case you receive the No new release found message you have four options:
The first and recommended approach is to simply wait. Direct upgrades from Ubuntu 16.04 LTS to Ubuntu 18.04 LTS will most likely be unavailable until late July 2018.
Force direct upgrade by using the -d switch. In this case sudo do-release-upgrade -d will force upgrade from Ubuntu 16.04 LTS to Ubuntu 18.04 LTS. In case you receive an "Upgrades to the development release are only available from the latest supported release." message, make sure that release upgrader default behavior is set to ltswithin /etc/update-manager/release-upgrades.
Upgrade to 17.10 first by changing the default behavior of the release upgrader to normalwithin the /etc/update-manager/release-upgrades file. When ready, execute the sudo do-release-upgrade command again. Once your system is upgraded to Ubuntu 17.10 then follow the Ubuntu 17.10 to Ubuntu 18.04 upgrade procedure while keeping the release upgrader behavior set to normal.
Use the Debian way described below to upgrade your Ubuntu 16.04 system.
Upgrading from Ubuntu 17.10
Start by executing the sudo do-release-upgrade command. In case you receive the No new release foundmessage, ensure that the default release upgrader is set to normal and re-execute the sudo do-release-upgrade command.
How to Upgrade Ubuntu The Debian Way
Change Your Sources
If you've selected the traditional Debian path, you're going to need to change the /etc/apt/sources.list file and replace the name of your previous release with bionic. So, if you're on 16.04, replace every instance of xenial with bionic. If you currently have 17.10, replace artful with bionic.
This process can be automated by using the following sed command:
$ sudo sed -i 's/xenial/bionic/g' /etc/apt/sources.list
Ubuntu Bionic Beaver Sources
Then, look in /etc/apt/sources.list.d/. Change any files in there the same way. If you end up getting an error when you try to update Ubuntu, use artful until those repositories are updated.
Ubuntu Update and Ubuntu Upgrade
Now, you can run the Ubuntu dist upgrade. First, update the Apt sources. Then, run the Ubuntu upgrade.
$ sudo apt update && sudo apt -y dist-upgrade
Upgraded Ubuntu 16.04 Xenial Xerus to Ubuntu 18.04 Bionic Beaver
Upgraded Ubuntu 16.04 system to Ubuntu 18.04
The upgrade should take a bit of time. Chances are, every package on the system will be upgraded. When the Ubuntu upgrade does finish, reboot the system. When the system comes back up, you'll be running Ubuntu 18.04 LTS Bionic Beaver!
Closing Thoughts
That's all there really is to it. You should notice that your login screen is different, especially if you were on 16.04. Depending on your choices during the Ubuntu dist upgrade, the system may automatically make the switch from Unity to GNOME for you. This procedure will also work on servers. It's exactly the same. Just be especially careful of any external repositories and version upgrades like PHP.
Posted by: xSicKx - 02-05-2019, 02:33 PM - Forum: PC Discussion
- No Replies
What Is RetroArch?
If you want to play all your favorite old games, RetroArch sets up a slick, all-in-one interface on your computer for any retro game you can imagine. RetroArch is a program that combines emulators for tons of retro video game systems like the Nintendo, Super Nintendo, Genesis, and others. It’s available for Windows, Mac, Linux, Android, iOS, and even hacked Wii consoles, among others. RetroArch has a menu that allows you to set up a gamepad, browse your library of games, and play anything from nearly any system with a few button presses.
Unfortunately, it’s pretty hard to set up—partially due to its sheer number of options (shaders, overlays, frame rate caps, and more). But RetroArch is constantly being updated, and it features a ton of options for tinkering with settings to give you the exact experience you want from your emulators. Let’s be up front here: RetroArch is for tweakers and people who love to tinker with every single option available. It’s for people who want to use specific emulators for specific games. It’s for people who want to set up custom visual settings for every game. It’s less about just playing that old arcade game from back in the day, and more about reproducing it as accurately as possible.
However, RetroArch is pretty hard to set up and requires a lot of tinkering to get it working properly. Once you do, it works like a dream, but prepare yourself for an arduous set up process. There are easier options out there, but none have the customization options of RetroArch.
Step One: Download RetroArch
Before you do anything, you need to download RetroArch. For this guide, we’ll be concentrating on the desktop version (primarily Windows and Mac), but the basics are applicable across any platform.
For this guide, I recommend sticking to the stable build, which you can find for your operating system of choice here (as of this writing, the most current version is 1.7.6). Just select your operating system and download the software inside the folder. Once that’s complete, unzip the file.
Step Two: Set Up Your Controllers
While you can navigate the RetroArch interface with a keyboard, it’s made for a controller, so it makes sense to set that up before we do anything else. Once RetroArch is downloaded, go ahead and open it up, then plug in a USB controller to your computer (RetroArch works with a massive number of USB game controllers, from an XBox controller to a PS4 controller, but I haven’t been able to find an actual list of compatible controllers anywhere). RetroArch will automatically detect your controller, and in many cases, it might even automatically configure the buttons for you. But it’s good to double-check.
When you first open up RetroArch, you’ll see a pretty simple interface with a lot of nonsense words. We’ll get to what all that means and how it works below, but for now, let’s just make sure your controller works:
Use the arrow keys on your keyboard to navigate down to Settings, then press X to select it. (You can press Z to go back a menu.) You can also use your controller, if it works out of the box.
Scroll down to Input and press X to select it.
Scroll down to User 1 Bind All and press X to select that. You’ll get a graphic overlay to set up your controller. Pick up your controller and follow the on-screen prompts.
Continue this process for any additional controllers you have, going down the list to input 2, 3, and so on.
You can now navigate with the A and B buttons on your controller (or whichever buttons you chose during the setup process) to go back and forth between menu items. As you’d expect, the d-pad will move you around the menu screen as well.
While you’re in the Input menu, it’s worth scrolling up to the Menu Toggle Gamepad Combo option. This option allows you to back out from any game into the RetroArch menu screen by tapping a combination of buttons on your controller. Pick one of the two combinations that work best for your controller of choice (for something like a PS4 controller, I like L3+R3 because I probably won’t tap that combo by accident).
Step Three: Dig Into the Video Settings
You’re almost ready to play games, but you’ll want to make a couple of quick changes to the video settings before you do.
Head to Settings > Video. Here, you’ll find a ton of options, mostly for stuff that doesn’t matter right now. However, there are some settings you’ll likely want to change (you change toggles with the left and right arrow keys/left and right on the d-pad):
Full screen mode: On (unless you prefer RetroArch running in a window, of course)
Full screen windowed mode: Off (decreases input lag)
Of course, there are tons of other options here, but this is all you’ll need to get things moving. You can tweak more later if you want.
Step Four: Download Emulator “Cores” and Tweaking Tools
Finally, it’s time to download some emulators in RetroArch:
From the main menu screen, scroll down to “Online Updater” and select it.
Select Core Updater. In RetroArch, emulators are referred to as “cores.”
Here, you’ll see a long list of various emulators. RetroArch does not come with any emulators initially, so you’ll need to download the ones you’ll use. Scroll to one on the list, and press X to select and download it.
We are working on a list of the best emulators on different operating systems. For ones not listed, I recommend grabbing a couple different ones for each console you want to emulate. That way, you can choose which emulator a game uses on a per-game basis. Some emulators are better with certain games than others.
Nintendo - Game Boy Advance (VBA Next) PC
Nintendo - Nintendo 64 (ParaLLEl N64) PC
From the Online Updater menu, you can also download various tweaking tools for RetroArch. This part’s a little confusing because the word “Update” suggests you’re, well, updating something, but right now you’re actually downloading these various tweaks and settings. To do so, just select the Update [item] option and RetroArch will do the rest. I recommend downloading each of them once before you even try to load a ROM, but here’s what each of various options mean:
Update Core Info Files: This updates any files related to the emulators. If you’re having trouble with a particular game, try updating here to see if a fix has been released.
Update Assets: This updates logos, fonts, and other similar things that might change slightly in each iteration of RetroArch.
Update Autoconfig Profiles: This is the automatic controller configuration file. Select this update if your controller doesn’t seem to work.
Update Cheats: As the name implies, this downloads all the various cheat files available for games.
Update Databases: This updates the database files of games and emulators so when you scan for ROMs (in the next step), RetroArch can automatically detect them.
Update Overlays: Overlays are an optional images that sit over the game screen. For example, you can add a Game Boy overlay that makes your screen look more like a classic Game Boy by adding the image of a Game Boy’s case around the game (like this).
Update Cg Shaders: These are the various shaders (basically filters) that you can run to make a game look more authentic (like running a CRT filter that simulates an old TV).
Update GLSL Shaders: These function the same as Cg shaders, but exist where Cg support might not (like in Linux or Android).
Once you run those updates, you can set up your emulators.
Step Five: Set Up Your Emulators and ROM Directories
It’s almost time to play some games, I promise. But first, you need to tell RetroArch where those games are located. You’ll also likely want to play around with a couple of Settings before you load you first game. First though, let’s point RetroArch to your various ROMs folders (From this step on, we’re going to assume you already have a bunch of ROMs from your favorite ROM source):
Head to Settings > Directory > File Browser Dir and pick the parent directory where your ROMs are located. This makes the next steps a little easier.
Head back to the main menu screen and select Add Content > Scan Directory and then select a ROMs folder. If you have your ROMs grouped in folders by console, you’ll need to scan each folder separately.
With that, RetroArch will automatically add your ROMs to the system. When you back out to the main menu, you’ll now see an icon for each console you have ROMs for on the main screen. Just press right or left to cycle through them.
Step Six: Load a ROM
Now, you finally have RetroArch set up and ready to play some games.
Before you start, I recommend going to Settings > Configuration and set Configuration Per-Core to On. This allows you to customize settings on a per-emulator basis instead of a universal setting for everything. So, when you load a up a Game Boy game, you can set up filters specifically for that emulator. Then, you can pick different settings for your NES games, and so on:
From the main menu screen, and scroll to the right to the console you want to play.
Pick the game you want to play.
Select the emulator you want to use.
Select Start Content to start the game.
If all goes well, your game should start up. Yay! Now let’s take a quick look at how to get into the in-game options. Tap the gamepad combo you set up in Step Two (mine’s R3+L3). This pulls up the RetroArch in-game menu. There’s a lot of different settings here to change the visuals, but for this beginner’s guide, let’s just stick to the one thing that really matters: save states.
To save a game, just back out to the menu with your gamepad combo, and select Save State. You can load up your game in the future by simply selecting Load State. Now you won’t have to try and beat Battletoads in one sitting.
If this all sounds a bit cumbersome, don’t worry. Once you get past the initial setup process, RetroArch does everything else automatically. Your settings for each emulator are carried over to every game you load into it, so all your NES games will look and play the same, while your Game Boy games will do the same with different settings. This means that once you get through the initial hump of setting everything up, playing games in the future is a simple process.
While this guide will get you up and running, we’ve barely scratched the surface of RetroArch here. There are countless other advanced menu items and settings to dig into if you want. We’ll look into some of those in a future post.
Wargroove Gets Off To A Strong Start, New Updates Outlined
Last week saw the release of the Advance War-esque tactics game Wargroove, which was met with glowing praise. Now, just a couple days after launch, England-based developer Chucklefish has announced that new updates and content are on the way.
In a new blog post on the game's official website, Chucklefish confirmed that sales of the game have "already covered the cost of development" in just three days. New improvements are on the way, some of which should be out quite soon.
According to the post, a post-launch patch is currently going through approval. The update is said to introduce a number of bug fixes and small improvements like addressing issues that cause online multiplayer maps against AI to break, spectating online on Fog of War maps to not work, and more.
In addition to short-term plans, the studio outlined a plethora of quality of life fixes. Some of these include various ways to quickly skip battle scenes, keeping fast map movement enabled without holding a button, displaying S rank requirements, and more. There's no time-frame on when they'll officially be implemented into the game.
Chucklefish also confirmed that modding support is coming soon and that work is underway on a PS4 version. Additionally, it's "looking into a larger content update, DLC and more."
In our Wargroove review, we called it "a delight to play" because Chucklefish "made meaningful improvements that make this both a satisfying answer to starved Advance Wars fans' wishes and a genuinely great experience on its own merits."
Wargroove is out now for PC, Xbox One, and Nintendo Switch.
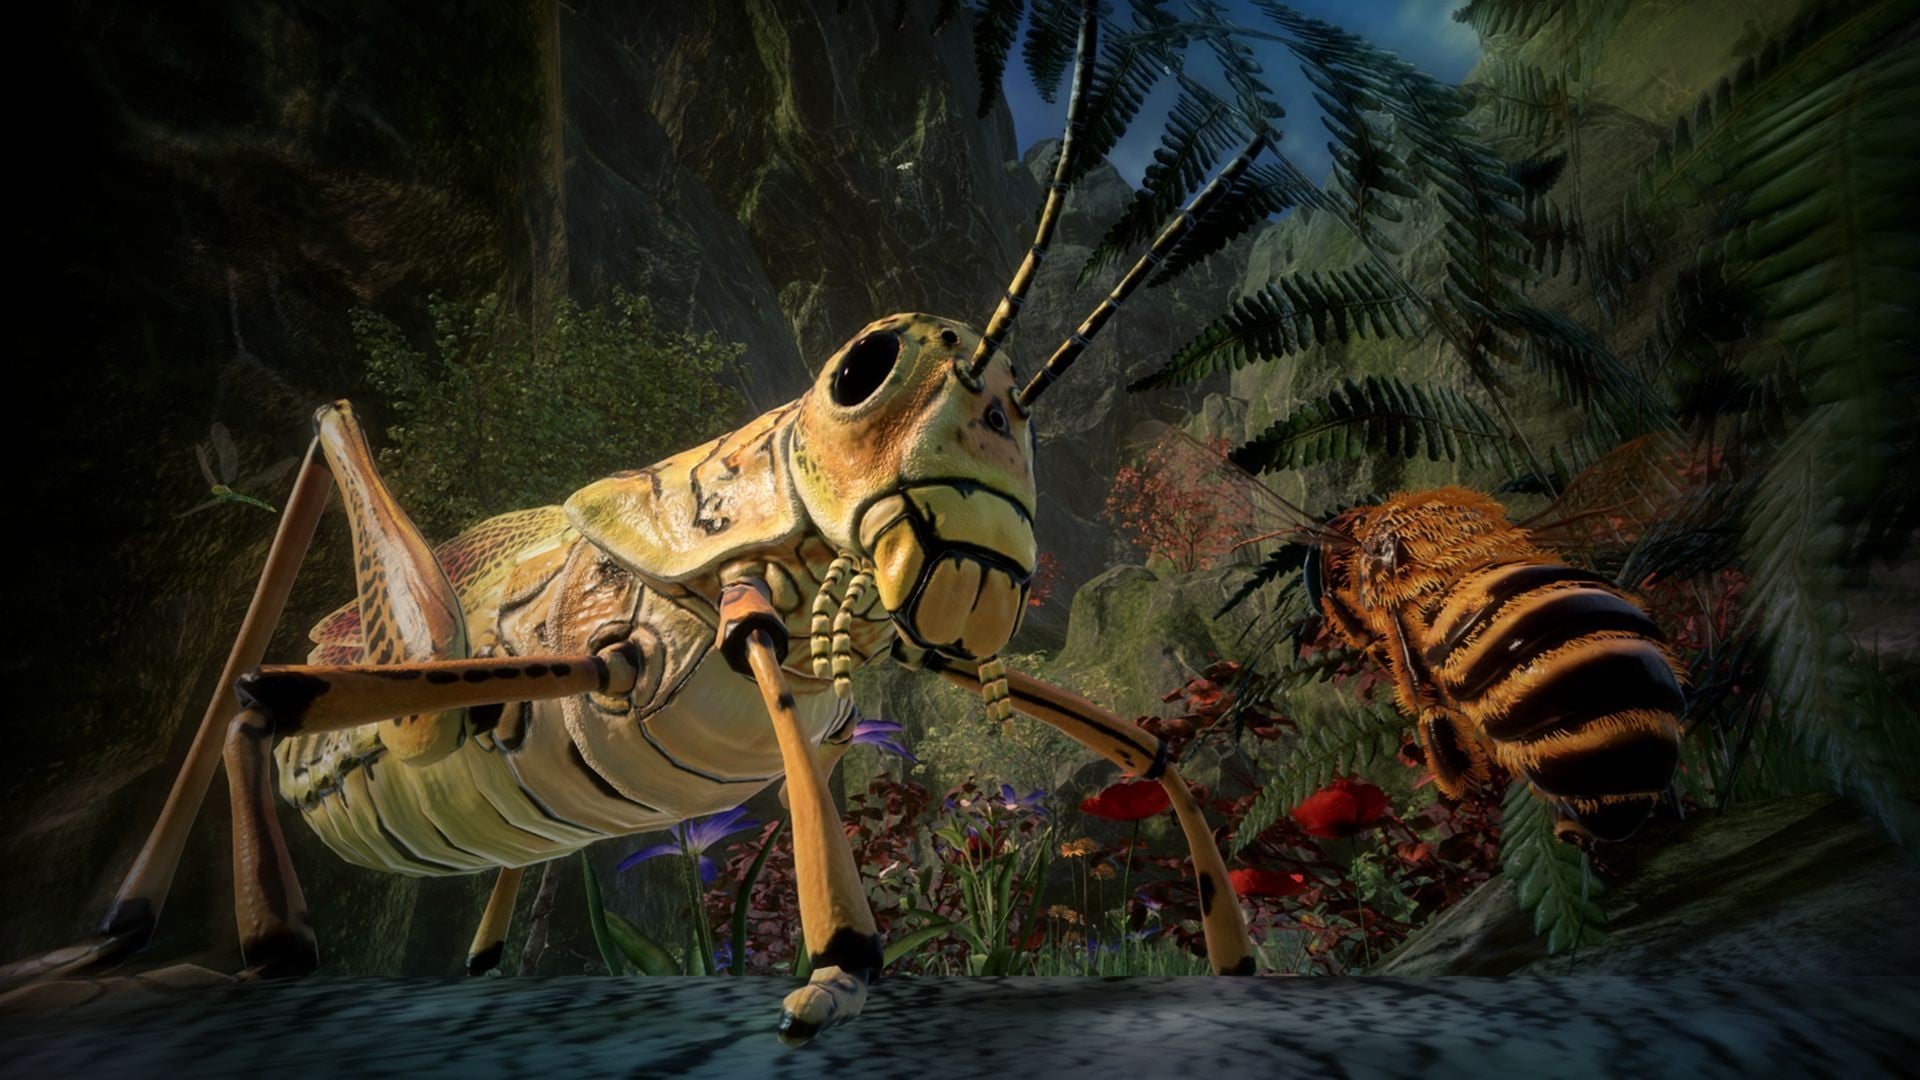
Bee Simulator Is Buzzing Its Way To A Physical Release On Switch In 2019
Varsav Game Studios, the developer of the upcoming Bee Simulator, has announced a publishing partnership with Bigben Interactive which will see the game launch physically on Switch “at the end of 2019”.
If you’ve missed the news on this one in the past, Bee Simulator has you seeing the world through the eyes of a honey bee. You’ll be competing with other bees in races, collecting pollen, performing “waggle dances”, and exploring a world inspired by Central Park in New York – presumably every bee’s dream destination? It supports co-op and vs. split-screen play, and the developer has been working on expanding the game’s features over the last couple of months.
Here are some of those features, as shared in a press release today:
– A unique chance to see the macro scale world from the micro perspective of a honeybee; – A realistic representation of a place inspired by Central Park; – Three diverse modes enriched with educational elements: a) Single-player story mode presents you with a family of bees. Can you save the hive from the threat of human beings? b) Exploration mode allows you to freely discover a world inspired by Central Park in New York. c) Split-screen mode can either be used for cooperation or competition. It includes an additional map that makes the game even more fascinating. – The possibility to interact with your surroundings: people, animals, plants, and other insects; – A lack of violence – it’s a perfect choice for parents looking for a game that their children can safely play; – Relaxing music composed by Mikołaj Stroiński, who was responsible for the soundtrack of such games as The Witcher 3 and The Vanishing of Ethan Carter.
Łukasz Rosiński, founder and joint-CEO of Varsav Game Studios, has said the following:
As a unique mix of action game with elements of simulation, and definitely with an educational mission, we deeply believe that Bee Simulator has great potential. Potential not only to give players huge amounts of fun and entertainment from being a bee, but also by increasing their knowledge of the nature that surrounds them, and maybe even change their work-life-nature balance.
No specific release date has been given just yet, but we do know that it will launch simultaneously worldwide across consoles and PC.
Will you be(e) adding this one to your physical Switch collection Does the idea have you positively buzzing withexcitement? Tell us below.
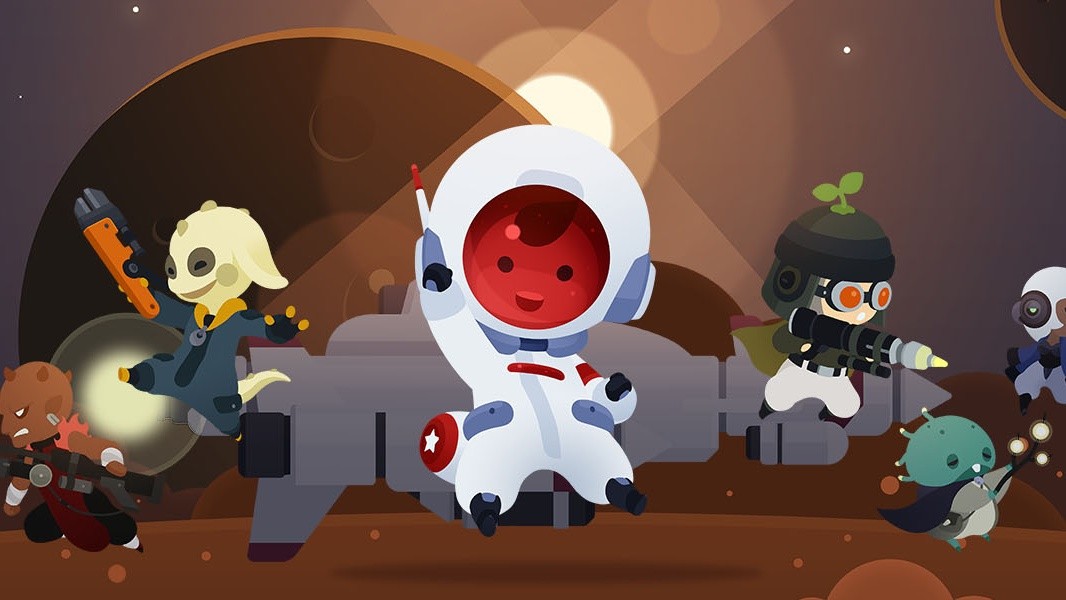
Captain StarONE Brings “Unique” Strategy Gameplay To Switch This Week
Flyhigh Works has revealed that its next game on Switch, Captain StarONE, will be bringing its strategy-based gameplay to the console very soon indeed. So soon, in fact, you’ll be able to pick it up later this week.
Described as “a unique game blending action and ‘inaction’”, Captain StarONE has you setting your strategies and combos before multitasking as the game carries out your commands. Once you’re all set, simply sit back, watch the battles unfold, and be ready to jump straight back in to provide a helping hand.
As you progress through the game, your enemies become stronger and your strategies and actions change. You’ll soon be assisting the Captain for stronger moves, making timely interventions to manipulate and generate combos, aiming for major damage, strengthening your equipment, organising teams and more.
The game launches on 7th February in North America, with a European release coming soon after on the 12th. You’ll be able to get your hands on it for $9.99 / €9,99 / £9.19.
What do you think? Do you like the look of this one? Let us know if you plan on picking it up with a comment below.