


Recently I came up with an idea to block certain websites because I didn’t want my little brother to surf certain sites while he was using my laptop. Being a smart kid, he knew ways of uninstalling chrome extensions that I used to block websites. That is when I came up with the idea of creating my own website blocker script. He wouldn’t have any clue what actually happened in the backend.
Project Description
Thus, in this project, we are going to create a website blocker with the help of Python. Our script will bring up a window where we can enter the name of the websites that we want to block and then we can use the block button in the window to block those websites. We will also create another script that will unblock the websites that we previously blocked. The unblock script will be a simple command line script that will help you unblock the previously blocked websites.
Note that we will be working with the hosts file of our system to block and unblock the websites. Simply put, the hosts file is a system file which has the capability to override DNS and redirect URLs or IP addresses to different locations. In our case, we will simply redirect the websites to be blocked to our local ip address, i.e. ‘127.0.0.1’ .
So, without further ado let us dive into our fun project.
Step 1: Import the Necessary Libraries
All we need is the Tkinter Module to create our GUI blocker application. You can install Tkinter using the pip installer on your terminal:
pip install tk
Step 2: Create the GUI Display Window

Code:
root = Tk()

root.geometry('500x300')

root.resizable(0, 0)

root.title("Finxter Website Blocker")

Label(root, text='WEBSITE BLOCKER', font='arial 20 bold').pack()

Label(root, text='Finxter', font='arial 20 bold').pack(side=BOTTOM)

Label(root, text='Enter Website :', font='arial 13 bold').place(x=5, y=60)

Websites = Text(root, font='arial 10', height='2', width='40', wrap=WORD, padx=5, pady=5)

Websites.place(x=140, y=60)
Explanation:
Tk()allows you to create an empty GUI window where you can add labels and buttons,- The
geometry()function will allow you to specify a width and height of the window. resizable(0,0)allows you to set a fixed size for the window.- The
title()function allows you to set the title of the window. - The
Label()widget allows you to display more lines of text which can only be seen but cannot be modified by the user. - Let’s explore the different parameters that I used in the Label widget.
root– This is the name which use to refer our window.text– Used to specify the text that we want to display on the label.font– This determines the type of font our label text will appear in.pack– Used to organize the widget in a block.
Text()is used to create a widget for multi-line text areas. Let’s understand some of the parameters used withinText()–
- wrap = WORD allows you to break a line after the occurrence of the last word.
- padx allows you to specify the padding around the text. This means, it allows you to put an extra bit of space on right and left ends of the text widget.
- pady allows you to specify the padding on top and bottom side of the text widget.
Step 3: Define the Host Address and IP Address
Since we want to block the websites on our system, hence you need to add them to the system host file. To do so, you will need to specify the host address and the IP address.
host_path = 'C:\Windows\System32\drivers\etc\hosts'

ip_address = '127.0.0.1'
Step 4: Creating the Blocker Function
Now, we need to create the function that will allow us to block a certain website. Therefore, as soon as you feed in the website name and click on the block button on the application, the website will be blocked immediately. If the website is already present within the host file then the application window will display a message that the website is already blocked.
Code:
def Blocker(): website_lists = Websites.get(1.0, END) Website = list(website_lists.split(",")) with open(host_path, 'r+') as host_file: file_content = host_file.read() for website in Website: if website in file_content: Label(root, text='Already Blocked', font='arial 12 bold').place(x=200, y=200) pass else: host_file.write(ip_address + " " + website + '\n') Label(root, text=" Blocked ", font='arial 12 bold').place(x=230, y=200)
Explanation:
website_listswill store all the websites entered to be blocked by the user. Note that thegetfunction used will allow you to fetch the websites entered within the text widget of the application.- Open up the system host file in the read and write mode (r+).
- We then check the contents of the host file and if a website is already present within the file then we ask the widget to display a message -” Already Blocked!”. Otherwise, we simply go ahead and the website to the host file and then display the message – “Blocked”.
That’s it. All that remains to be done is to create a block button for our application.
Step 5: Creating the Block Button
We need a button that triggers the Blocker function as soon as it s pressed. Thus, our next step is to create the block button and attach the Blocker function to this button.
Code:
block = Button(root, text='Block', font='arial 12 bold', pady=5, command=Blocker, width=6, bg='royal blue1', activebackground='sky blue')

block.place(x=230, y=150)

root.mainloop()
Explanation:
Button()function allows you to create a button on the application.
- The
commandparameter is used to call the Blocker function as soon as the button is clicked by the user. - The
activebackgroundparameter is used to set a background color for the button when it is clicked. - Note that we have already discussed all the other parameters used within the Button function previously in step 2.
- The
- The
placefunction allows you to align or place the button at a particular position in the application. root.mainloop()is the Tkinter method that tells Python to run the Tkinter event loop. Themainloopmethod listens to events like button clicks or keypresses, and halts any code that comes after it from executing until you close the window where you called the method.
Putting It All Together
Woohoo!!! We have successfully created our “Website Blocker” application. Finally, when you put everything together, this is how the complete script looks like –
from tkinter import * host_path = 'C:\Windows\System32\drivers\etc\hosts'

ip_address = '127.0.0.1'

root = Tk()

root.geometry('500x300')

root.resizable(0, 0)

root.title("Finxter Website Blocker")

Label(root, text='WEBSITE BLOCKER', font='arial 20 bold').pack()

Label(root, text='Finxter', font='arial 20 bold').pack(side=BOTTOM)

Label(root, text='Enter Website :', font='arial 13 bold').place(x=5, y=60)

Websites = Text(root, font='arial 10', height='2', width='40', wrap=WORD, padx=5, pady=5)

Websites.place(x=140, y=60) def Blocker(): website_lists = Websites.get(1.0, END) Website = list(website_lists.split(",")) with open(host_path, 'r+') as host_file: file_content = host_file.read() for website in Website: if website in file_content: Label(root, text='Already Blocked', font='arial 12 bold').place(x=200, y=200) pass else: host_file.write(ip_address + " " + website + '\n') Label(root, text=" Blocked ", font='arial 12 bold').place(x=230, y=200) block = Button(root, text='Block', font='arial 12 bold', pady=5, command=Blocker, width=6, bg='royal blue1', activebackground='sky blue') block.place(x=230, y=150)

root.mainloop()
Output

The Unblock Script
Once you have successfully blocked the required websites, what if you want to unblock them later on? That’s exactly what the next script will do.
The idea is to replicate the above process, the only difference in this case is we will remove the webiste name from the hosts file now.
Code:
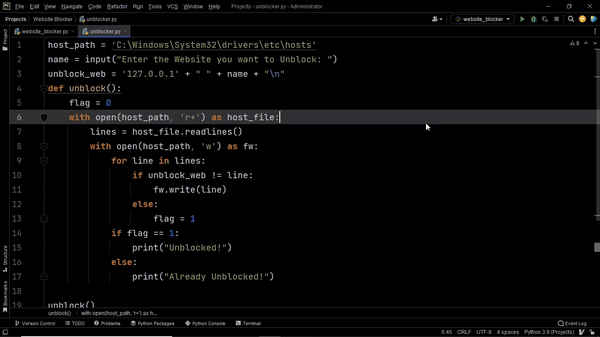
host_path = 'C:\Windows\System32\drivers\etc\hosts'

name = input("Enter the Website you want to Unblock: ")

unblock_web = '127.0.0.1' + " " + name + "\n"

def unblock(): flag = 0 with open(host_path, 'r+') as host_file: lines = host_file.readlines() with open(host_path, 'w') as fw: for line in lines: if unblock_web != line: fw.write(line) else: flag = 1 if flag == 1: print("Unblocked!") else: print("Already Unblocked!") unblock()
Output:
Conclusion
There we go! We have our complete application. This can be extremely handy if you wish to block or unblock websites from your system. I hope this project added some value and helped you in your coding quest. Stay tuned and subscribe for more interesting projects and tutorials.
Useful Read: Top 10 Tkinter Cheat Sheets
https://www.sickgaming.net/blog/2023/01/...n-windows/