


Quarkus is, in its own words, “Supersonic subatomic Java” and a “Kubernetes native Java stack tailored for GraalVM & OpenJDK HotSpot, crafted from the best of breed Java libraries and standards.” For the purpose of illustrating how to modernize an existing Java application to Quarkus, I will use the Red Hat JBoss Enterprise Application Platform (JBoss EAP) quickstarts helloworld quickstart as sample of a Java application builds using technologies (CDI and Servlet 3) supported in Quarkus.
It’s important to note that both Quarkus and JBoss EAP rely on providing developers with tools based—as much as possible—on standards. If your application is not already running on JBoss EAP, there’s no problem. You can migrate it from your current application server to JBoss EAP using the Red Hat Application Migration Toolkit. After that, the final and working modernized version of the code is available in the https://github.com/mrizzi/jboss-eap-quickstarts/tree/quarkus repository inside the helloworld module.
This article is based on the guides Quarkus provides, mainly Creating Your First Application and Building a Native Executable.
Get the code
To start, clone the JBoss EAP quickstarts repository locally, running:
$ git clone https://github.com/jboss-developer/jboss...starts.git Cloning into 'jboss-eap-quickstarts'... remote: Enumerating objects: 148133, done. remote: Total 148133 (delta 0), reused 0 (delta 0), pack-reused 148133 Receiving objects: 100% (148133/148133), 59.90 MiB | 7.62 MiB/s, done. Resolving deltas: 100% (66476/66476), done. $ cd jboss-eap-quickstarts/helloworld/
Try plain, vanilla helloworld
The name of the quickstart is a strong clue about what this application does, but let’s follow a scientific approach in modernizing this code, so first things first: Try the application as it is.
Deploy helloworld
- Open a terminal and navigate to the root of the JBoss EAP directory
EAP_HOME(which you can download). - Start the JBoss EAP server with the default profile by typing the following command:
$ EAP_HOME/bin/standalone.sh
Note: For Windows, use the EAP_HOME\bin\standalone.bat script.
After a few seconds, the log should look like:
[org.jboss.as] (Controller Boot Thread) WFLYSRV0025: JBoss EAP 7.2.0.GA (WildFly Core 6.0.11.Final-redhat-00001) started in 3315ms - Started 306 of 527 services (321 services are lazy, passive or on-demand)
- Open
http://127.0.0.1:8080in a browser, and a page like Figure 1 should appear:
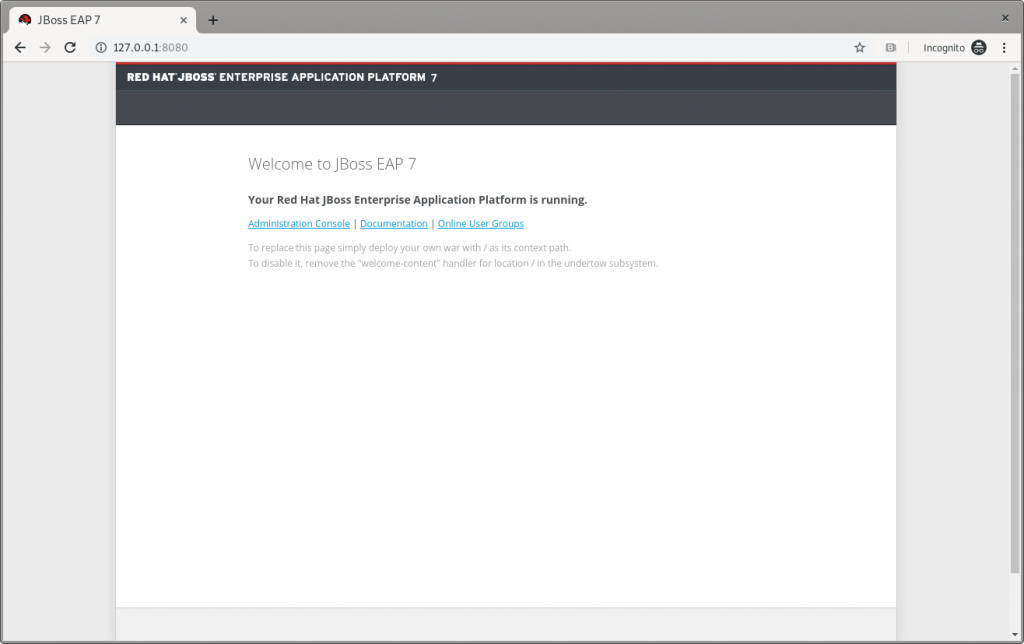
Figure 1: The JBoss EAP home page.
- Following instructions from Build and Deploy the Quickstart, deploy the
helloworldquickstart and execute (from the project root directory) the command:
$ mvn clean install wildfly:deploy
This command should end successfully with a log like this:
[INFO] ------------------------------------------------------------------------ [INFO] BUILD SUCCESS [INFO] ------------------------------------------------------------------------ [INFO] Total time: 8.224 s
The helloworld application has now been deployed for the first time in JBoss EAP in about eight seconds.
Test helloworld
Following the Access the Application guide, open http://127.0.0.1:8080/helloworld in the browser and see the application page, as shown in Figure 2:
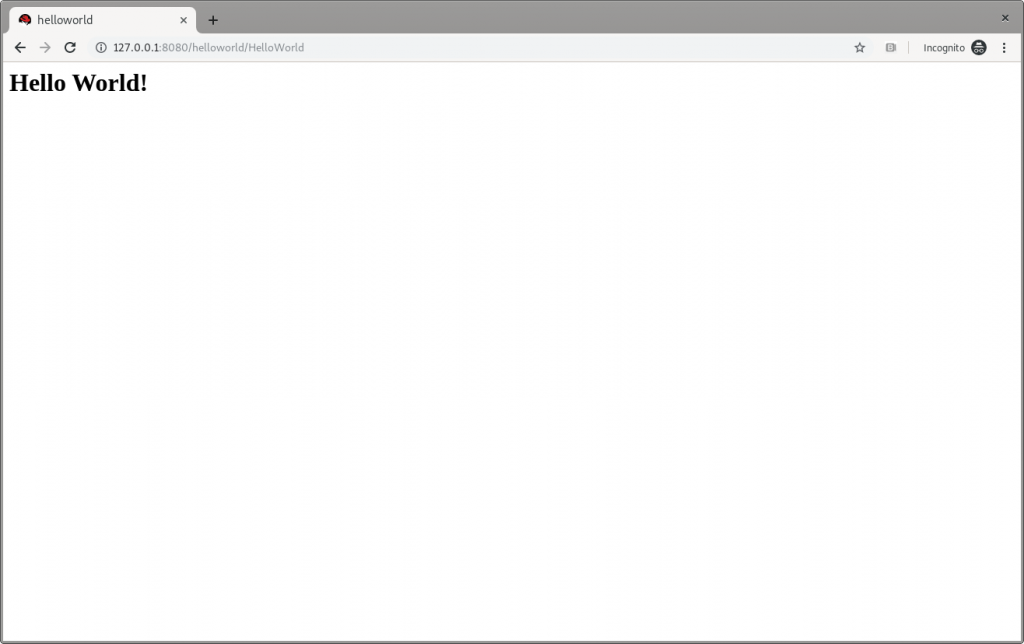
Figure 2: JBoss EAP’s Hello World.
Make changes
Change the createHelloMessage(String name) input parameter from World to Marco (my ego is cheap):
writer.println("<h1>" + helloService.createHelloMessage("Marco") + "</h1>");
Execute again the command:
$ mvn clean install wildfly:deploy
and then refresh the web page in the browser to check the message displayed changes, as shown in Figure 3:

Figure 3: JBoss EAP’s Hello Marco.
Undeploy helloworld and shut down
If you want to undeploy (optional) the application before shutting down JBoss EAP, run the following command:
$ mvn clean install wildfly:undeploy
To shut down the JBoss EAP instance, enter Ctrl+C in the terminal where it’s running.
Let’s modernize helloworld
Now we can leave the original helloworld behind and update it.
Create a new branch
Create a new working branch once the quickstart project finishes executing:
$ git checkout -b quarkus 7.2.0.GA
Change the pom.xml file
The time has come to start changing the application. starting from the pom.xml file. From the helloworld folder, run the following command to let Quarkus add XML blocks:
$ mvn io.quarkus:quarkus-maven-plugin:0.23.2:create
This article uses the 0.23.2 version. To know which is the latest version is, please refer to https://github.com/quarkusio/quarkus/releases/latest/, since the Quarkus release cycles are short.
This command changed the pom.xml, file adding:
- The property
<quarkus.version>to define the Quarkus version to be used. - The
<dependencyManagement>block to import the Quarkus bill of materials (BOM). In this way, there’s no need to add the version to each Quarkus dependency. - The
quarkus-maven-pluginplugin responsible for packaging the application, and also providing the development mode. - The
nativeprofile to create application native executables.
Further changes required to pom.xml, to be done manually:
- Move the
<groupId>tag outside of the<parent>block, and above the<artifactId>tag. Because we remove the<parent>block in the next step, the<groupId>must be preserved. - Remove the
<parent>block: The application doesn’t need the JBoss parent pom anymore to run with Quarkus. - Add the
<version>tag (below the<artifactId>tag) with the value you prefer. - Remove the
<packaging>tag: The application won’t be a WAR anymore, but a plain JAR. - Change the following dependencies:
- Replace the
javax.enterprise:cdi-apidependency withio.quarkus:quarkus-arc, removing<scope>provided</scope>because—as stated in the documentation—this Quarkus extension provides the CDI dependency injection. - Replace the
org.jboss.spec.javax.servlet:jboss-servlet-api_4.0_specdependency withio.quarkus:quarkus-undertow, removing the<scope>provided</scope>, because—again as stated in the documentation—this is the Quarkus extension that provides support for servlets. - Remove the
org.jboss.spec.javax.annotation:jboss-annotations-api_1.3_specdependency because it’s coming with the previously changed dependencies.
- Replace the
The pom.xml file’s fully changed version is available at https://github.com/mrizzi/jboss-eap-quickstarts/blob/quarkus/helloworld/pom.xml.
Note that the above mvn io.quarkus:quarkus-maven-plugin:0.23.2:create command, besides the changes to the pom.xml file, added components to the project. The added file and folders are:
- The files
mvnwandmvnw.cmd, and.mvnfolder: The Maven Wrapper allows you to run Maven projects with a specific version of Maven without requiring that you install that specific Maven version. - The
dockerfolder (insrc/main/): This folder contains exampleDockerfilefiles for bothnativeandjvmmodes (together with a.dockerignorefile). - The
resourcesfolder (insrc/main/): This folder contains an emptyapplication.propertiesfile and the sample Quarkus landing pageindex.html(more in the section “Run the modernizedhelloworld“).
Run helloworld
To test the application, use quarkus:dev, which runs Quarkus in development mode (more details on Development Mode here).
Note: We expect this step to fail as changes are still required to the application, as detailed in this section.
Now run the command to check if and how it works:
$ ./mvnw compile quarkus:dev [INFO] Scanning for projects... [INFO] [INFO] ----------------< org.jboss.eap.quickstarts:helloworld >---------------- [INFO] Building Quickstart: helloworld quarkus [INFO] --------------------------------[ war ]--------------------------------- [INFO] [INFO] --- maven-resources-plugin:2.6:resources (default-resources) @ helloworld --- [INFO] Using 'UTF-8' encoding to copy filtered resources. [INFO] Copying 2 resources [INFO] [INFO] --- maven-compiler-plugin:3.1:compile (default-compile) @ helloworld --- [INFO] Nothing to compile - all classes are up to date [INFO] [INFO] --- quarkus-maven-plugin:0.23.2:dev (default-cli) @ helloworld --- Listening for transport dt_socket at address: 5005 INFO [io.qua.dep.QuarkusAugmentor] Beginning quarkus augmentation INFO [org.jbo.threads] JBoss Threads version 3.0.0.Final ERROR [io.qua.dev.DevModeMain] Failed to start quarkus: java.lang.RuntimeException: io.quarkus.builder.BuildException: Build failure: Build failed due to errors [error]: Build step io.quarkus.arc.deployment.ArcProcessor#validate threw an exception: javax.enterprise.inject.spi.DeploymentException: javax.enterprise.inject.UnsatisfiedResolutionException: Unsatisfied dependency for type org.jboss.as.quickstarts.helloworld.HelloService and qualifiers [@Default] - java member: org.jboss.as.quickstarts.helloworld.HelloWorldServlet#helloService - declared on CLASS bean [types=[javax.servlet.ServletConfig, java.io.Serializable, org.jboss.as.quickstarts.helloworld.HelloWorldServlet, javax.servlet.GenericServlet, javax.servlet.Servlet, java.lang.Object, javax.servlet.http.HttpServlet], qualifiers=[@Default, @Any], target=org.jboss.as.quickstarts.helloworld.HelloWorldServlet] at io.quarkus.arc.processor.BeanDeployment.processErrors(BeanDeployment.java:841) at io.quarkus.arc.processor.BeanDeployment.init(BeanDeployment.java:214) at io.quarkus.arc.processor.BeanProcessor.initialize(BeanProcessor.java:106) at io.quarkus.arc.deployment.ArcProcessor.validate(ArcProcessor.java:249) at sun.reflect.NativeMethodAccessorImpl.invoke0(Native Method) at sun.reflect.NativeMethodAccessorImpl.invoke(NativeMethodAccessorImpl.java:62) at sun.reflect.DelegatingMethodAccessorImpl.invoke(DelegatingMethodAccessorImpl.java:43) at java.lang.reflect.Method.invoke(Method.java:498) at io.quarkus.deployment.ExtensionLoader$1.execute(ExtensionLoader.java:780) at io.quarkus.builder.BuildContext.run(BuildContext.java:415) at org.jboss.threads.ContextClassLoaderSavingRunnable.run(ContextClassLoaderSavingRunnable.java:35) at org.jboss.threads.EnhancedQueueExecutor.safeRun(EnhancedQueueExecutor.java:2011) at org.jboss.threads.EnhancedQueueExecutor$ThreadBody.doRunTask(EnhancedQueueExecutor.java:1535) at org.jboss.threads.EnhancedQueueExecutor$ThreadBody.run(EnhancedQueueExecutor.java:1426) at java.lang.Thread.run(Thread.java:748) at org.jboss.threads.JBossThread.run(JBossThread.java:479) Caused by: javax.enterprise.inject.UnsatisfiedResolutionException: Unsatisfied dependency for type org.jboss.as.quickstarts.helloworld.HelloService and qualifiers [@Default] - java member: org.jboss.as.quickstarts.helloworld.HelloWorldServlet#helloService - declared on CLASS bean [types=[javax.servlet.ServletConfig, java.io.Serializable, org.jboss.as.quickstarts.helloworld.HelloWorldServlet, javax.servlet.GenericServlet, javax.servlet.Servlet, java.lang.Object, javax.servlet.http.HttpServlet], qualifiers=[@Default, @Any], target=org.jboss.as.quickstarts.helloworld.HelloWorldServlet] at io.quarkus.arc.processor.Beans.resolveInjectionPoint(Beans.java:428) at io.quarkus.arc.processor.BeanInfo.init(BeanInfo.java:371) at io.quarkus.arc.processor.BeanDeployment.init(BeanDeployment.java:206) ... 14 more
It failed. Why? What happened?
The UnsatisfiedResolutionException exception refers to the HelloService class, which is a member of the HelloWorldServlet class (java member: org.jboss.as.quickstarts.helloworld.HelloWorldServlet#helloService). The problem is that HelloWorldServlet needs an injected instance of HelloService, but it can not be found (even if the two classes are in the very same package).
It’s time to return to Quarkus guides to leverage the documentation and understand how @Inject—and hence Contexts and Dependency Injection (CDI)—works in Quarkus, thanks to the Contexts and Dependency Injection guide. In the Bean Discovery paragraph, it says, “Bean classes that don’t have a bean defining annotation are not discovered.”
Looking at the HelloService class, it’s clear there’s no bean defining annotation, and one has to be added to have Quarkus to discover the bean. So, because it’s a stateless object, it’s safe to add the @ApplicationScoped annotation:
@ApplicationScoped public class HelloService {
Note: The IDE should prompt you to add the required package shown here (add it manually if need be):
import javax.enterprise.context.ApplicationScoped;
If you’re in doubt about which scope to apply when the original bean has no scope defined, please refer to the JSR 365: Contexts and Dependency Injection for Java 2.0—Default scope documentation.
Now, try again to run the application, executing again the ./mvnw compile quarkus:dev command:
$ ./mvnw compile quarkus:dev [INFO] Scanning for projects... [INFO] [INFO] ----------------< org.jboss.eap.quickstarts:helloworld >---------------- [INFO] Building Quickstart: helloworld quarkus [INFO] --------------------------------[ war ]--------------------------------- [INFO] [INFO] --- maven-resources-plugin:2.6:resources (default-resources) @ helloworld --- [INFO] Using 'UTF-8' encoding to copy filtered resources. [INFO] Copying 2 resources [INFO] [INFO] --- maven-compiler-plugin:3.1:compile (default-compile) @ helloworld --- [INFO] Changes detected - recompiling the module! [INFO] Compiling 2 source files to /home/mrizzi/git/forked/jboss-eap-quickstarts/helloworld/target/classes [INFO] [INFO] --- quarkus-maven-plugin:0.23.2:dev (default-cli) @ helloworld --- Listening for transport dt_socket at address: 5005 INFO [io.qua.dep.QuarkusAugmentor] (main) Beginning quarkus augmentation INFO [io.qua.dep.QuarkusAugmentor] (main) Quarkus augmentation completed in 576ms INFO [io.quarkus] (main) Quarkus 0.23.2 started in 1.083s. Listening on: http://0.0.0.0:8080 INFO [io.quarkus] (main) Profile dev activated. Live Coding activated. INFO [io.quarkus] (main) Installed features: [cdi]
This time the application runs successfully.
Run the modernized helloworld
As the terminal log suggests, open a browser to http://0.0.0.0:8080(the default Quarkus landing page), and the page shown in Figure 4 appears:
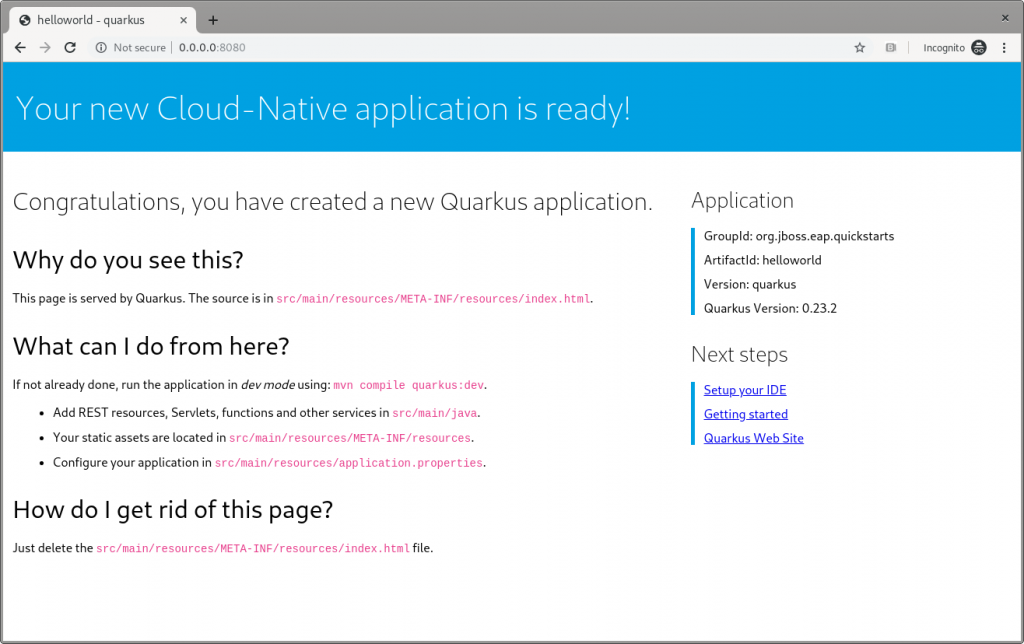
Figure 4: The Quarkus dev landing page.
This application has the following context’s definition in the WebServlet annotation:
@WebServlet("/HelloWorld") public class HelloWorldServlet extends HttpServlet {
Hence, you can browse to http://0.0.0.0:8080/HelloWorldto reach the page shown in Figure 5:

Figure 5: The Quarkus dev Hello World page.
It works!
Make changes
Please, pay attention to the fact that the ./mvnw compile quarkus:dev command is still running, and we’re not going to stop it. Now, try to apply the same—very trivial—change to the code and see how Quarkus improves the developer experience:
writer.println("<h1>" + helloService.createHelloMessage("Marco") + "</h1>");
Save the file, and then refresh the web page to check that Hello Marco appears, as shown in Figure 6:
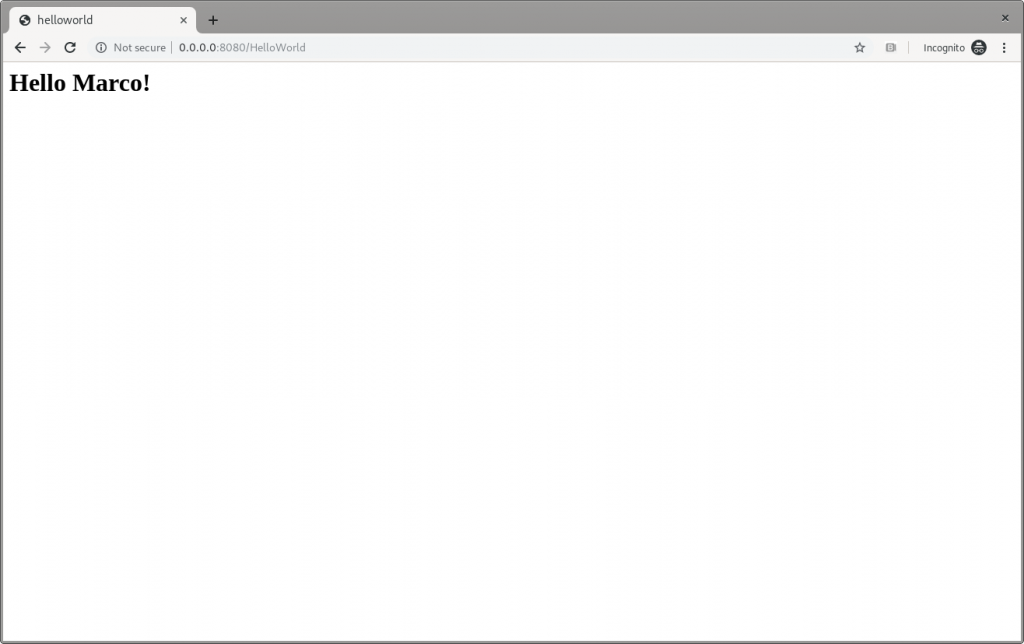
Figure 6: The Quarkus dev Hello Marco page.
Take time to check the terminal output:
INFO [io.qua.dev] (vert.x-worker-thread-3) Changed source files detected, recompiling [/home/mrizzi/git/forked/jboss-eap-quickstarts/helloworld/src/main/java/org/jboss/as/quickstarts/helloworld/HelloWorldServlet.java] INFO [io.quarkus] (vert.x-worker-thread-3) Quarkus stopped in 0.003s INFO [io.qua.dep.QuarkusAugmentor] (vert.x-worker-thread-3) Beginning quarkus augmentation INFO [io.qua.dep.QuarkusAugmentor] (vert.x-worker-thread-3) Quarkus augmentation completed in 232ms INFO [io.quarkus] (vert.x-worker-thread-3) Quarkus 0.23.2 started in 0.257s. Listening on: http://0.0.0.0:8080 INFO [io.quarkus] (vert.x-worker-thread-3) Profile dev activated. Live Coding activated. INFO [io.quarkus] (vert.x-worker-thread-3) Installed features: [cdi] INFO [io.qua.dev] (vert.x-worker-thread-3) Hot replace total time: 0.371s
Refreshing the page triggered the source code change detection and the Quarkus automagic “stop-and-start.” All of this executed in just 0.371 seconds (that’s part of the Quarkus “Supersonic Subatomic Java” experience).
Build the helloworld packaged JAR
Now that the code works as expected, it can be packaged using the command:
$ ./mvnw clean package
This command creates two JARs in the /target folder. The first is helloworld-<version>.jar, which is the standard artifact built from the Maven command with the project’s classes and resources. The second is helloworld-<version>-runner.jar, which is an executable JAR.
Please pay attention to the fact that this is not an uber-jar, because all of the dependencies are copied into the /target/lib folder (and not bundled within the JAR). Hence, to run this JAR in another location or host, both the JAR file and the libraries in the /lib folder have to be copied, considering that the Class-Path entry of the MANIFEST.MF file in the JAR explicitly lists the JARs from the lib folder.
To create an uber-jar application, please refer to the Uber-Jar Creation Quarkus guide.
Run the helloworld packaged JAR
Now, the packaged JAR can be executed using the standard java command:
$ java -jar ./target/helloworld-<version>-runner.jar INFO [io.quarkus] (main) Quarkus 0.23.2 started in 0.673s. Listening on: http://0.0.0.0:8080 INFO [io.quarkus] (main) Profile prod activated. INFO [io.quarkus] (main) Installed features: [cdi]
As done above, open the http://0.0.0.0:8080 URL in a browser, and test that everything works.
Build the helloworld quickstart-native executable
So far so good. The helloworld quickstart ran as a standalone Java application using Quarkus dependencies, but more can be achieved by adding a further step to the modernization path: Build a native executable.
Install GraalVM
First of all, the tools for creating the native executable have to be installed:
- Download GraalVM 19.2.0.1 from https://github.com/oracle/graal/releases/tag/vm-19.2.0.1.
- Untar the file using the command:
$ tar xvzf graalvm-ce-linux-amd64-19.2.0.1.tar.gz
- Go to the
untarfolder. - Execute the following to download and add the native image component:
$ ./bin/gu install native-image
- Set the
GRAALVM_HOMEenvironment variable to the folder created in step two, for example:
$ export GRAALVM_HOME={untar-folder}/graalvm-ce-19.2.0.1)
More details and install instructions for other operating systems are available in Building a Native Executable—Prerequisites Quarkus guide.
Build the helloworld native executable
As stated in the Building a Native Executable—Producing a native executable Quarkus guide, “Let’s now produce a native executable for our application. It improves the startup time of the application and produces a minimal disk footprint. The executable would have everything to run the application including the ‘JVM’ (shrunk to be just enough to run the application), and the application.”
To create the native executable, the Maven native profile has to be enabled by executing:
$ ./mvnw package -Pnative
The build took me about 1:10 minutes and the result is the helloworld-<version>-runner file in the /target folder.
Run the helloworld native executable
The /target/helloworld-<version>-runner file created in the previous step. It’s executable, so running it is easy:
$ ./target/helloworld-<version>-runner INFO [io.quarkus] (main) Quarkus 0.23.2 started in 0.006s. Listening on: http://0.0.0.0:8080 INFO [io.quarkus] (main) Profile prod activated. INFO [io.quarkus] (main) Installed features: [cdi]
As done before, open the http://0.0.0.0:8080 URL in a browser and test that everything is working.
Next steps
I believe that this modernization, even of a basic application, is the right way to approach a brownfield application using technologies available in Quarkus. This way, you can start facing the issues and tackling them to understand and learn how to solve them.
In part two of this series, I’ll look at how to capture memory consumption data in order to evaluate performance improvements, which is a fundamental part of the modernization process.

The post Quarkus: Modernize “helloworld” JBoss EAP quickstart, Part 1 appeared first on Red Hat Developer.
https://www.sickgaming.net/blog/2019/11/...rt-part-1/