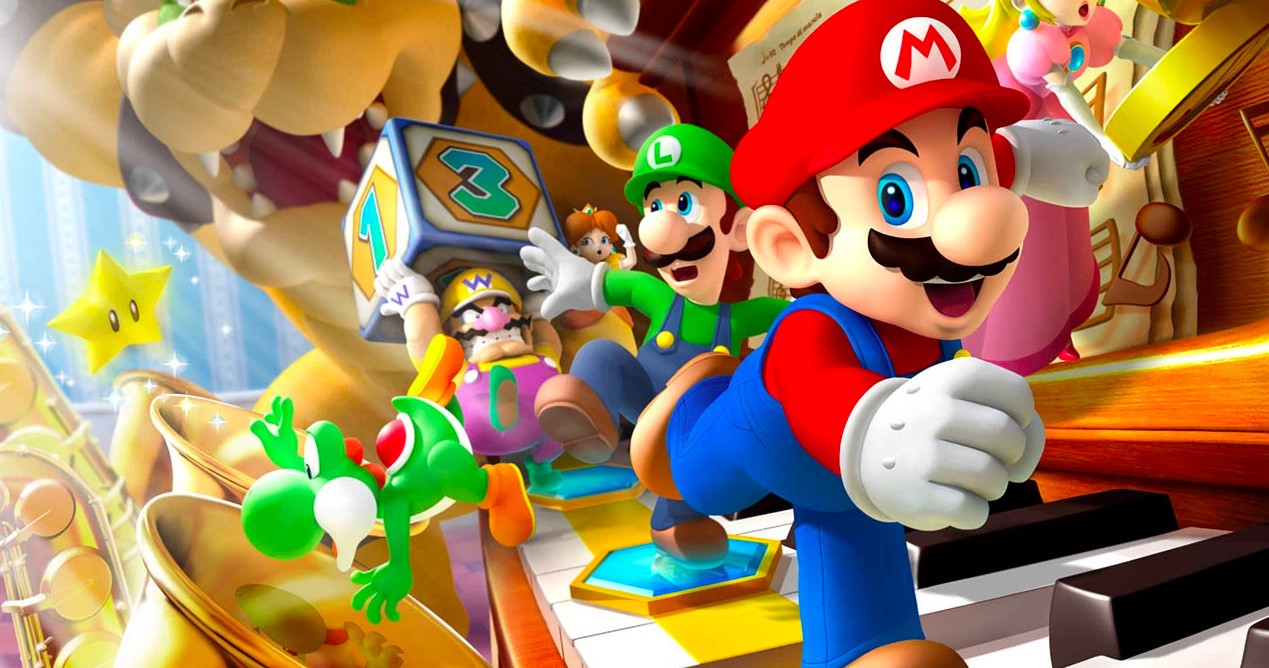
The Mario Party series is intended to engender friendly competition in a colourful, cartoon-like world, but as we all know, it rarely ends up like that. Few Nintendo franchises are capable of totally destroying relationships like this one, and since the inception of the series in the Nintendo 64, we’ve seen plenty of chances to annoy friends and family over the years.
With the release of Super Mario Party – one of the best entries in the series in years – we thought it might be nice to recount some of our personal memories relating to the lineage.
Ryan Craddock, staff writer
For me, Mario Party will always bring back memories of my childhood, even if the games started to grate on me after a while. My dear Mum and I would play Mario Party 4, 5 and 6 together pretty regularly, sometimes thanks to her wonderful trait of letting me have the odd day off school for no reason other than to play games together (although my pet rabbit actually chewed through Mario Party 6’s included microphone cable, so that didn’t help).
I always preferred the minigames to the main event as a child (although with Super Mario Party I’ve grown to love all aspects), which naturally meant that I started to lose interest after hours and hours of travelling around the boards. I’ll always love how they can appeal to players of all skill levels and experience, though, allowing us to both enjoy the game in equal measure.
Liam Doolan, news reporter
There are some serious life lessons in the original Mario Party games on the Nintendo 64. Much like the real world – one minute you’re enjoying the high life and the next thing you know you’ve lost it all. I guess in the context of Mario Party, this loosely translates to another player taking every star and coin in your possession. Often when I did get past this point, my hopes of winning would then be crushed during Toad’s closing ceremony when a player who was seemingly done and dusted made a stunning comeback by claiming every bonus star on offer. #rigged
Steve Bowling, US editor
My most fond memory of Mario Party is also my most recent. The night of Super Mario Party’s release, I was hanging out with two seasoned Mario Party players: Andre Segers of Gamexplain and Imran Khan of Game Informer. We sat down to play with Andre playing Mario, Imran playing Rosalina and me playing as Wario. For our fourth, we added a computer player, Peach, on the hardest AI setting. The game was set for 20 turns, which takes about two hours. As we started the game, we all joked that Mario Party’s notoriously brutal AI would be the death of us, and how the game would find a way to put an end to our friendship.
Many minigames and a few drinks later, we were at the end of last dice roll of the 20th turn. Peach was down by two stars, with my Wario in first place. Peach was up next. In that last roll she managed to use a gold warp pipe to grab a star, then got a second star from a hidden block. When the post-game bonuses were announced, guess who grabbed a third-star? Peach. I was dropped from first place all the way to fourth, and Peach, who we all knew was going to find a way to make us salty, claimed first. I may have lost, but it was the absolute best game of Mario Party I’ve ever played.
Austin Voigt, contributor
Although the first Mario Party released when I was the tender age of 6 – and not yet permitted to have any video game systems of my own – I do recall fond childhood memories of experiencing this shiny new multiplayer game on friends’ N64s. Some shamefully involved kicking the controller out of others’ hands in order to win the minigames!
However, the only previous version of Mario Party I actually owned myself was Mario Party 8 on the Wii – and sadly, it did not get played as much as it should have. Luckily, now that some time has passed – and more of my friends & family have become gamers – I have every intention of picking up the Switch version before the holidays. And solidly trouncing my grandma. (No joke – this will be a challenge; she’s actually great at gaming.)
Gonçalo Lopes, contributor
Since I am as old as time itself, it comes as no surprise that I actually got to experience the series right from the original Nintendo 64 outing. In those simpler days when the Internet was still an expensive privilege, local multiplayer remained the number one source for juvenile shenanigans for me and my like-minded friends.
Between loud Goldeneye and even louder WCW/nWo Revenge sessions, the original Mario Party became our number one go-to game when it came to pitting Nintendo characters against one another – outside the realm of karts, of course – at a time when no one could know that in just one year, something far more smashing was coming along. The board game nature of the title also made it far more accessible to non-hardcore gamers like our parents, so it was a title that could be enjoyed by the whole family without much fuss. Don’t mistake that last statement to assume this was a casual experience; some of those minigames gave the poor Nintendo 64 controllers’ analogue sticks quite a workout, but if anyone asks “officially”, none of them were broken playing Mario Party. Honest.
For me, the series truly took off on the GameCube, with the new technology enabling a big leap in aesthetics while at the same time not ditching out the ease of local multiplayer shenanigans and casual player friendliness. While not a match for the utter insanity surrounding our playing sessions of NHL Hitz, we still found saner entertainment in the GameCube entries of Mario Party 4 and 5, with my only regret being the late arrival of Mario Party 6. The microphone minigames were ridiculously fun, but we hardly had time to play them.
By the time the Wii arrived, something odd began happening with most of my friends. While I kept on living out my youthful carefree existence surrounded by Nintendo video game bliss, everyone was starting to get married, have children and take part in adult stuff like “real jobs”. While the Wii truly was the absolute king at parties, there where so many multiplayer offerings that even Mario Party began to struggle to stand out.
The brilliant Wii U version was used one single time with friends and I suspect the Switch version will probably have a similar future. I must admit that most of my friends have naturally outgrown the series, but I will keep on picking up every new outing; it may not be the pinnacle of Nintendo’s triple-A franchise pile, but one day I hope to once again gather family and friends around Nintendo hardware for some wacky dice-throwing antics.
Damien McFerran, editor
I have to admit, I’m one of those people who doesn’t possess especially strong feelings about the Mario Party series; unlike Mario Kart and Smash Bros., the franchise tends to pass under the radar of many players, but the massive number of instalments would suggest it has a large fanbase – and my few experiences with the game have illustrated why that is.
I recall playing the original Mario Party with a group of friends who weren’t what you’d call seasoned players. I popped it into the N64 almost unwillingly, as I was keener to play titles like GoldenEye 007 and J-League Perfect Striker – titles that required serious skill and therefore gave plenty of opportunity for bragging rights. However, I instantly became aware of the true power of Mario Party; because so much of it is based on chance it’s more of a throwback to board games – you know, those things we all used to play before video games came along and ruined family time.
The minigames are simple but engaging, which helps novices to jump right in. Finally, the cast of instantly-recognisable characters makes the whole thing tremendously appealing, even to non-gamers. That’s perhaps the true magic of the Mario Party franchise; it’s one of Nintendo’s most accessible series, which is really saying something when you consider how much effort the company makes to ensure its games can be enjoyed by as many people as possible.
Richard Atkinson – contributor
Friendships. Many of us are lucky to have them and, in many instances, there are few things in the world that can easily break that special bond we hold with our nearest and dearest. That is until Mario Party entered the video game scene on the N64 in the late ’90s and, boy, did we know about it…
The Mario party series boasts itself – and always has done – as the ultimate couch party game and it personally has a special place in my heart. Since I was first rage-quitting at the tremendously young age of 10, I’ve played pretty much every Mario Party there is and, although it’s no secret that the franchise has come across some seriously questionable design choices over the years (I’m looking at you Mario Party 9 with your silly car mechanic), there’s no denying that the mini-games are where it’s at.
The recent launch of Super Mario Party on Switch isn’t perfect, but it feels like Nintendo has listened to its ever-vocal fans; the car is nowhere to be seen, less random stars are dished out willy-nilly at the end of games and the motion controls actually add a ton of fun and the ‘waggles’ don’t feel shoe-horned in to put the Joy-Con back on the main stage as a system seller.
Never go away, Mario Party, even if my best friend still won’t talk to me after snatching her stars right from under her unsuspecting nose using the gold pipe.
What are your personal memories of the Mario Party series? Feel free to share them with the wider world by posting a comment below.
Weekend Deal – Total War: Warhammer Franchise, 25% to 75% Off
We wanted to give you a heads up about some exciting language options coming to Steam.
Starting today, we are adding two new languages (Vietnamese and Latin American Spanish) to the list of 26 languages officially supported by Steam. This means the Steam desktop client, the Steam store, and the Steam Community, are all translated to make it easier for Vietnamese or Latin American Spanish speakers to interact with Steam, find games, and chat with friends. It also means that game developers can now provide translations of their game in those languages through Steam.
Why Vietnamese?
Vietnamese is the sole national language of the country Vietnam, but is also widely used in other countries, including the United States, Australia, and France. There are over 75 million Vietnamese speakers worldwide. In November of 2017, we added Steam support for the national currency of Vietnam, the Vietnamese Dong, along with a number of payment methods that make it easier for players in Vietnam to make purchases on Steam. While supporting payments methods and currencies is important for making Steam accessible to global audiences, we realized our mistake in not also supporting the national language too so that players can more easily find their way around Steam and be able to get games in their native language, when available.
Why Latin American Spanish?
In the past, Steam has only supported a single definition of Spanish-language. But our customers and game developers have been reminding us of the stylistic differences among Spanish spoken in different locales, and requested that Steam support that difference. As a result, we now have a definition of both Castilian (European) Spanish and Latin American (LatAm) Spanish, translating the Steam desktop client, store, and community into both variants of Spanish.
As a practical example, this is how we already treat Portuguese and Brazilian Portuguese, where customers can choose one, the other, or both for their language preferences, and game developers can indicate whichever variants their game supports.
Changing Your Language Preferences in Steam
Whether your native language is Vietnamese, Castilian Spanish, or any of the 26 other languages supported by Steam, you can specify your language preferences in the Steam desktop client by clicking “Steam>settings>interface”.
Additionally, you can specify more than one language within the Steam store to help you find more games available in languages you may speak. For example, you may want to run Steam in Vietnamese, but you also speak English and want to make sure you can find games that are available with English language audio. You can visit your store preferences to select multiple languages for games that you wish to discover in the Steam store.
FAQ for Game Developers
Language support can be pretty important for the enjoyment of games. If you are making a game on Steam, here are some questions we thought you might have and some answers. Of course if you have additional question, please let us know through the Steamworks contact form.
Q: What do I need to do if my game already supports Spanish? A: If you want to add another language support option, you can provide Spanish support in both Castilian and Latin American varieties. If you don’t plan to add additional support, that’s OK: Steam will assume that your existing Spanish language content is Castilian and automatically provide that content to customers that have indicated either Castilian or Latin American Spanish. If your existing translation is actually Latin American Spanish, you can update your definition within Steamworks by visiting your app landing page and clicking “Edit Steamworks Settings” and selecting “Depots” from the “SteamPipe” drop-down.
Q: What if my game doesn’t support Spanish at all? A: That’s okay, and you don’t need to make any changes. But just so you know: nearly 2 million of our 45 million daily active users view the store in Spanish, and platform revenue in Latin America increased 35% over the previous year… so now might be a good time to consider adding support!
Q: What’s the difference, anyway? Why does this matter? A: There are some substantial differences in vocabulary and colloquial choices between these two varieties of Spanish. By supporting the difference on the Steam store and UI, we can make it more welcoming and easy to use. By supporting the difference in your game, you can provide the best possible experience to any customers who want to play your game in Spanish. Historically, customer improvements to localization and regional support have helped grow the overall pie of platform opportunity for developers, and we think this will be one more improvement for people who play and make PC games.
Q: Do I get any benefit if my game supports additional languages on Steam? A: Definitely! In addition to making your game more accessible to more customers, language preference is one of the things the store takes into account when making recommendations. That means a customer is more likely to see your game in the store if it supports the language preferences the customer selected. For example, Vietnamese is the fifth most spoken language in the United States, at around 1.5 million speakers.
Q: Where can I learn more about adding language support? A: We’re so glad you asked! The documentation here provides a rundown on localization, and some best practices and advice. https://partner.steamgames.com/doc/store/localization
Posted by: xSicKxBot - 10-16-2018, 01:11 AM - Forum: Windows
- No Replies
Microsoft mourns the passing of co-founder Paul Allen
Microsoft is mourning the passing of Paul Allen, a renowned philanthropist and business leader who co-founded the company more than four decades ago. He was 65.
Allen died Monday from complications of non-Hodgkin’s lymphoma, according to a statement from Vulcan Inc. on behalf of the Allen family, Vulcan Inc. and the Paul G. Allen Network.
In a written statement, Microsoft CEO Satya Nadella noted Allen’s huge impact on technology and much more:
“Paul Allen’s contributions to our company, our industry and to our community are indispensable. As co-founder of Microsoft, in his own quiet and persistent way, he created magical products, experiences and institutions, and in doing so, he changed the world. I have learned so much from him – his inquisitiveness, curiosity and push for high standards are something that will continue to inspire me and all of us at Microsoft.
“Our hearts are with Paul’s family and loved ones. Rest in peace.”
An archival photo of Allen can be downloaded here.
Kubernetes RBAC and serviceaccounts are being used by applications to interact with the cluster.
We are now introducing and using Helm for a deployment (specifically for the deployment of the etcd-operator in part 3)
All versions of the main tools and technologies have been upgraded and locked
Fixed bugs, refactored K8s manifests and refactored applications’ code
We are now providing Dockerfile specs for socat registry and Jenkins
We’ve improved all instructions in the blog post and included a number of informational text boxes
The software industry is rapidly seeing the value of using containers as a way to ease development, deployment, and environment orchestration for app developers. Large-scale and highly-elastic applications that are built in containers definitely have their benefits, but managing the environment can be daunting. This is where an orchestration tool like Kubernetes really shines.
Kubernetes is a platform-agnostic container orchestration tool created by Google and heavily supported by the open source community as a project of the Cloud Native Computing Foundation. It allows you to spin up a number of container instances and manage them for scaling and fault tolerance. It also handles a wide range of management activities that would otherwise require separate solutions or custom code, including request routing, container discovery, health checking, and rolling updates.
Kenzan is a services company that specializes in building applications at scale. We’ve seen cloud technology evolve over the last decade, designing microservice-based applications around the Netflix OSS stack, and more recently implementing projects using the flexibility of container technology. While each implementation is unique, we’ve found the combination of microservices, Kubernetes, and Continuous Delivery pipelines to be very powerful.
Crossword Puzzles, Kubernetes, and CI/CD
This article is the first in a series of four blog posts. Our goal is to show how to set up a fully-containerized application stack in Kubernetes with a simple CI/CD pipeline to manage the deployments.
We’ll describe the setup and deployment of an application we created especially for this series. It’s called the Kr8sswordz Puzzle, and working with it will help you link together some key Kubernetes and CI/CD concepts. The application will start simple enough, then as we progress we will introduce components that demonstrate a full application stack, as well as a CI/CD pipeline to help manage that stack, all running as containers on Kubernetes. Check out the architecture diagram below to see what you’ll be building.
Read all the articles in the series:
The completed application will show the power and ease with which Kubernetes manages both apps and infrastructure, creating a sandbox where you can build, deploy, and spin up many instances under load.
Get Kubernetes up and Running
The first step in building our Kr8sswordz Puzzle application is to set up Kubernetes and get comfortable with running containers in a pod. We’ll install several tools explained along the way: Docker, Minikube, and Kubectl.
This tutorial only runs locally in Minikube and will not work on the cloud. You’ll need a computer running an up-to-date version of Linux or macOS. Optimally, it should have 16 GB of RAM. Minimally, it should have 8 GB of RAM. For best performance, reboot your computer and keep the number of running apps to a minimum.
Install Docker
Docker is one of the most widely used container technologies and works directly with Kubernetes.
Install Docker on Linux
To quickly install Docker on Ubuntu 16.04 or higher, open a terminal and enter the following commands (see the Linux installation instructions for other distributions):
After installation, create a Docker group so you can run Docker commands as a non-root user (you’ll need to log out and then log back in after running this command):
sudo usermod -aG docker $USER
When you’re all done, make sure Docker is running:
sudo service docker start
Install Docker on macOS
Download Docker for Mac (stable) and follow the installation instructions. To launch Docker, double-click the Docker icon in the Applications folder. Once it’s running, you’ll see a whale icon in the menu bar.
Try Some Docker Commands
You can test out Docker by opening a terminal window and entering the following commands:
# Display the Docker versiondocker version# Pull and run the Hello-World image from Docker Hubdocker run hello-world# Pull and run the Busybox image from Docker Hubdocker run busybox echo "hello, you've run busybox"# View a list of containers that have rundocker ps -a
Images are specs that define all the files and resources needed for a container to run. Images are defined in a DockerFile, and built and stored in a repository. Many OSS images are publically available on Docker Hub, a web repository for Docker images. Later we will setup a private image repository for our own images.
Install Minikube and Kubectl
Minikube is a single-node Kubernetes cluster that makes it easy to run Kubernetes locally on your computer. We’ll use Minikube as the primary Kubernetes cluster to run our application on. Kubectlis a command line interface (CLI) for Kubernetes and the way we will interface with our cluster. (For details, check out Running Kubernetes Locally via Minikube.)
Install Virtual Box
Download and install the latest version of VirtualBox for your operating system. VirtualBox lets Minikube run a Kubernetes node on a virtual machine (VM)
Install Minikube
Head over to the Minikube releases page and install the latest version of Minikube using the recommended method for your operating system. This will set up our Kubernetes node.
Install Kubectl
The last piece of the puzzle is to install kubectl so we can talk to our Kubernetes node. Use the commands below, or go to the kubectl install page.
On Linux, install kubectl using the following command:
Helm is a package manager for Kubernetes. It allows you to deploy Helm Charts (or packages) onto a K8s cluster with all the resources and dependencies needed for the application. We will use it a bit later in Part 3, and highlight how powerful Helm charts are.
On Linux or macOS, install Helm with the following command.
Now it’s time to make your own copy of the Kubernetes CI/CD repository on Github.
1. Install Git on your computer if you don’t have it already.
On Linux, use the following command:
sudo apt-get install git
On macOS, download and run the macOS installer for Git. To install, first double-click the .dmg file to open the disk image. Right-click the .pkg file and click Open, and then click Open again to start the installation.
2. Fork Kenzan’s Kubernetes CI/CD repository on Github. This has all the containers and other goodies for our Kr8sswordz Puzzle application, and you’ll want to fork it as you’ll later be modifying some of the code.
a. Sign up if you don’t yet have an account on Github.
b. On the Kubernetes CI/CD repository on Github, click the Fork button in the upper right and follow the instructions.
c. Within a chosen directory, clone your newly forked repository.
This command will clear out any other Kubernetes contexts you’ve previously setup on your machine locally, so be careful. If you want to keep your previous contexts, avoid the last command which deletes the ~/.kube folder.
Run a Test Pod
Now we’re ready to test out Minikube by running a Pod based on a public image on Docker Hub.
A Pod is Kubernetes’ resiliency wrapper for containers, allowing you to horizontally scale replicas.
1. Start up the Kubernetes cluster with Minikube, giving it some extra resources.
If your computer does not have 16 GB of RAM, we suggest giving Minikube less RAM in the command above. Set the memory to a minimum of 4 GB rather than 8 GB.
Inspect the pods in the cluster. You should see the add-ons heapster, influxdb-grafana, and nginx-ingress-controller.
kubectl get pods --all-namespaces
3. View the Minikube Dashboard in your default web browser. Minikube Dashboard is a UI for managing deployments. You may have to refresh the web browser if you don’t see the dashboard right away.
minikube service kubernetes-dashboard --namespace kube-system
4. Deploy the public nginx image from DockerHub into a pod. Nginx is an open source web server that will automatically download from Docker Hub if it’s not available locally.
kubectl run nginx --image nginx --port 80
After running the command, you should be able to see nginx under Deployments in the Minikube Dashboard with Heapster graphs. (If you don’t see the graphs, just wait a few minutes.)
A Kubernetes Deployment is a declarative way of creating, maintaining and updating a specific set of Pods or objects. It defines an ideal state so K8s knows how to manage the Pods.
5. Create a K8s service for deployment. This will expose the nginx pod so you can access it with a web browser.
6. The following command will launch a web browser to test the service. The nginx welcome page displays, which means the service is up and running. Nice work!
minikube service nginx
7. Delete the nginx deployment and service you created.
kubectl delete service nginx

kubectl delete deployment nginx
Create a Local Image Registry
We previously ran a public image from Docker Hub. While Docker Hub is great for public images, setting up a private image repository on the site involves some security key overhead that we don’t want to deal with. Instead, we’ll set up our own local image registry. We’ll then build, push, and run a sample Hello-Kenzan app from the local registry. (Later, we’ll use the registry to store the container images for our Kr8sswordz Puzzle app.
8. From the root directory of the cloned repository, set up the cluster registry by applying a .yaml manifest file.
kubectl apply -f manifests/registry.yaml
Manifest .yaml files (also called k8s files) serve as a way of defining objects such as Pods or Deployments in Kubernetes. While previously we used the run command to launch a pod, here we are applying k8s files to deploy pods into Kubernetes.
9. Wait for the registry to finish deploying using the following command. Note that this may take several minutes.
kubectl rollout status deployments/registry
10. View the registry user interface in a web browser. Right now it’s empty, but you’re about to change that.
minikube service registry-ui
11. Let’s make a change to an HTML file in the cloned project. Open the /applications/hello-kenzan/index.html file in your favorite text editor, or run the command below to open it in the nano text editor.
nano applications/hello-kenzan/index.html
Change some text inside one of the <p> tags. For example, change “Hello from Kenzan!” to “Hello from Me!”. When you’re done, save the file. (In nano, press Ctrl+X to close the file, type Y to confirm the filename, and press Enter to write the changes to the file.)
12. Now let’s build an image, giving it a special name that points to our local cluster registry.
When a docker image is tagged with a hostname prefix (as shown above), Docker will perform pull and push actions against a private registry located at the hostname as opposed to the default Docker Hub registry.
13. We’ve built the image, but before we can push it to the registry, we need to set up a temporary proxy. By default the Docker client can only push to HTTP (not HTTPS) via localhost. To work around this, we’ll set up a Docker container that listens on 127.0.0.1:30400 and forwards to our cluster.
14. Now run the proxy container from the newly created image. (Note that you may see some errors; this is normal as the commands are first making sure there are no previous instances running.)
This step will fail if local port 30400 is currently in use by another process. You can check if there’s any process currently using this port by running the command lsof -i :30400
15. With our proxy container up and running, we can now push our hello-kenzan image to the local repository.
docker push 127.0.0.1:30400/hello-kenzan:latest
Refresh the browser window with the registry UI and you’ll see the image has appeared.
16. The proxy’s work is done for now, so you can go ahead and stop it.
docker stop socat-registry
17. With the image in our cluster registry, the last thing to do is apply the manifest to create and deploy the hello-kenzan pod based on the image.
Notice the change you made to the index.html file. That change was baked into the image when you built it and then was pushed to the registry. Pretty cool!
19. Delete the hello-kenzan deployment and service you created.
kubectl delete service hello-kenzan

kubectl delete deployment hello-kenzan
We are going to keep the registry deployment in our cluster as we will need it for the next few parts in our series.
If you’re done working in Minikube for now, you can go ahead and stop the cluster by entering the following command:
minikube stop
If you need to walk through the steps we did again (or do so quickly), we’ve provided npm scripts that will automate running the same commands in a terminal.
1. To use the automated scripts, you’ll need to install NodeJS and npm.
On Linux, follow the NodeJS installation steps for your distribution. To quickly install NodeJS and npm on Ubuntu 16.04 or higher, use the following terminal commands.
2. Change directories to the cloned repository and install the interactive tutorial script:
a. cd ~/kubernetes-ci-cd b. npm install
3. Start the script
npm run part1 (or part2, part3, part4 of the blog series)
4. PressEnterto proceed running each command.
Up Next
In Part 2of the series, we will continue to build out our infrastructure by adding in a CI/CD component: Jenkins running in its own pod. Using a Jenkins 2.0 Pipeline script, we will build, push, and deploy our Hello-Kenzan app, giving us the infrastructure for continuous deployment that will later be used with our Kr8sswordz Puzzle app.
This article was revised and updated by David Zuluaga, a front end developer at Kenzan. He was born and raised in Colombia, where he studied his BE in Systems Engineering. After moving to the United States, he studied received his master’s degree in computer science at Maharishi University of Management. David has been working at Kenzan for four years, dynamically moving throughout a wide range of areas of technology, from front-end and back-end development to platform and cloud computing. David’s also helped design and deliver training sessions on Microservices for multiple client teams.
Posted by: xSicKxBot - 10-15-2018, 04:46 PM - Forum: Windows
- No Replies
Microsoft unveils genomics innovation and new partners at ASHG 2018
The world’s leading geneticists will converge in San Diego October 16-20 for the American Society of Human Genetics (ASHG) Annual Meeting. This year’s event will showcase some amazing new advances in genomics, and Microsoft Genomics will have exciting news and updates to share.
The latest in genome analysis
The strength of any analytical insight will always depend on the strength of the data used to generate it. If you want to perform repeatable genomic analysis that generates durable datasets, you should rely on industry standards that are constantly validated, versioned and properly curated.
With that in mind, Microsoft is deepening its commitment to genomics with the fourth iteration of the open source Genome Analysis Toolkit (GATK4). The toolkit update is designed to optimize performance for researchers as they strengthen data pipelines and power successful genomic analyses, so they can reduce the risk of noise or artifacts within the data set and extract more insight from the genome.
A growing partner network
To ensure that genomics researchers have access to a broad array of tertiary analysis and orchestrated cloud technology options, Microsoft is working with several new partners: BizData, Eagle Genomics, Genoox, Gentera Biotechnology, L7 Informatics, Parabricks, Qiagen and Veritas Genetics. They will be with us at ASHG 2018, sharing their insights and demonstrating how their data tools and services will help broaden and deepen what researchers can achieve in genomics. We continue to expand our genomics partner ecosystem, with now more than 20 partners, from wet lab sequencing prep out to interpretation.
“We are very excited to partner with Microsoft Genomics and utilize Whole Genome Sequencing and the Arvados platform to answer the most interesting and difficult questions in genomics.” notes Ward Vandewege, Veritas’ VP of Engineering, “Running on Microsoft Azure, we can demonstrate the possibilities of genomic analyses at scale by taking advantage of Veritas’ sequencing capabilities and Arvados’ open-source federated platform bringing the analyses to data.”
Anthony Finbow, CEO of Eagle Genomics commented: “We are delighted to partner with Microsoft Healthcare on its Genomics service and look forward to working together to unlock the potential of the microbiome and solve some of the grand challenges of our age. We are seeing strong demand for our knowledge discovery platform amongst enterprise customers in the biotech and pharma, food and personal care industries as they embrace the digital reinvention of Life Sciences R&D. Microsoft Genomics will help tackle the computing and scaling challenges, accelerating the adoption of the technologies and the launch of new products and therapies, heralding a new era in scientific discovery.”
A promising research study at The Icahn School of Medicine at Mount Sinai
Dr. Robert Klein from the Klein Lab at the Icahn School of Medicine at Mount Sinai is leading a team of bioinformaticians and geneticists seeking evidence for how our genes are involved in cancer risks, assisted by new technologies and the cloud to analyze the largest “big data” sets.
The Mount Sinai research team had been successful in gene sequencing, but they were starting to run into a bottleneck. “We weren’t getting enough space on the computer to store the data as we’re downloading it, running it, and working with it,” Dr. Klein said. “The data was just getting too big.”
With the Microsoft Genomics service, Dr. Klein added, “I give it the input data that would come from the sequencers, it can uniformly realign everything and let me do the joint calling for the analysis I want.” Microsoft Genomics enables “a way to try the large re-analysis of whole genome sequencing data.”
A powerful new way to analyze long-read bio data
In what’s likely to be our most exciting development at the event, we plan to demonstrate a completely new method for analyzing long-read genomic data and capturing major structural rearrangements.
Through collaborative research with Stanford University, we’ve developed a powerful new genomics algorithm that runs on an Intel Altera field-programmable gate array (FPGA) infrastructure within Microsoft Azure. It is an entirely new way of utilizing and understanding long-read genetic data, and will also be one of the first public-facing services based on FPGAs—the same board-level architecture that underpins the incredible machine learning capabilities of Microsoft Project Brainwave.
This revolutionary genomics service will make it easier for researchers to build and complete a whole new set of explorations using long-read data in the cloud. We can’t wait to see what the genetics community makes of it and hear how you plan to apply these powerful new capabilities when the service formally launches.
An exciting genomics success
At last year’s ASHG annual meeting, we presented a summary of how Microsoft Genomics was supporting collaborative pediatric cancer research at St. Jude Children’s Research Hospital.
This year, Microsoft and St. Jude are pleased to share early global adoption of the hospital’s global data sharing and research initiative. The St. Jude Cloud is using Microsoft cloud technology to successfully deliver pediatric cancer data to more than 2,000 clinicians and researchers among 300 organizations in 28 countries. St. Jude is using collaborative research in the cloud to make the genome more actionable, and it’s taking powerful steps forward in the understanding and treatment of pediatric cancer.
What the future holds
At ASHG, you can hear a poster presentation from Microsoft data scientist Erdal Cosgun, Ph.D. on research he conducted with his intern Min Oh. They explored the consistency of the quality scores with machine learning for next-generation sequencing experiments. He will present a machine learning approach for estimating quality scores of variant calls derived from BWA+GATK best practice powered by the Microsoft Genomics service.
You can also try out our Public Preview of Microsoft Genomics service GATK4. Between now and December 31, 2018, bring your Azure account and 20 whole genome samples to run with Microsoft Genomic Service at no cost. Let us know if you need to open a free trial Azure account and we can help you get started.
Stop by Microsoft Genomics at ASHG 2018 and find out more how we’re making deep genomic analysis easier and more accessible.
Posted by: xSicKxBot - 10-15-2018, 09:59 AM - Forum: Lounge
- No Replies
Halloween 2018's Best In-Game Events And Updates
It's October again, and that means time for Halloween festivities throughout a whole host of online games. Many announcements have already begun to outline the upcoming festivities, so we're keeping track of all the spooky specials. Many of these will be time-limited events with special rewards, like the OverwatchHalloween Terror event, so check out the active dates and plan your gaming accordingly.
Dauntless
The Dauntless Dark Harvest event will kick off in the middle of the month, casting a shadow on the hub city of Ramsgate. It will introduce a new cult known as the Unseen, who worship a Behemoth. Slayers can test their might against a new Behemoth in the Shattered Isles and stores will offer limited-time exclusive items.
Dates
Begins October 17
Destiny 2
Destiny is bringing back its annual Festival of the Lost, the Halloween-themed celebration that offers some special masks and exclusive loot. This year, it will include a horde-like PvE mode, a special quest-line to solve a murder, and a unique currency to purchase masks and a special auto rifle called Horror Story. You can also earn new Ephemeral Engrams for exclusive cosmetic items. This will all be accompanied by the return of the Iron Banner event, with some tweaks to make it easier to obtain Powerful gear.
Dates
Begins October 16
Fortnite
The entire season is somewhat spooky, with the Darkness Rises theme and skins like the Dire Wolf. Plus the game brought back the popular Skull Trooper skin and made it a little easier to get the Ghost Portal Back Bling. We've gotten a look at some special leaked Halloween cosmetics. Those include skins, back bling, gliders, and pickaxes. No word yet on what creepy world events might be ringing in the seasonal content.
Hearthstone's annual "Hallow's End" celebration starts on October 17 and lasts through Halloween on October 31. Logging in during the event will net you a free golden Witch's Cauldron card, and the Headless Horseman will return for a new Tavern Brawl starring the characters from the Monster Hunt mode. You'll also be able to take part in a dual class Arena mode, and characters will use Hallow's End emotes. Finally, the event will accompany the launch of a new Paladin hero for purchase with a new Witchwood bundle.
Killing Floor 2 has already introduced its Halloween Horrors: Monster Masquerade update. The sprawling update includes a new Monster Ball map, along with Halloween-themed looks and effects for all the zeds and bosses. Plus you can access new weapons and limited-time items to take them all down.
Overwatch's annual Halloween Terror event is once again here. Each year the Halloween Terror event continues the story of Junkenstein's monster, and this one serves up two separate PvE modes: Classic and Endless Night. The event is always a debuts several new Halloween-themed skins, emotes, sprays, and more. It is going on now through October 31, and Blizzard has revealed all the nifty new costumes.
Dates
October 9-31
Rocket League
Rocket League is bringing back its Haunted Hallows event on October 15. You can earn "Candy Corn" currency for playing online matches, which can then be used to cash in for limited cosmetics like decals, toppers, and wheels. You can also gain a Golden Pumpkin that will contain a customization item from the Nitro, Turbo, or Player's choice crates. The event will end on November 5, and your Candy Corn will expire on November 8, so make sure you cash it in fast.
The Splatoon 2 version of a Halloween gathering is a twist on its usual monthly Splatfests, appropriately named Splatoween. It will start October 19 and last through October 21, with players picking their sides in a Turf Wars between Team Trick and Team Treat. Inkopolis will also be updated with Halloween decorations, and the squid kids will get a chance at four special Splatoween headgear that can be kept after the event is over. You'll have to go through the Nintendo Switch News app to get them, however.
My Memory of Us is a reminiscence of a friendship between a boy and a girl. A friendship made during tough times. Times of terror, pain, and exclusion in a world where people were forced to live in two artificially detached worlds.
Can poor Luigi survive in a haunted house and save Mario? Not without your help!
Solve petrifying puzzles and suck up all the spooky spirits in the Luigi’s Mansion™ game, available now for the Nintendo 3DS™ family of systems.
Follow a map on the touchscreen, shine a flashlight, blow fire, shoot water, stun ghosts, and trap them…before Mario is trapped forever! As you capture spirits with your Poltergust 3000, you could also rake in millions in hidden, in-game riches for our hard-luck hero.
Complete the mission…or face erasure. That’s all Neku knows after regaining consciousness in the middle of a busy intersection without his memories. Now he and his partner must fight to survive a life-or-death game in the urban labyrinth of Tokyo.
This definitive version of Square Enix’s action-RPG classic brings the twisted tale to life on the Nintendo Switch™ system along with a new chapter, exclusive two-player combat, and some killer, newly remixed music.
Features:
• Fight to survive the week-long “Reapers’ Game” playing out on the crowded streets of Shibuya, Tokyo. Includes all standard story content from the Nintendo DS™ and mobile versions.
• Hours of additional content, including the bonus chapter, “Another Day,” and the Nintendo Switch exclusive chapter, “A New Day.”
• Join a friend for local, two-player co-op combat in Tabletop or TV mode.
• Collect an array of mysterious, stylish pins with powerful psychic abilities, then point the way to victory in real-time, action-fueled RPG battles.
• Distinctive modern art from a team of artists led by producer Tetsuya Nomura, best known for his work on the Kingdom Hearts and Final Fantasy game series.
• The expansive soundtrack boasts a wide array of genres, including everything from rock to hip-hop to electronica. Also contains new remixed music tracks!
Hardware Review: NS Glasses 3D VR Headset for Switch
Virtual reality is one of those things that seems supremely popular, but technology isn’t always willing to keep up with people’s expectations. PSVR among others are noble efforts for certain, but Nintendo has kept itself firmly within the old-fashioned 2D TV world with the Switch, at least for the time being.
That hasn’t stopped third parties trying to muscle in on the craze though, and exklim is one such company with their NS Glasses. These promise a 3D experience compatible with all existing games using ‘passive 3D’ technology. The truth of the matter is different however.
Traditional VR headsets use two separate lenses, one for each eye, and require a screen or screens to show two separate images, one for each eye. The brain then does what brains do, and makes a 3D image in your noggin with depth and everything. The NS Glasses use two lenticular lenses that stretch the entire width of the device, one in front of the other. In theory this gives the wearer a 3D effect, but in reality it does little more than give you a headache.
The headset holds the Switch in place by using a large, red clip. This has been specifically designed for the console and it certainly shows, holding it firmly but safely in place with ridges and notches that allow it to sit neatly and without wobbling. Sadly once you put it on the weight of the console becomes apparent, and given the almost absurd length of the headset, it’s not a comfortable time.
Given the nature of the device, it’s extremely difficult for us to provide photographs that accurately represent how the image looks to the naked eye, as camera lenses and eyes don’t work in exactly the same manner. As such we’ve provided both an actual photo (left) and a mocked-up recreation (right) to gives as true a representation as possible.
The screen becomes slightly distorted and blurred, hiding jagged edges, and a notable amount of chromatic aberration is present. This is when certain colours of light are offset slightly, giving an unusual colourful ‘glow’ around certain edges. It’s distracting and unpleasant.
The image does not even remotely appear ‘3D’, either. The only explanation we can think of for someone believing it to give such an illusion is the way the lenses cause the edges of the screen to appear blurrier than the centre, giving a similar look to tilt-shift photography. It’s a stretch at best that this effect could be sold as 3D.
The manufacturer were also kind enough to send a second unit intended for developers. This behaves in much the same way, only considerably more intense, and is presumably designed for game-makers to create a version of their game which takes the distortion into account, but the blurring and chromatic aberration is also intensified, so it’s really hard to see how this could work in practice.
The appeal of 3D gaming is still alive and kicking, and the ability to immerse yourself in an entire world without borders is indeed one that many have dreamed of for decades. Unfortunately, the NS Glasses not only fail to deliver such an experiences, but they actually make playing games more uncomfortable and the various distortions it provides are irritating and distracting.
It’s a noble idea to bring the Switch into the VR space in any form whilst Nintendo refuses to do so, but this is a product that disappoints in nearly every facet.
Thanks to exklim for providing the headsets for review. If you want to learn more you can do so by clicking here.


