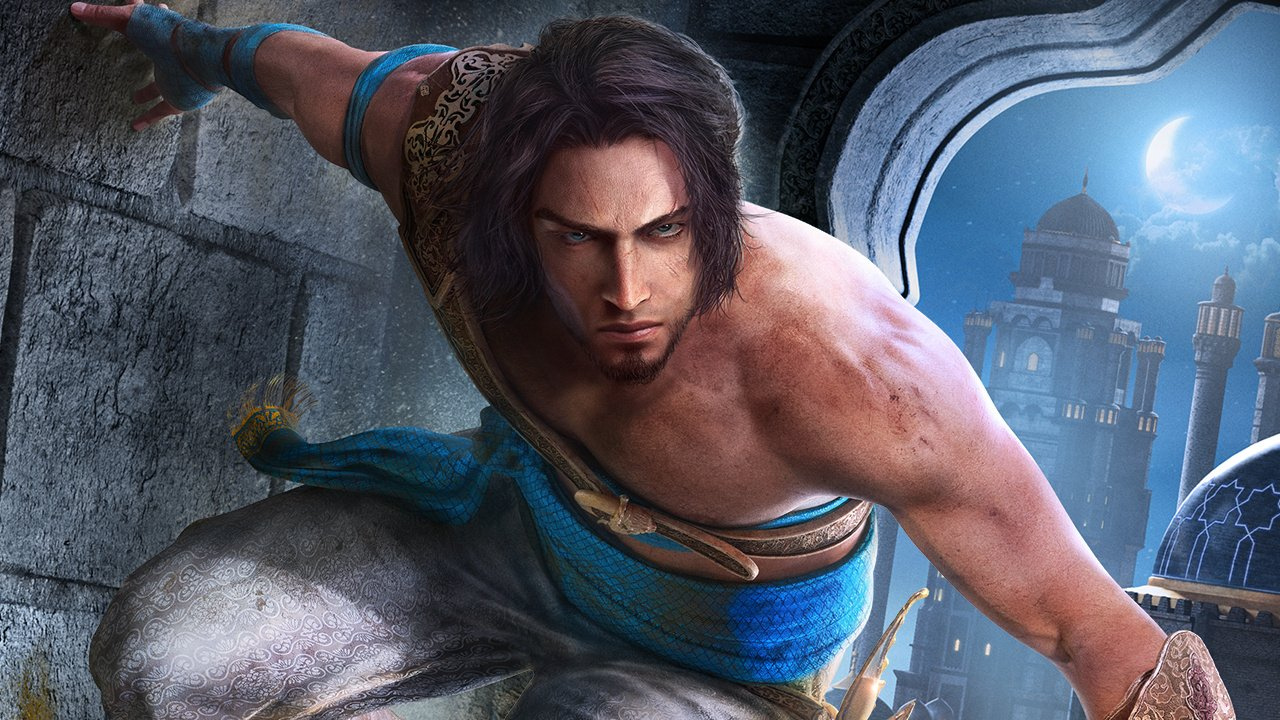
While there was no formal mention of a Nintendo release, a Ubisoft Twitter account at the time posted and then removed a tweet making reference to a Switch version. Pre-orders for a Switch copy of the game also temporarily went live and this followed with box art surfacing online.
To top it off, another two retailer listings for a Nintendo Switch version of the game have now appeared in Greece (thanks, Nintendo Life user Geobros). These websites include GameExplorers and The Console Club. The same cover art is once again on display, and the release date is also 21st January next year, which lines up with the launch on other platforms.
Senior analyst at Niko Partners Daniel Ahmad (who previously implied the remake wouldn’t be coming to the Switch at all) more recently said a Nintendo release wouldn’t be happening “in January”.
If we hear anything official about the upcoming Prince of Persia remake coming to the Switch, we’ll be sure to let you know. In the meantime, tell us if you would like to see this title released on Nintendo hardware.
Posted by: xSicKxBot - 11-09-2020, 04:18 AM - Forum: Lounge
- No Replies
Donald Glover Gives Brief, Yet Hopeful, News About Atlanta Seasons 3 And 4
It's been two and a half years since we've seen a new episode of FX's Atlanta, with Season 2 coming to an end in May 2018. However, series creator and star Donald Glover has a little bit of news about the upcoming Season 3 and 4.
Over on Twitter, Glover announced announced that the upcoming seasons will be great. How great? Well, here's what Glover said.
while im here: 'atlanta' s3+s4 are going to be some of the best television ever made. sopranos only ones who can touch us.
While that may seem like an outlandish statement, Atlanta's Season 2 episode "Teddy Perkins" is easily the best single episode of any TV series from that year, so hitting the "Sopranos mark" doesn't seem like a far-fetched idea by any means. GameSpot named that episode the #1 Best TV Episode of 2018 and the series as a whole one of the Best TV Shows of 2018.
Posted by: xSicKxBot - 11-09-2020, 01:58 AM - Forum: Python
- No Replies
How to Set Up Conda
Ready, Steady, Go —-> Data Science by setting up Conda in your Computer
It has never been easier from the early python data tools invention than now, to set up an user environment in our own computer. Conda brings that easiness with it.
Conda as it defines itself is an “OS-agnostic, system-level binary package manager and ecosystem.”
The guiding principles of python are written by Tim Peters in PEP 20 — The Zen of Python. One of the aphorisms mentioned in it is, “There should be one– and preferably only one –obvious way to do it.” Conda is an effort towards it not only for Python but other languages like R, Ruby, etc.
If you wish to read more about conda, read an excellent blog post written by Travis Oliphant. He’s the creator of Numpy and Scipy.
The best way to install Conda package manager for python is through any one of the two distributions,
Anaconda
Miniconda
Choosing Between Anaconda and Miniconda
Miniconda is a small, bootstrap version of Anaconda that includes only conda, Python, the packages they depend on. If you’re ready to allocate more space (around 3 GB), Anaconda is the best option. Anaconda will install a wide range of packages that you might need to deal with the data. Otherwise, Miniconda will serve the purpose and you can install any package as required.
To get an up to date and stable version of the software, installing from the official documentation is the best way to do so. We’ll provide you the links to the docs. The steps mentioned in the docs are very easy to follow like a cakewalk. Also, by the time whenever any of the links are dead, We’ll update them.
We didn’t provide all the instructions directly here on this page because it’s very easy and clearly mentioned in the docs. The theme of this article is only to provide you with the necessary information to choose between Miniconda and Anaconda.
Guide to Setup Raspberry Pi with LCD Display using I2C Backpack
Last modified on November 8th, 2020.
Internet of things (IoT) is fascinating. I am predominantly a web applications person. But sensors, LED display, chips, soldering and the collage of software with these “things” is exciting.
The credit card sized Raspberry Pi computer gives all the opportunity to experiment and explore IoT. I wrote getting started with IoT using Raspberry Pi and PHP a while back. Now I thought of extending that and write about my hobby projects that I do with Raspberry Pi.
Monitor website uptime and notify if it’s up or down.
Show traffic user count to my website integrating Google Analytics.
Notify if there is a sale in my online shop.
Raspberry Pi is my hobby and I thought of sharing with you about these tiny projects. This will be a multi article series. Let us start with how to connect a I2C LCD display with the Raspberry Pi.
Then I will write about all the above items one by one.
I2C LCD display module
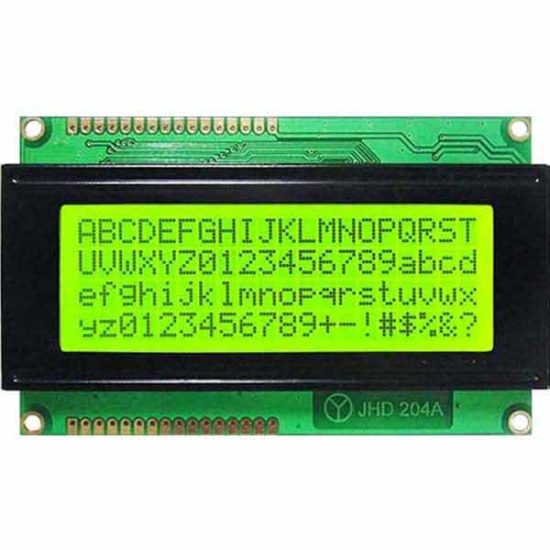
Widely popular are 16×2(LCD1602) and 20×4 (LCD2004) LCD displays. The below image shows a 20×4 LCD display module.
Three main reasons to choose this type of LCD display for IoT projects using Raspberry Pi or Arduino.
Economical to purchase. You can buy a 16×2 LCD module for just $1 USD.
It requires 5v to run and so we can hook it to Raspberry Pi and no dedicated power source required.
Consumes low current. You can keep it on 24×7 with backlight on without burning your purse.
Why I2C backpack?
These LCD modules have parallel interface. That will not be convenient to connect multiple pins to the chip and use them in parallel mode.
I2C is a serial bus developed by Philips. So we can use I2C communication and just use 4 wires to communicate. To do this we need to use an I2C adapter and solder it to the display.
I2C uses two bidirectional lines, called SDA (Serial Data Line) and SCL (Serial Clock Line) with 5V standard power supply requirement a ground pin. So just 4 pins to deal with.
When you buy the LCD module, you can purchase LCD, I2C adapter separately and solder it. If soldering is not your thing, then it is better to buy the LCD module that comes with the I2C adapter backpack with it.
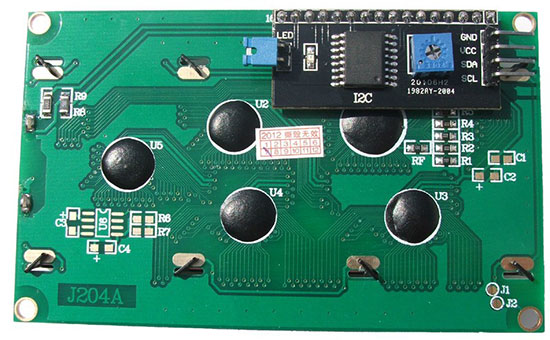
The above image is backside of a 2004 LCD module. The black thing is the I2C adapter. You can see the four pins GND, VCC, SDA and SCL. That’s where the you will be connecting the Raspberry Pi.
The square blue thing with plus mark is used for adjusting the brightness of the display. The blue jumper is used to switch on or off the backlight.
Switching off the backlight may not be necessary. If you switch off, the characters will be barely visible. You can keep it on 24×7, it will not eat up power as it is a low power consumption device.
Logic converter
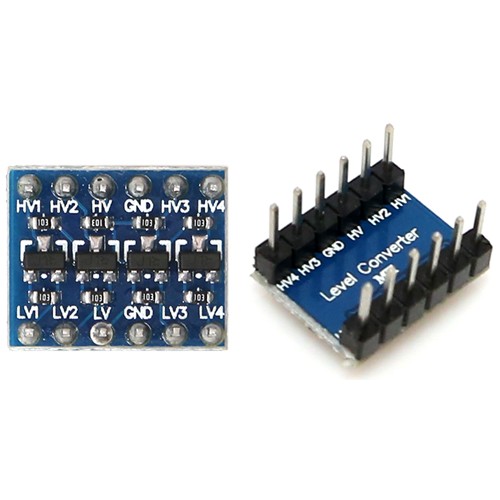
Raspberry Pi GPIO pins are natively of 3.3V. So we should not pull 5v from Raspberry Pi. The I2C LCD module works on 5V power and to make these compatible, we need to shift up the 3.3V GPIO to 5V. To do that, we can use a logic level converter.
This is an important point and this is where a lot of beginners fail out. You may find some conflicting information in the Internet pages.
You might see RPIs connected directly to a 5V devices, but they may not be pulling power from RPI instead supplying externally. Only for data / instruction RPI might be used. So watch out, you might end up frying the LCD module or the RPI itself.
Required hardware list
Raspberry Pi (I have used Zero W and you can use any model you have).
LCD display with I2C adapter backpack (I have used 20×4, you can use as per your choice).
3.3V to 5V bi-directional logic level converter
Breadboard
Jumper wires
Pre-requisite
Micro SD card with Raspbian OS
5.1V power supply (Official power adapter recommended)
Memory card reader
Why official power adapter?
Why am I recommending the official power adapter! There is a reason to it. The cheap mobile adapters though guarantee a voltage, they do not provide a steady voltage. That may not be required in charging a cellphone device but not in the case of Raspberry Pi. That is the main reason, a USB keyboard or mouse attached does not get detected. They may not get sufficient power. Either go for an official power adapter or use the best branded one you know.
Headless
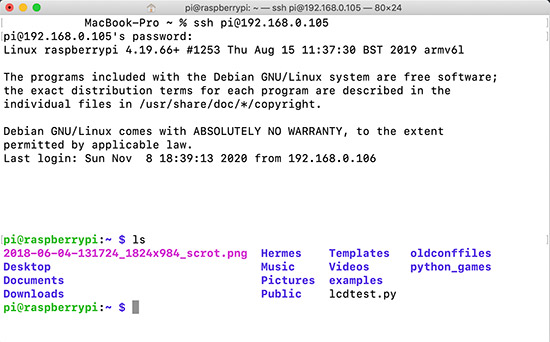
I have a headless setup. I am doing SSH from my MAC terminal and use VIM as editor. VNC viewer may occasionally help but doing the complete programming / debugging may not be comfortable. If you do not prefer SSH way, then you will need a monitor to plug-in to Raspberry Pi.
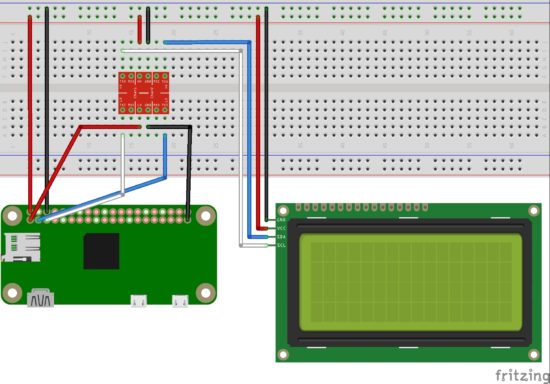
Raspberry Pi LCD I2C Circuit diagram
I have used a breadboard, logic level converter, 20×4 LCD display module with I2C backpack and Raspberry Pi Zero W in the circuit diagram.
3.3V GPIO of Raspberry Pi is converted using a logic level converter to 5V to be compatible for the LCD display.
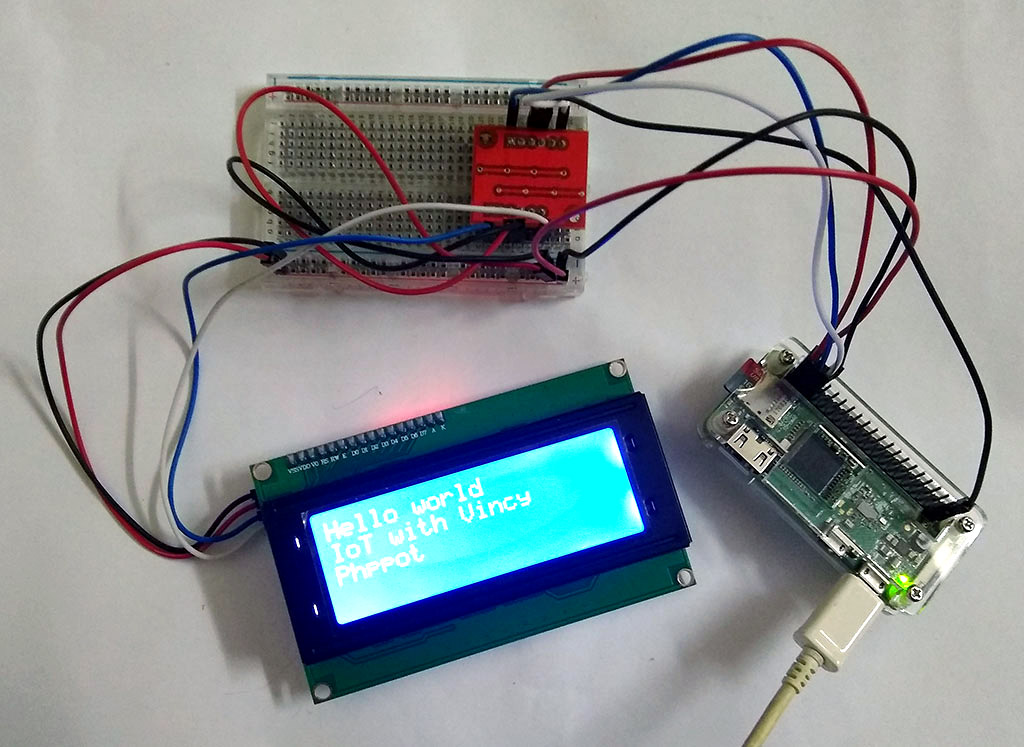
Raspberry Pi setup with LCD display module using I2C backpack
Programming
As you know my language of choice to build website is PHP. But for IoT with Raspberry Pi, let us use Python. Reason being availability of packages and that will save ton of effort. Low level interactions via serial or parallel interface is easier via Python.
I2C
We need the below two tools for working with I2C. So install it by running the following command in the RPI terminal.
sudo apt-get install python-smbus i2c-tools
Enable I2C
sudo raspi-config
The above command opens the Raspberry Pi configuration in the terminal. Under ‘Interfacing Options’, activate I2C.
sudo vi /etc/modules
Add the following two lines at the end of the file and save it.
i2c-bcm2708

i2c-dev
Then restart Raspberry Pi.
sudo reboot
Test I2C
To check if the I2C is properly connected and detected.
sudo i2cdetect -y 1
This will return a matrix with ’27’ highlighted, that means you I2C is detected and it is the address.
We need a library to interact with the LCD module. There are many Python libraries available. I prefer RPLCD.
sudo pip install RPLCD
This will install the RPLCD library.
Raspberry Pi LCD Hello World Python program
LCDHelloWorld.py
Following code imports the RPLCD library. Then initializes the LCD instance. Then print the “Hello World” string followed by new line. Then another two statements. Then a sleep for 5 seconds and switch off the LCD backlight. Finally, clear the LCD screen.
# Import LCD library

from RPLCD import i2c # Import sleep library

from time import sleep # constants to initialise the LCD

lcdmode = 'i2c'

cols = 20

rows = 4

charmap = 'A00'

i2c_expander = 'PCF8574' # Generally 27 is the address;Find yours using: i2cdetect -y 1 address = 0x27 port = 1 # 0 on an older Raspberry Pi # Initialise the LCD

lcd = i2c.CharLCD(i2c_expander, address, port=port, charmap=charmap, cols=cols, rows=rows) # Write a string on first line and move to next line

lcd.write_string('Hello world')

lcd.crlf()

lcd.write_string('IoT with Vincy')

lcd.crlf()

lcd.write_string('Phppot')

sleep(5)

# Switch off backlight

lcd.backlight_enabled = False # Clear the LCD screen

lcd.close(clear=True)
My next article in this series will be on how to integrate the GMail API and notify for new mails.
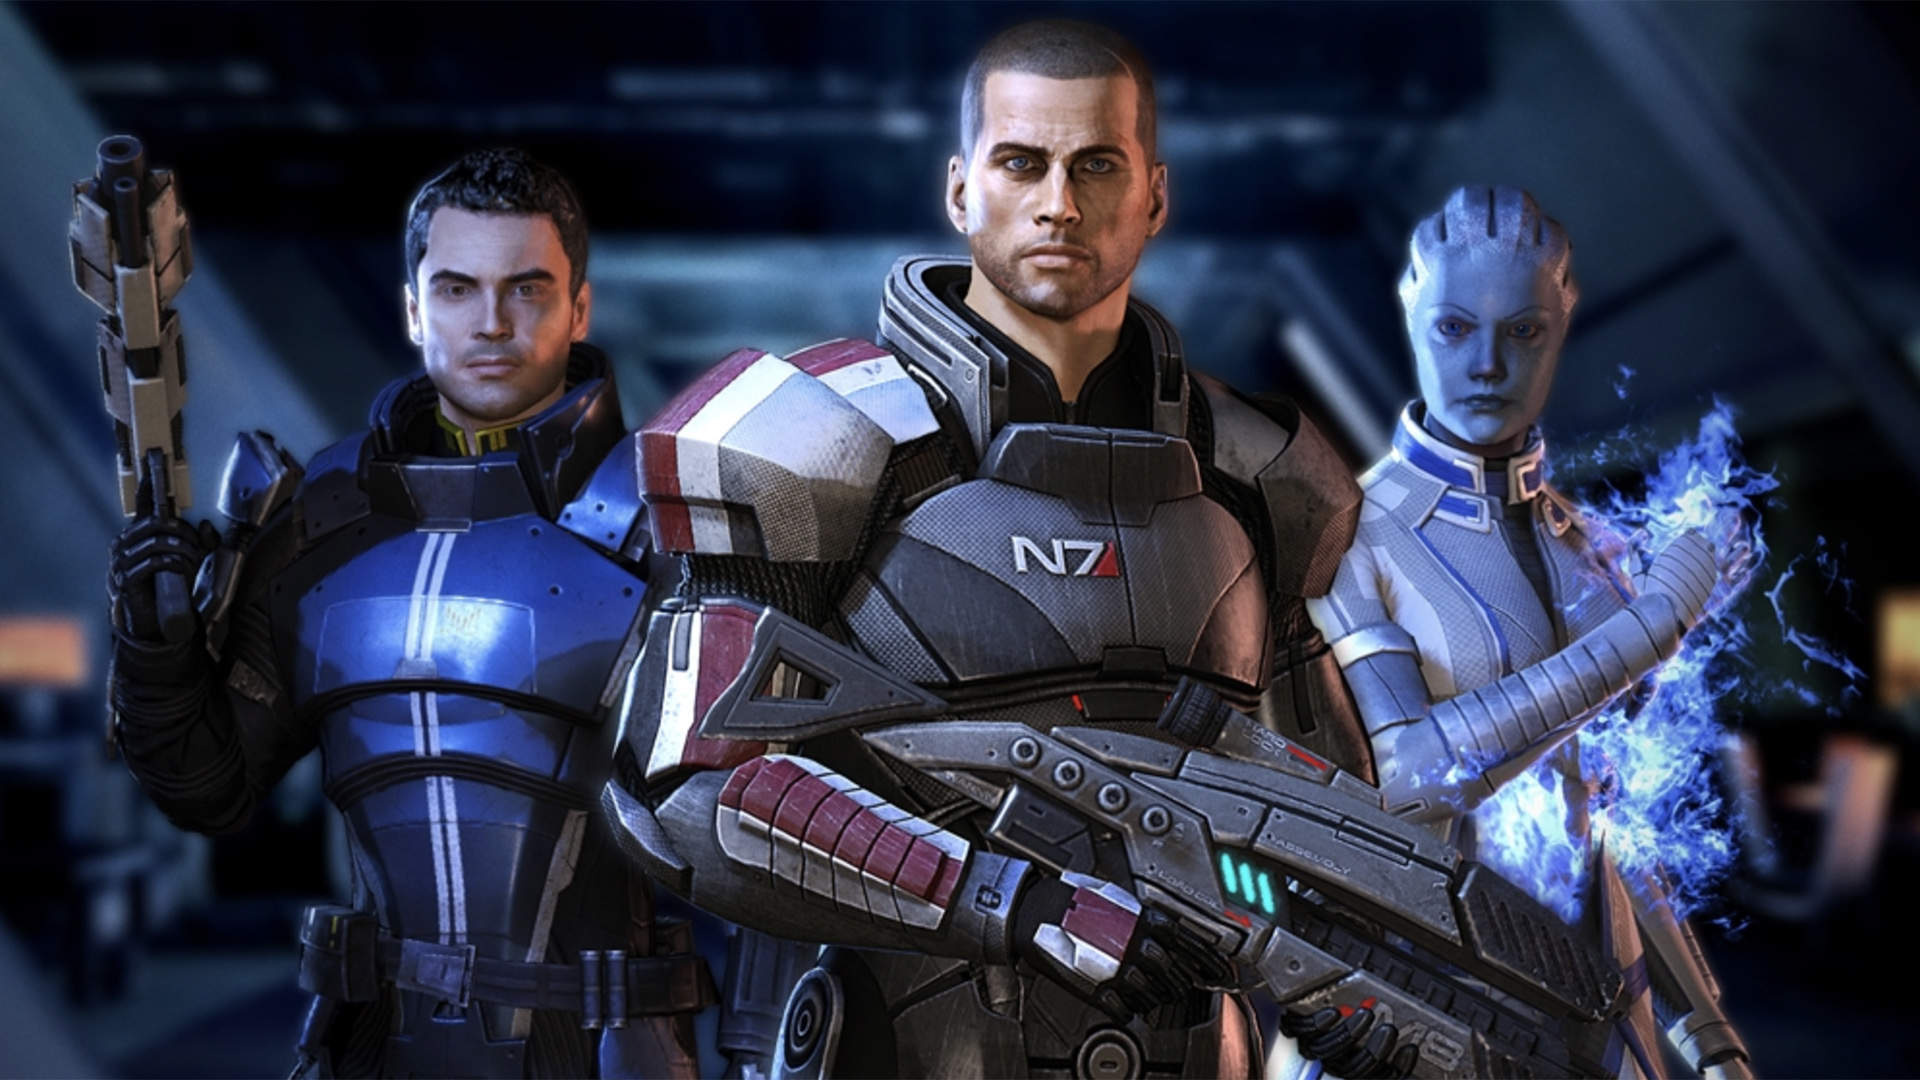
Mass Effect Legendary Edition Isn’t Coming To Switch After All
Update: Well, that’s official, then – the Switch is missing out. Mass Effect Legendary Edition has been confirmed for current-gen Sony and Microsoft consoles (and PC) with next-gen enhancements on the way, but there’s no love for Nintendo’s console in this instance.
Original Story [Tue 22nd Sep, 2020 10:45 BST]: The heavily rumoured Mass Effect Trilogy Remaster release won’t be coming to Nintendo Switch as previously expected, according to VentureBeat’s Jeff Grubb.
In a newly posted YouTube video, Grubb – known for his insider knowledge of the industry – briefly discusses the rumoured title, noting that Mass Effect is “definitely not” one of the seven games EA is planning to bring to Switch over the next year (thanks, VGC).
He explains that he’ll be able to share more details on the new release next week, and speaking on the Xbox Expansion Pass podcast, has also suggested that the remaster compilation will actually be titled ‘Legendary Edition’.
So is the game coming to Switch or not? Will it simply launch on Switch a year-or-so after it does on other platforms, explaining both the retail listings and Grubb’s comments? We’ll have to wait and see.
Cobra Kai Takes a Modern Eye to the Classic Beat ‘em Up Genre
We’re ecstatic to be working on a video game based in the universe which originated from “The Karate Kid.” As a kid born in the 80s, you can imagine how many times I tried to land a perfect crane kick on pretty much any target, from empty cans to tennis balls. I remember one day when I was seven playing as a goalie in a soccer match at school when I literally saved a shot with an admittedly clumsy, but good enough crane kick just to show off to my friends.
I actually had not watched the show when the opportunity came along to pitch a Cobra Kai game concept to GameMill Entertainment (the show had not found its way to Netflix yet). I decided to watch an episode or two to get into a Karate Kid headspace and 20 hours later I had binged both seasons and was writing mechanics and ideas all over the place in a 100 page slideshow. I became a die-hard fan as soon as Johnny called MIguel “Menudo” in the first minutes of the first episode. At this point, the team and I have watched the series countless times to bring as much of it to the game as possible. That’s why we have characters that don’t appear that much on the series having more screen time in the game. To be honest, I almost feel a bit sad that I got to know what will go down in season three beforehand as a result of working with the show creators on this game.
Cobra Kai: The Karate Kid Saga Continues is a classic beat ‘em up, which was a decision we made early on. When we started the project a year ago, we knew Streets of Rage and Battletoads were coming up and we also saw great games like River City Girls finding a lot of love from its fanbase, so we felt it would be awesome to have a Cobra Kai beat ‘em up as part of the genre’s unofficial revival. It also helps that we just love the genre here at Flux. At age nine, I used to sneak out of my room at 5 a.m. to play Streets of Rage in the living room, just to go back to bed before 6:30 a.m. when my unsuspecting mom would wake me up. That window, of course, would not count towards my daily video game hours quota. If you’re reading this – sorry, mom.
The game features two campaigns: Cobra Kai and Miyagi Do. Each one allows you to explore the city with characters from that dojo and learn the story from that dojo’s perspective and face the other dojo’s fighters as bosses. The true ending, however, only reveals itself to those who play both campaigns.
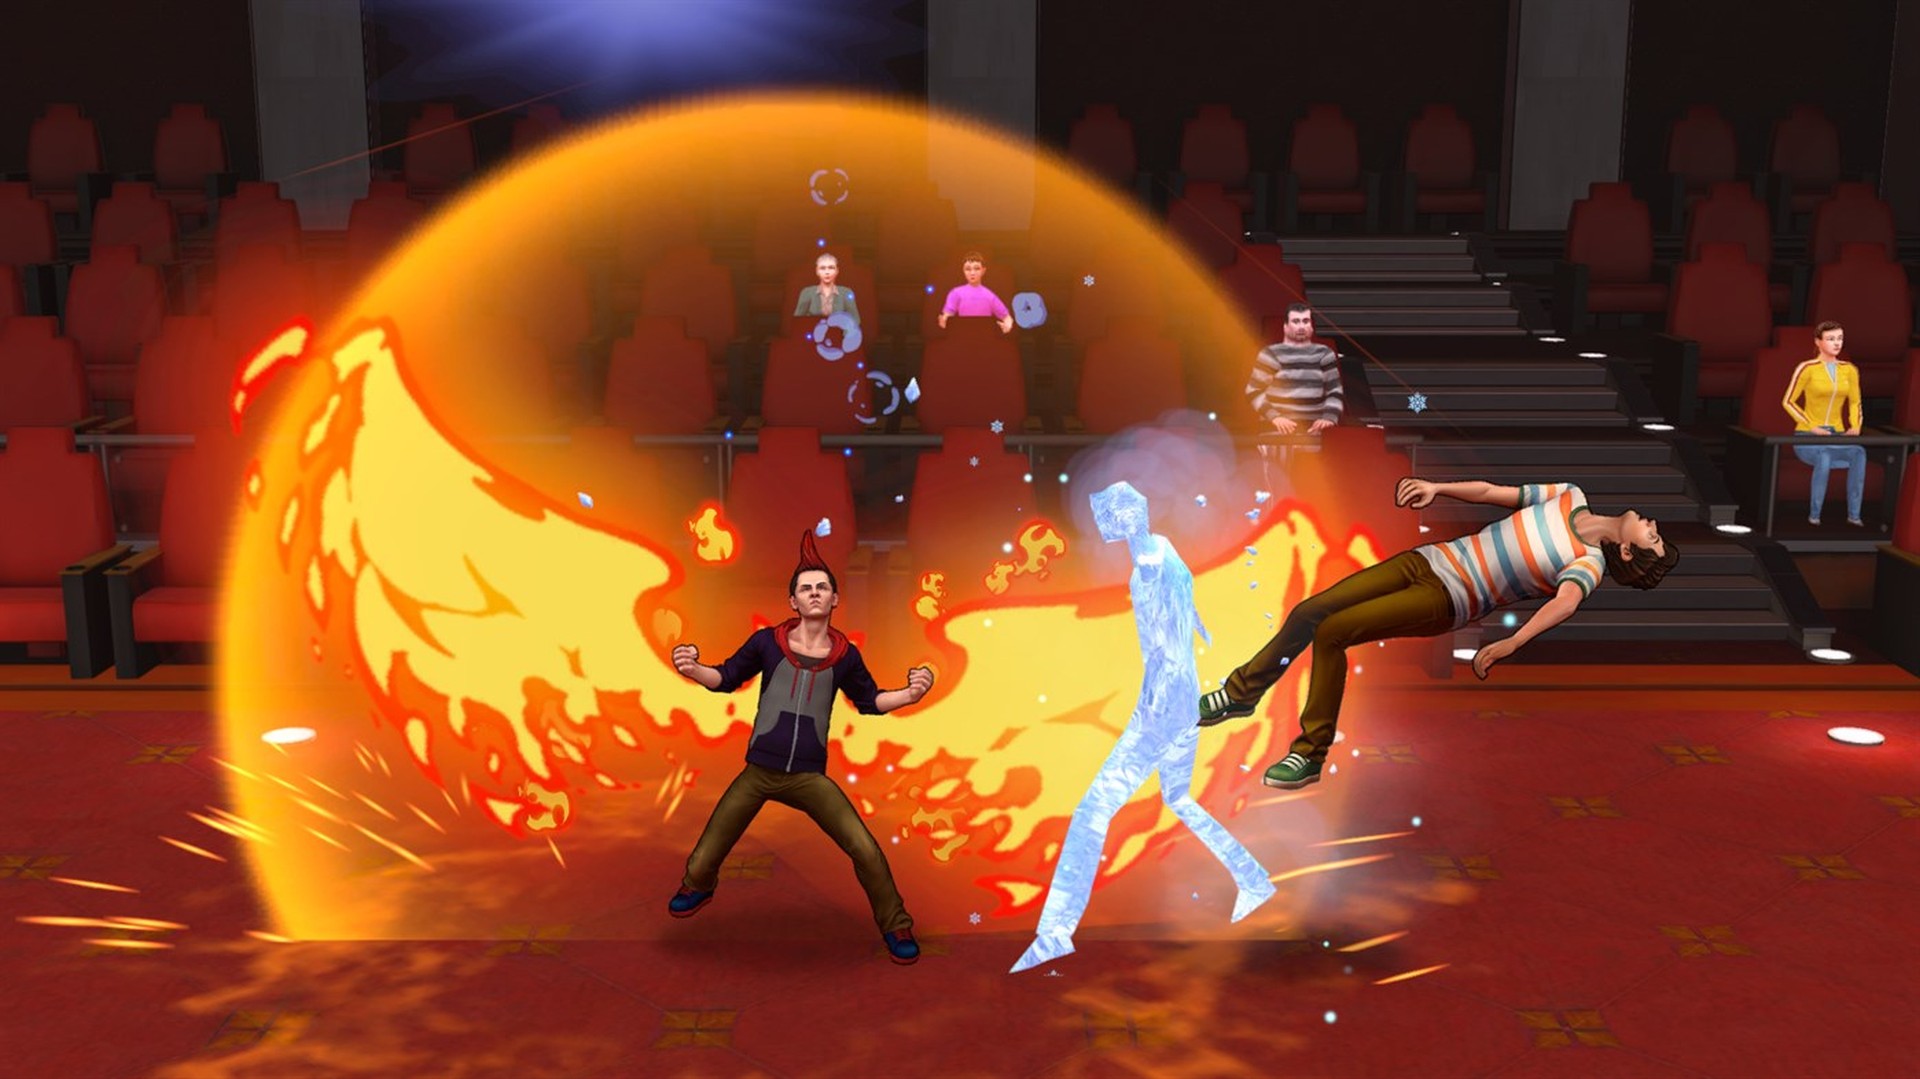
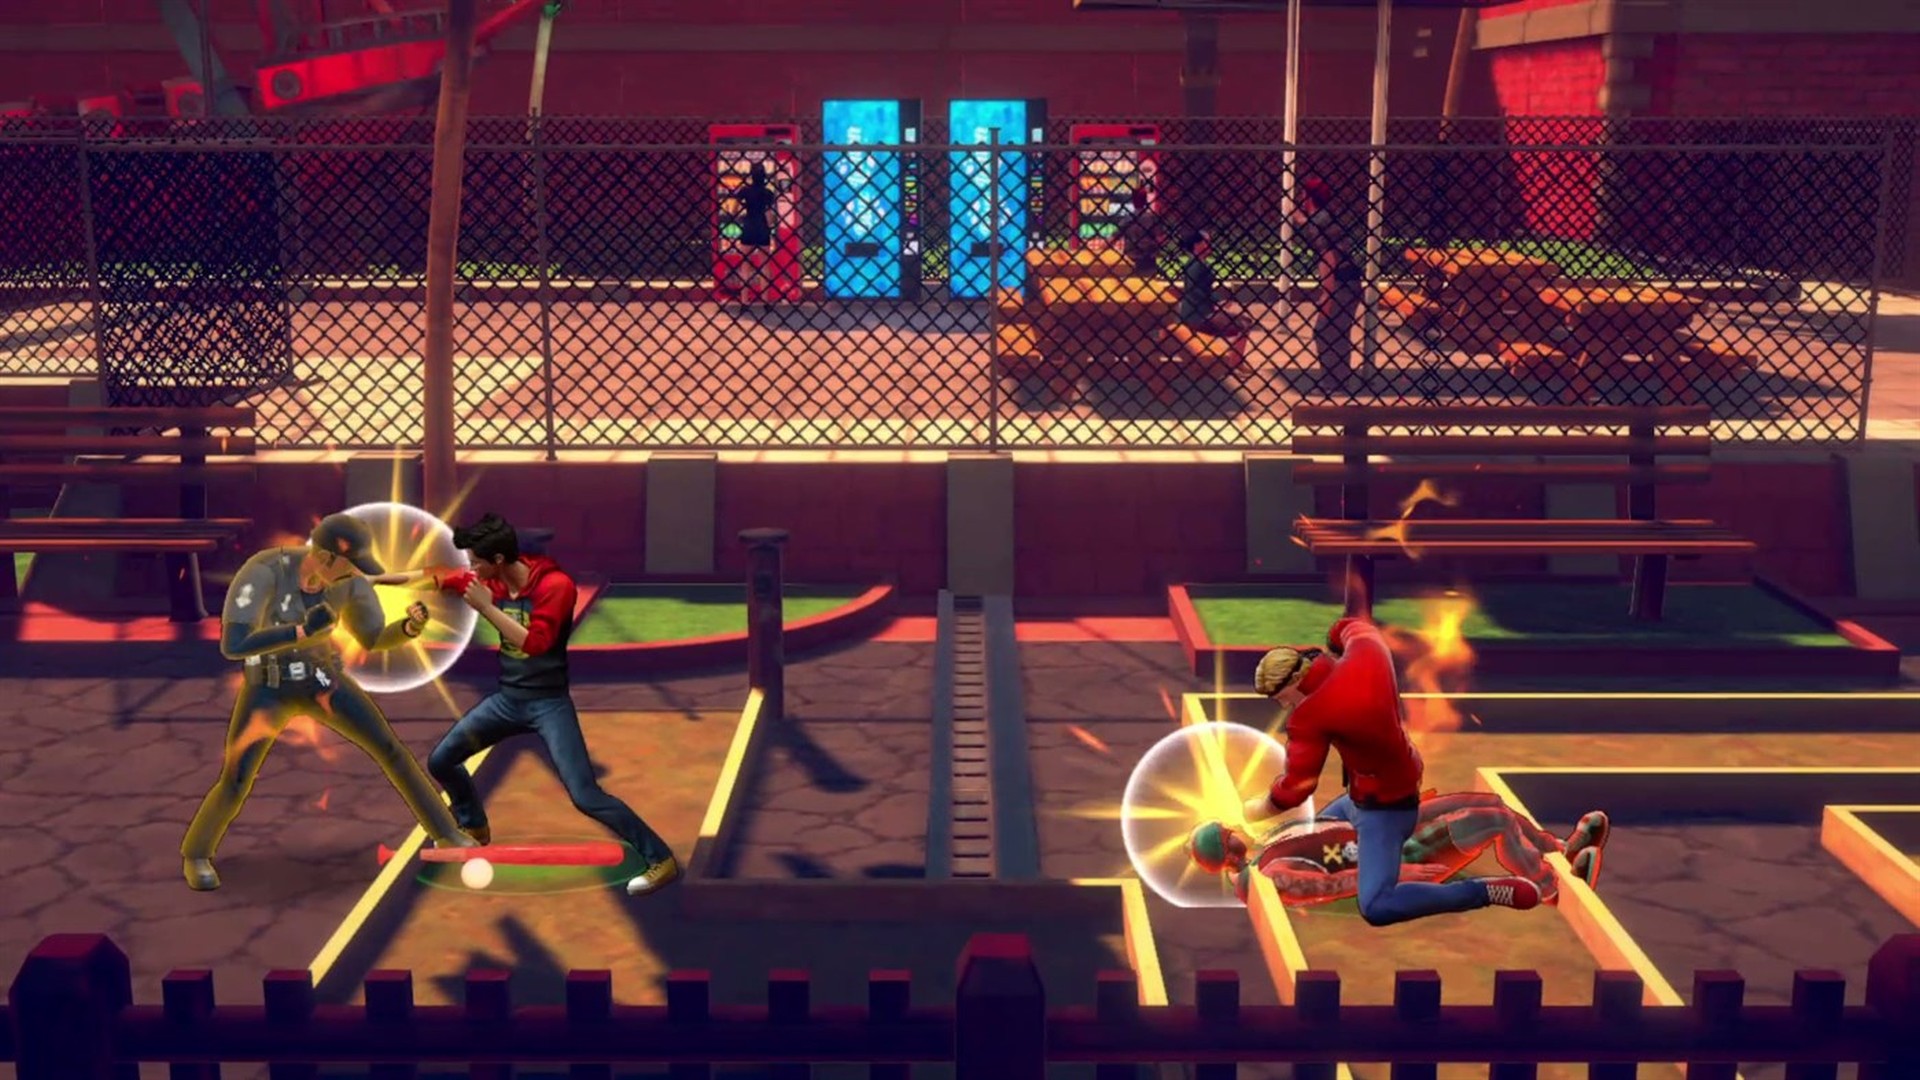
The basic flow of each level is classic beat ‘em up: advance through the areas fighting everyone and moving forward to a new section. But how you do it is where Cobra Kai really shines. Inspired by Cobra Kai dojo’s “Strike First” motto, we have created the “Never Stop Attacking” fighting engine. That means there’s no waiting around – you can always go for your next strike on your opponents. You can hit them with punches, kicks, grabs, flaming strikes and icy attacks, hit them standing and flying, use the environment, use unorthodox weapons, and even beat them on the ground. Our approach is to empower players with a really large moveset that can be used in all sorts of creative ways, and have each player figure out their go-to characters, combos, skills, weapons, and overall combat flow. You can also upgrade all of your attacks through the course of the game.
For added depth, we brought in and adapted to the genre some great concepts from other awesome games, like ultimate attacks from Overwatch; skills with cooldown from Assassin’s Creed Odyssey; environmental attacks like those in Def Jam series; a combo meter inspired by Devil May Cry; dodge and parry systems similar to the Souls series; upgrade trees from RPGs like Final Fantasy; short and fun challenges like Bloodstained has; a power up buff system inspired by Dead Cells’ roguelike approach; and of course also some references to lovely classics of the genre, such as the screen throw from Turtles In Time and the ground attacks from Combatribes.
We also wanted the game to feel fast. We love the arcade and 16-bit era, but those games feel slow by today’s standards, so we went for a fighting game pace, like Street Fighter. That is why the game has an unforeseen amount of unique attacks and combos to explore in the beat ‘em up genre. Characters are designed as fighting game characters, meaning many cool concepts from fighting games are here, but simplified for a less daunting experience. There is buffering, chaining moves, juggling, cornering, super armor, frame advantage, parry, quick recover, frames design, and more. On top of all that, we have created a core loop inspired by the Doom franchise. You have different types of attacks and each one brings specific rewards, so you can use whatever suits best for your current situation in that very second.
We have a lot of heightened action in the gameplay, but we are working with the music composers, actors, and the creators of the show to deliver an authentic Cobra Kai story experience that takes place parallel to the events from Season two, right in the peak of the rivalry between the Cobra Kai and Miyagi Do dojos. It shows other angles, giving fans more insight into how things ended up like they did in the season two finale and also affords smaller characters a chance to shine – or get beaten up in boss battles.
We’ve recorded voice over with William Zabka (Johnny), Ralph Macchio (Daniel), Gianni DeCenzo (Demetri), and Jacob Bertrand (Hawk). I’ll never forget the moment Zabka read the first line of the script, “Those bastards… Why didn’t you tell me about the note?” and we all were so excited – we felt like Johnny was really there!
The game is available now on Xbox One and I can say, for fans of the show excited for its third season premiering on Netflix on January 8, 2021, this game does offer at least a little insight into what is coming next. There is a great new character from Season three that debuts in the game. We tell some of their backstory in one of the main missions of the game, they are actually a boss fight, but that’s all I can say.
Cobra Kai: The Karate Kid Saga Continues
GameMill Entertainment
☆☆☆☆☆
★★★★★
Choose a side, master your moves, and embrace your destiny in an epic beat ’em up adventure inspired by the hit show. Take control of 8 playable characters with deep movesets, combos, progression, real-time character swaps, ultimate attacks, and much more! 34 years after the events of the 1984 All Valley Karate Tournament, the rivalry of Daniel LaRusso and Johnny Lawrence continues. The fight is in your hands now! •Two-Fold Storyline – Featuring an all-new storyline filled with unique cutscenes and dialog-choose to take control of Daniel and his students at Miyagi-Do Karate through a storyline campaign. Or select their rivals, Johnny Lawrence and his disciples at Cobra Kai to play their side of the story. Completing both sides of the campaign unveils an ultimate ending. •RPG-Like Dojo Progression – Master 40 unique skills and upgrade your characters’ stats as you karate your way through enemies. •Character Swap System – Choose your Dojo then seamlessly swap between your favorite characters within, including Miyagi Do’s Daniel, Robby, Sam and Demetri; or Cobra Kai’s Johnny, Miguel, Hawk and Tory. •Live the Cobra Kai Universe – Explore Los Angeles across 28 missions filled with characters and enemies from the show! •Authentic Cobra Kai Experience – Featuring the voices of William Zabka, Ralph Macchio and other top-tier cast, along with an exclusive soundtrack from the creators of the Cobra Kai show.
There are only a few days left in Unity’s 10th Anniversary MegaBundle X that we previously discussed here. Taking a quick look through the assets in the bundle it becomes clear that there are a number of assets that would be perfect for people looking to create a racing game. Today we are going to look at the following assets from the bundle:
Quickly and easily create and populate road networks using a simple spline based approach, both in the editor and dynamically at run-time, with a terrain aware system.
A collection of toon shader styled racing cars, rally cars and monster trucks. It also contains several props, track pieces and more for creating a full racing game with a consistent art style.
They’re trees. Oak trees. There are 5 of them, enough said.
The above links contain affiliate codes that pay GFS a small commission if you purchase anything (thanks so much if you do!). Of course be sure to use the Bundle Link and not individual asset links to get the savings, at least until November 12th. You can learn more and see all the above assets in action in the video below.
With the PlayStation 5 just a few days away from launch, now is a good time to just take stock of your PlayStation Network account and be sure you know what is coming with you when you make the console transition. The good news is that you lose nothing when moving over your account, with Sony offering easy ways to do so, too.
Just sign in
Pretty much all your need to do on the PlayStation 5 to bring over your PSN account is log in. You can do this by entering your PSN username and password (and entering any two-factor authentication codes you should be using), or you can make use of Sony's recently revamped PlayStation app. Just download the app onto a smartphone or tablet, log in using your credentials and hit "Sign in on PS5". Your PS5 will provide you with a QR code that you can scan with the app to log you in instantly. This will take out most of the headaches and should have you signed in and ready to go in a matter of seconds.
Don't create a new account for a new name
This might be obvious, but you don't need to create a new PSN account to change your Online ID. Doing so will lock you out of content stored on your existing PSN account, such as games and content purchases. Instead, you can edit your Online ID just like you can on PS4. Your first change will be free, but Sony will charge you for any changes thereafter.
FREE Whispering Willows, Little Hope Release, GalaQuiz
Whispering Willows FREEbie
[freebies.indiegala.com] Play as Elena to find her missing father, use your astral projection to solves the mansion’s tricks and puzzles, help the lingering souls and discover so much more in Whispering Willows.
[www.indiegala.com] The Halloween weekend continues...and some sales are still surviving. Don't forget that these scary deals will also gift you free scratchy cards filled with mysterious Steam keys! For every purchase...you'll get something special: a BONUS Scratch Card with a secret Steam title in it for every store cart purchase!
The 228th GalaQuiz will be LIVE soon, win up to $50 in GalaCredit!
[www.indiegala.com] The GalaQuiz will take place in less than 2 hours from this announcement Today's GalaQuiz[www.indiegala.com] hints are up. The theme will be Horror Movies. Look forward for an awesome upcoming event.