Posted on Leave a comment

How to Create Zip Files using PHP ZipArchive and Download

by Vincy. Last modified on September 12th, 2022.

Creating a zip from a folder full of files can be done in PHP using the ZipArchive class. This class instance creates a handle to read or write files to a compressed archive.

This class includes several properties and methods to zip file archives.

In this article, we will see an example of,

  1. How to create a zip archive file.
  2. How to download the compressed zip file.

If you want to know how to compress more than one image in PHP image compression refer to this earlier article.

How to create a zip archive file

This file parses the input directory and compresses its files into a zip file. It proceeds with the following steps to create the zip file of a directory.

  1. Create a PHP ZipArchive class instance.
  2. Open a zip file archive with the instance. It accepts the output zip file name and the mode to open the archive.
  3. Apply a recursive parsing in the input directory.
  4. If the directory includes a file, then it adds to the zip archive using addFile().

It handles the use cases of getting the possibilities of being unable to read or archive the directory. Once the zip is created, it displays a message to the browser.

create-zip-file.php

<?php
// Important: You should have read and write permissions to read
// the folder and write the zip file
$zipArchive = new ZipArchive();
$zipFile = "./example-zip-file.zip";
if ($zipArchive->open($zipFile, ZipArchive::CREATE) !== TRUE) { exit("Unable to open file.");
}
$folder = 'example-folder/';
createZip($zipArchive, $folder);
$zipArchive->close();
echo 'Zip file created.'; function createZip($zipArchive, $folder)
{ if (is_dir($folder)) { if ($f = opendir($folder)) { while (($file = readdir($f)) !== false) { if (is_file($folder . $file)) { if ($file != '' && $file != '.' && $file != '..') { $zipArchive->addFile($folder . $file); } } else { if (is_dir($folder . $file)) { if ($file != '' && $file != '.' && $file != '..') { $zipArchive->addEmptyDir($folder . $file); $folder = $folder . $file . '/'; createZip($zipArchive, $folder); } } } } closedir($f); } else { exit("Unable to open directory " . $folder); } } else { exit($folder . " is not a directory."); }
}
?>

Output

//If succeeded it returns Zip file created. //If failed it returns Unable to open directory example-folder.
[or] "example-folder is not a director.

php create zip

How to download the compressed zip file

In the last step, the zip file is created using the PHP ZipArchive class. That zip file can be downloaded by using the PHP code below.

It follows the below steps to download the zip file created.

  1. Get the absolute path of the zip file.
  2. Set the header parameters like,
    • Content length.
    • Content type.
    • Content encoding, and more.

download-zip-file.php

<?php
$filename = "example-zip-file.zip";
if (file_exists($filename)) { // adjust the below absolute file path according to the folder you have downloaded // the zip file // I have downloaded the zip file to the current folder $absoluteFilePath = __DIR__ . '/' . $filename; header('Pragma: public'); header('Expires: 0'); header('Cache-Control: must-revalidate, post-check=0, pre-check=0'); header('Cache-Control: private', false); // content-type has to be defined according to the file extension (filetype) header('Content-Type: application/zip'); header('Content-Disposition: attachment; filename="' . basename($filename) . '";'); header('Content-Transfer-Encoding: binary'); header('Content-Length: ' . filesize($absoluteFilePath)); readfile($absoluteFilePath); exit();
}
?>

This file just has the links to trigger the function to create a zip file containing the compressed archive of the directory. Then, the action to download the output zip archive is called.

index.php

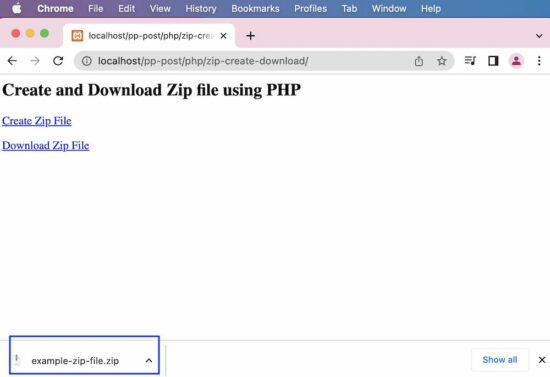
<div class='container'> <h2>Create and Download Zip file using PHP</h2> <p> <a href="create-zip-file.php">Create Zip File</a> </p> <p> <a href="download-zip-file.php">Download Zip File</a> </p>
</div>

Some methods of PHP ZipArchive class

We can do more operations by using the methods and properties of the PHP ZipArchive class. This list of methods is provided by this PHP class.

  1. count() – used to get the number of files in the zip archive file.
  2. extractTo() – extracts the archive content.
  3. renameIndex() – rename a particular archive entry by index.
  4. replaceFile() – replace a file in the zip archive with a new file by specifying a new path.

ZipArchive methods used in this example

Some of the methods are used in this example listed below. These are frequently used methods of this class to work with this.

  1. open() – Open a zip archive file by specifying the .zip file name.
  2. addFile() – To add a file from the input directory to the zip archive.
  3. addEmptyDir() – adds an empty directory into the archive to load the subdirectory file of the input directory.
  4. close() – closes the active ZipArchive with the reference of the handle.

Download

↑ Back to Top

Posted on Leave a comment

JavaScript Copy Text to Clipboard

by Vincy. Last modified on September 9th, 2022.

This example script in JavaScript is to copy text to the system clipboard. I am presenting three different methods in this tutorial.

  1. Via ClipBoard API.
  2. Using document.executeCommand (not recommended).
  3. By user consent.

This JS quick example uses the first and the best method to copy content of a textarea to the clipboard.

Quick example

var contentToCopy = document.getElementById(text_to_copy).value;
navigator.clipboard.writeText(contentToCopy).then(function() { console.log('Copied to clipboard with async.');
}, function(err) { console.error('Unable to copy with async ', err);
});

HTML textarea element from where the content is copied by the JS script.

<textarea id="text_to_copy">Text to copy</textarea>

javascript copy clipboard

1) Using The Clipboard API

Below HTML script gives an interface with a textarea and a button to trigger the copy action.

On clicking the button to call the JavaScript copyToClipBoard() function. This function moves the textarea content to the clipboard.

index.html

<html>
<head>
<title>JavaScript Copy Text to Clipboard</title>
<script src="copy-clipboard-async.js"></script>
<script src="https://code.jquery.com/jquery-3.6.1.min.js" integrity="sha256-o88AwQnZB+VDvE9tvIXrMQaPlFFSUTR+nldQm1LuPXQ=" crossorigin="anonymous"></script>
<link rel='stylesheet' href='style.css' type='text/css' />
<link rel='stylesheet' href='form.css' type='text/css' />
</head>
<body> <div class="phppot-container"> <h1>JavaScript Copy Text to Clipboard</h1> <div class="row"> <div class="message-input"> <label for="message-input">Message: </label> <textarea id="message-input" rows="15" name="message-input" class="message-input"></textarea> </div> </div> <div class="row"> <button onclick="copyToClipboard('message-input')" type="button">Copy to clipboard</button> </div> <div class="row"> <div id="copied"></div> </div> </div>
</body>
</html>

This JS script writes the text to the clipboard by calling clipboard.writeText(). It enhances the quick example by providing an interface to copy content via ClipBoard API.

copy-clipboard-async.js

/** * to copy to the clipboard using the Clipboard API * * @param element * @returns */
function copyToClipboard(element) { var contentToCopy = document.getElementById(element).value; navigator.clipboard.writeText(contentToCopy).then(function() { console.log('Copied to clipboard with async.'); }, function(err) { console.error('Unable to copy with async ', err); });
}

2) document.execCommand

This method was widely used to copy content by calling the executeCommand(“copy”). It is deprecated but still supported by many browsers.

It dynamically appends the textarea element to the HTML body and selects its content using JavaScript. Then the executeCommand() function call triggers the copy action.

copy-clipboard-execcommand.js

/** * to copy to the clipboard using the document.execCommand * * @param element * @returns */
function copyToClipboard(element) { var contentToCopy = document.getElementById(element).value; var temp = $("<textarea>"); $("body").append($temp); temp.val(contentToCopy); temp.select(); document.execCommand("copy"); temp.remove(); console.log('Copied!');
}

3) Copy by user

This is the safest method of copying the content to the clipboard. This does not use any native function of the JavaScript and can be described more of a process. It prompts the user to confirm copying the selected content to the clipboard.

copy-by-user-consent.html

<html>
<head>
<title>JavaScript Copy Text to Clipboard</title>
</head>
<body> <!-- In this style, we present the control to the end user to copy. --> <!-- Text to be copied is shown to the user and he uses the built-in browser's feature and copies to the clipboard. --> <!-- If this is possible to use in your use case, then this is the safest method. --> <button id="copy-btn" onclick="copyToClipboard(document.getElementById('copy-btn').innerHTML)">Text to copy.</button> <script> function copyToClipboard(text) { window.prompt("Press Ctrl+C to copy to clipboard.", text); } </script>
</body>
</html>

Download

↑ Back to Top

Posted on Leave a comment

PHP Session Destroy after 30 Minutes

by Vincy. Last modified on September 6th, 2022.

PHP has a core function session_destroy() to clear all the session values. It is a simple no-argument function that returns a boolean true or false.

The PHP session ID is stored in a cookie by default. Generally that session cookie file is name PHPSESSID. The session_destroy function will not unset the session id in the cookie.

To destroy the session ‘completely’, the session ID must also be unset.

This quick example uses session_destroy() to destroy the session. It uses the set_cookie() method to kill the entirety by expiring the PHP session ID.

Quick example

destroy-session.php

<?php
// Always remember to initialize the session,
// even before attempting to destroy it. // Destroy all the session variables.
$_SESSION = array(); // delete the session cookie also to destroy the session
if (ini_get("session.use_cookies")) { $cookieParam = session_get_cookie_params(); setcookie(session_name(), '', time() - 42000, $cookieParam["path"], $cookieParam["domain"], $cookieParam["secure"], $cookieParam["httponly"]);
} // as a last step, destroy the session.
session_destroy();

Note:

  1. Use session_start() to reinitiate the session after the PHP session destroy.
  2. Use PHP $_SESSION to unset a particular session variable. For an older PHP version, use session_unset().

php session destroy output

About this login session_destroy() example

Let’s create a login example code to use PHP session, session_destroy and all. It allows users to login and logout from the current session. Use this code if you are looking for a complete user registration and login in PHP script.

This example provides an automatic login session expiry feature.

Landing page with a login form

This form posts the username and the password entered by the user. It verifies the login credentials in PHP.

On successful login, it stores the logged-in state into a PHP session. It sets the expiry time to 30 minutes from the last login time.

It stores the last login time and the expiry time into the PHP session. These two session variables are used to expire the session automatically.

login.php

<?php
session_start();
$expirtyMinutes = 1;
?>
<html>
<head>
<title>PHP Session Destroy after 30 Minutes</title>
<link rel='stylesheet' href='style.css' type='text/css' />
<link rel='stylesheet' href='form.css' type='text/css' />
</head>
<body> <div class="phppot-container"> <h1>Login</h1> <form name="login-form" method="post"> <table> <tr> <td>Username</td> <td><input type="text" name="username"></td> </tr> <tr> <td>Password</td> <td><input type="password" name="password"></td> </tr> <tr> <td><input type="submit" value="Sign in" name="submit"></td> </tr> </table> </form>
<?php
if (isset($_POST['submit'])) { $usernameRef = "admin"; $passwordRef = "test"; $username = $_POST['username']; $password = $_POST['password']; // here in this example code focus is session destroy / expiry only // refer for registration and login code https://phppot.com/php/user-registration-in-php-with-login-form-with-mysql-and-code-download/ if ($usernameRef == $username && $passwordRef == $password) { $_SESSION['login-user'] = $username; // login time is stored as reference $_SESSION['ref-time'] = time(); // Storing the logged in time. // Expiring session in 30 minutes from the login time. // See this is 30 minutes from login time. It is not 'last active time'. // If you want to expire after last active time, then this time needs // to be updated after every use of the system. // you can adjust $expirtyMinutes as per your need // for testing this code, change it to 1, so that the session // will expire in one minute // set the expiry time and $_SESSION['expiry-time'] = time() + ($expirtyMinutes * 60); // redirect to home // do not include home page, it should be a redirect header('Location: home.php'); } else { echo "Wrong username or password. Try again!"; }
}
?>
</div>
</body>
</html>

login

Dashboard validates PHP login session and displays login, and logout links

This is the target page redirected after login. It shows the logout link if the logged-in session exists.

Once timeout, it calls the destroy-session.php code to destroy all the sessions.

If the 30 minutes expiry time is reached or the session is empty, it asks the user to log in.

home.php

<?php
session_start();
?>
<html>
<head>
<title>PHP Session Destroy after 30 Minutes</title>
<link rel='stylesheet' href='style.css' type='text/css' />
<link rel='stylesheet' href='form.css' type='text/css' />
</head>
<body> <div class="phppot-container">
<?php
if (! isset($_SESSION['login-user'])) { echo "Login again!<br><br>"; echo "<a href='login.php'>Login</a>";
} else { $currentTime = time(); if ($currentTime > $_SESSION['expiry-time']) { require_once __DIR__ . '/destroy-session.php'; echo "Session expired!<br><br><a href='login.php'>Login</a>"; } else { ?> <h1>Welcome <?php echo $_SESSION['login-user'];?>!</h1> <a href='logout.php'>Log out</a>
<?php }
}
?>
</div>
</body>
</html>

This PHP code is used for users who want to log out before the session expiry time.

It destroys the session by requiring the destroy-session.php code. Then, it redirects the user to the login page.

logout.php

<?php
session_start();
require_once __DIR__ . '/destroy-session.php';
header('Location: login.php');
?>

I hope this example helps to understand how to destroy PHP sessions. And also, this is a perfect scenario that is suitable for explaining the need of destroying the session.
Download

↑ Back to Top

Posted on Leave a comment

Get User Location from Browser with JavaScript

by Vincy. Last modified on September 5th, 2022.

This tutorial uses JavaScript’s GeoLocation API to get users’ location. This API call returns location coordinates and other geolocation details.

The following quick example has a function getLatLong() that uses the GeoLocation API. It calls the navigator.geplocation.getCurrentPosition(). This function needs to define the success and error callback function.

On success, it will return the geolocation coordinates array. The error callback includes the error code returned by the API. Both callbacks write the response in the browser console.

User’s location is a privacy sensitive information. We need to be aware of it before working on location access. Since it is sensitive, by default browser and the underlying operating system will not give access to the user’s location information.

Important! The user has to,

  1. Explicitly enable location services at operating system level.
  2. Give permission for the browser to get location information.

In an earlier article we have seen about how to get geolocation with country by IP address using PHP.

Quick example

function getLatLong() { // using the JavaScript GeoLocation API // to get the current position of the user // if checks for support of geolocation API if (navigator.geolocation) { navigator.geolocation.getCurrentPosition( function(currentPosition) { console.log(currentPosition)}, function(error) { console.log("Error: " + error.code)} ); } else { locationElement.innerHTML = "JavaScript Geolocation API is not supported by this browser."; }
}

JavaScript GeoLocation API’s getCurrentPosition() function

The below code is an extension of the quick example with Geo Location API. It has a UI that has control to call the JavaScript function to get the current position of the user.

The HTML code has the target to print the location coordinates returned by the API.

The JavaScript fetch callback parameter includes all the geolocation details. The callback function reads the latitude and longitude and shows them on the HTML target via JavaScript.

<!DOCTYPE html>
<html>
<head>
<title>Get User Location from Browser with JavaScript</title>
<link rel='stylesheet' href='style.css' type='text/css' />
<link rel='stylesheet' href='form.css' type='text/css' />
</head>
<body> <div class="phppot-container"> <h1>Get User Location from Browser with JavaScript</h1> <p>This example uses JavaScript's GeoLocation API.</p> <p>Click below button to get your latitude and longitude coordinates.</p> <div class="row"> <button onclick="getLatLong()">Get Lat Lng Location Coordinates</button> </div> <div class="row"> <p id="location"></p> </div> </div> <script> var locationElement = document.getElementById("location"); function getLatLong() { // using the JavaScript GeoLocation API // to get current position of the user // if checks for support of geolocation API if (navigator.geolocation) { navigator.geolocation.getCurrentPosition( displayLatLong, displayError); } else { locationElement.innerHTML = "JavaScript Geolocation API is not supported by this browser."; } } /** * displays the latitude and longitude from the current position * coordinates returned by the geolocation api. */ function displayLatLong(currentPosition) { locationElement.innerHTML = "Latitude: " + currentPosition.coords.latitude + "<br>Longitude: " + currentPosition.coords.longitude; } /** * displays error based on the error code received from the * JavaScript geolocation API */ function displayError(error) { switch (error.code) { case error.PERMISSION_DENIED: locationElement.innerHTML = "Permission denied by user to get location." break; case error.POSITION_UNAVAILABLE: locationElement.innerHTML = "Location position unavailable." break; case error.TIMEOUT: locationElement.innerHTML = "User location request timed out." break; case error.UNKNOWN_ERROR: locationElement.innerHTML = "Unknown error in getting location." break; } } </script>
</body>
</html>

get user location browser output

In the above example script, we have a function for handing errors. It is important to include the function when getting user location via browser. Because, by default, the user’s permission settings will be disabled.

So most of the times, when this script is invoked, we will get errors. So we should have this handler declared and passed as a callback to the getCurrentPosition function. On error, JavaScript will call this error handler.

Geolocation API’s Output

Following is the output format returned by the JavaScript geolocation API. We will be predominantly using latitude and longitude from the result. ‘speed’ may be used when getting dynamic location of the user. We will be seeing about that also at the end of this tutorial.

{ coords = { latitude: 30.123456, longitude: 80.0253546, altitude: null, accuracy: 49, altitudeAccuracy: null, heading: null, speed: null, }, timestamp: 1231234897623
}

View Demo

User location by Geocoding

We can get the user’s location by passing the latitude and longitude like below. There are many different service providers available and below is an example using Google APIs.

const lookup = position => { const { latitude, longitude } = position.coords; fetch(`http://maps.googleapis.com/maps/api/geocode/json?latlng=${latitude},${longitude}`) .then(response => response.json()) .then(data => console.log(data)); //
}

Get dynamic user location from browser using watchPosition()

Here is an interesting part of the tutorial. How will get you a user’s dynamic location, that is when he is on the move.

We should use an another function of GeoLocation API to get dynamic location coordinates on the move. The function watchPosition() is used to do this via JavaScript.

To test this script, run it in a mobile browser while moving in a vehicle to get user’s dynamic location.

I have presented the code part that is of relevance below. You can get the complete script from the project zip, it’s free to download below.

var locationElement = document.getElementById("location"); function getLatLong() { // note the usage of watchPosition, this is the difference // this returns the dynamic user position from browser if (navigator.geolocation) { navigator.geolocation.watchPosition(displayLatLong, displayError); } else { locationElement.innerHTML = "JavaScript Geolocation API is not supported by this browser."; } }

View Demo Download

↑ Back to Top

Posted on Leave a comment

JavaScript Validate Email using Regular Expression (regex)

by Vincy. Last modified on September 1st, 2022.

This tutorial helps to learn how to validate email using regular expression (regex) in JavaScript. It has more than one example of how to do email validation.

Those examples differ in the regex patterns used and in the handling of input email.

The below quick example uses a regex pattern with a JavaScript match() function to validate email. Before finding the match, it converts the input email to lowercase.

Quick example

const validateEmail = (email) => { return String(email) .toLowerCase() .match( /^(([^<>()[\]\\.,;:\s@"]+(\.[^<>()[\]\\.,;:\s@"]+)*)|(".+"))@((\[[0-9]{1,3}\.[0-9]{1,3}\.[0-9]{1,3}\.[0-9]{1,3}\])|(([a-z\-0-9]+\.)+[a-z]{2,}))$/ );
};

Test results

When receiving an invalid email format, it returns null. Otherwise, it returns an array of content matched with the regex.

Input: vincy#example
Output: null. Input: [email protected]
Output: [email protected],vincy,vincy,,,example.co,,example.co,example.

Simple Email Validation in JavaScript using regex

This simple email validation script does a basic check with the input email string.

It validates the input email if it has the expected format regardless of the length and the data type.

I have added this example just to understand how to do pattern-based validation with regex in JavaScript.

I prefer to use the quick example and the strict validation example follows.

simple-validation.html

<!DOCTYPE html>
<html lang="en">
<head>
<meta charset="utf-8">
<title>JavaScript Simple Email Validation using Regular Expression (regex)</title>
<link rel='stylesheet' href='style.css' type='text/css' />
<link rel='stylesheet' href='form.css' type='text/css' />
</head>
<body> <div class="phppot-container"> <h1>JavaScript Simple Email Validation using Regular Expression (regex)</h1> <div class="tile-container"> <form name="form"> <div class="row"> <label for="email">Email address: </label> <input id="email" name="email" /> </div> <div class="row"> <input type="submit" name="submit" value="Submit" onclick="validateEmail(document.form.email)" /> </div> </form> </div> </div> <script> function matchEmailRegex(emailStr) { var emailRegex = /\S+@\S+\.\S+/; return emailStr.match(emailRegex); }; // validates in the form [email protected] // no more fancy validations function validateEmail(emailField) { var emailStr = emailField.value; if (matchEmailRegex(emailStr)) { alert("Entered value is a valid email."); } else { alert("Entered value is not an email."); } return false; } </script>
</body>
</html>

Test results

Input: vincy
Output: Entered value is not an email. Input: [email protected]
Output: Entered value is a valid email.

How to do strict email validation in JavaScript

This example uses an almost similar regex pattern that is used in the quick example. But, it handles the return value of the JavaScript match to output the validation message.

It gives a code to directly include in an application validation script to validate a form email input.

The alert() can be replaced with any form of letting the end user know about the validation status.

strict-validation.html

<!DOCTYPE html>
<html lang="en">
<head>
<meta charset="utf-8">
<title>JavaScript Validate Email using Regular Expression (regex)</title>
<link rel='stylesheet' href='style.css' type='text/css' />
<link rel='stylesheet' href='form.css' type='text/css' />
</head>
<body> <div class="phppot-container"> <h1>JavaScript Validate Email using Regular Expression (regex)</h1> <div class="tile-container"> <form name="form"> <div class="row"> <label for="email">Email address: </label> <input id="email" name="email" /> </div> <div class="row"> <input type="submit" name="submit" value="Submit" onclick="validateEmail(document.form.email)" /> </div> </form> </div> </div> <script> function matchEmailRegex(emailStr) { var emailRegex = /^(([^<>()[\]\\.,;:\s@\"]+(\.[^<>()[\]\\.,;:\s@\"]+)*)|(\".+\"))@((\[[0-9]{1,3}\.[0-9]{1,3}\.[0-9]{1,3}\.[0-9]{1,3}\])|(([a-zA-Z\-0-9]+\.)+[a-zA-Z]{2,}))$/; return emailStr.match(emailRegex); }; function validateEmail(emailField) { var emailStr = emailField.value; if (matchEmailRegex(emailStr)) { alert("Entered value is a valid email."); } else { alert("Entered value is not an email."); } return false; } </script>
</body>
</html>

Test results

Unlike the simple example, it strictly validates the email prefix with the allowed special characters.

It also checks the domain name format to validate the email. The following results show the test cases and respective outputs of the JavaScript email validation.

Input: vincy
Output: Entered value is not an email. Input: [email protected]
Output: Entered value is a valid email.

Download

↑ Back to Top

Posted on Leave a comment

JavaScript Remove Element from Array

by Vincy. Last modified on August 29th, 2022.

In this tutorial, let us learn about some JavaScript basics. How to remove elements from an array? The following list has examples in some languages.

  • PHP – array_splice($inputArray, $offset)
  • Python – inputArray.remove($element) to remove item by element. inputArray.pop($offset) to remove item by index.

This article gives code to learn how to do this in JavaScript. It has many examples of removing an element from a JavaScript array.

  1. Remove an element from JavaScript array by index or value.
  2. Remove all matching elements by value from JavaScript array.
  3. Remove elements from JavaScript array using filter (an alternate).
  4. Remove first element from array javascript.
  5. Remove last element from array javascript.

1) Remove an element from JavaScript array (by index and value)

This quick example gets the first index of the given element. Then, it applies JavaScript splice() by sending the first index position. The splice() removes the item in the specified index.

Quick example

// this JavaScript example removes first occurrence of the matching element from array
const elements = [2, 5, 4, 5, 6, 5, 8];
console.log(elements);
// returns the index of the first match of value '5' from an array
const index = elements.indexOf(5);
// when the element is found the index will be non-negative
if (index > -1) { // the second parameter '1' asks to remove one element elements.splice(index, 1);
}
// result array after delete is [ 2, 4, 5, 6, 5, 8 ]
console.log(elements);

This screenshot shows the output of the above example. It shows first the original array and then the modified array after the removal of an item.

javascript remove element array

2) Remove all matching elements by value from JavaScript array

This example creates a custom JavaScript function to remove all the occurrences of a given element. It iterates all the array elements in a loop.

On each iteration, it compares and calls array.splice() by the current index. In PHP, it is about one line to remove all the occurrences by using array_diff() function.

remove-all-item.html

<html>
<head>
<title>JavaScript Remove All Matching Element from Array</title>
</head>
<body> <h1>JavaScript Remove All Matching Element from Array</h1> <script> function removeAllItem(elementsArray, element) { var i = 0; // iterate the elements array and remove matching element // till the end of the array index while (i < elementsArray.length) { if (elementsArray[i] === element) { elementsArray.splice(i, 1); } else { ++i; } } return elementsArray; } // this JavaScript example removes all occurence of the matching element from array const elements = [ 2, 5, 4, 5, 6, 5, 8 ]; console.log(elements); elementAfterRemoval = removeAllItem(elements, 5); console.log(elementAfterRemoval); </script>
</body>
</html>

Output

Original Array: (7) [2, 5, 4, 5, 6, 5, 8]
Output Array: (4) [2, 4, 6, 8]

3) Remove elements from JavaScript array using filter (an alternate)

This is an alternate method that returns the same array output as the result of removing an item.

Instead of a loop, it parses the input array by using a JavaScript filter. The filter callback checks the condition to find the element match to remove.

If the match is not found, the current element will be pushed to an output array.

remove-alternate.html

<html>
<head>
<title>JavaScript Remove Element from Array - Alternate Method using filter</title>
</head>
<body> <h1>JavaScript Remove Element from Array - Alternate Method using filter</h1> <script> const elements = [ 2, 5, 4, 5, 6, 5, 8 ]; console.log(elements); var value = 5 // filter function does not change the original array // but the splice function changes the original array newElements = elements.filter(function(item) { return item !== value }) console.log(newElements) // result is [ 2, 4, 6, 8 ] </script>
</body>
</html>

Output

Original Array: (7) [2, 5, 4, 5, 6, 5, 8]
Output Array: (4) [2, 4, 6, 8]

4) Remove first element from array javascript

In JavaScript, the array.shift() function removes the first element of an input array. The shift() function returns the remove element which is 2 in this example.

remove-first-element.html

<html>
<head>
<title>JavaScript Remove First Element from Array</title>
</head>
<body> <h1>JavaScript Remove First Element from Array</h1> <script> // the JavaScript shift function moves elements to the left // this is like pop from a stack // splice function can also be used to achieve this var elements = [ 2, 5, 4, 5, 6, 5, 8 ]; console.log(elements); // removedElement is 2 var removedElement = elements.shift(); // result array after delete is [ 5, 4, 5, 6, 5, 8 ] console.log(elements); </script>
</body>
</html>

Output

Original Array: (7) [2, 5, 4, 5, 6, 5, 8]
Output Array: (6) [5, 4, 5, 6, 5, 8]

5) Remove the last element from array using JavaScript

JavaScript has a function array.pop() to remove the last item of an array. It also returns the removed item to the calling point as like like array.shift().

Note: If the input array is empty then the shift() and pop() will return undefined.

remove-last-element.html

<html>
<head>
<title>JavaScript Remove Last Element from Array</title>
</head>
<body> <h1>JavaScript Remove Last Element from Array</h1> <script> // the JavaScript pop function removes last element from an array var elements = [ 2, 5, 4, 5, 6, 5, 8 ]; console.log(elements); // removedElement is 8 var removedElement = elements.pop(); // result array after delete is [ 2, 5, 4, 5, 6, 5 ]; console.log(elements); </script>
</body>
</html>

Output

Original Array: (7) [2, 5, 4, 5, 6, 5, 8]
Output Array: (6) [2, 5, 4, 5, 6, 5]

This example created custom functions in JavaScript to remove all the occurrences of the specified element. Instead, there should be a native function in JavaScript for doing this. PHP, Python and most of the languages have the native function for this.

Download

↑ Back to Top

Posted on Leave a comment

JavaScript News Ticker

by Vincy. Last modified on August 28th, 2022.

This article provides a lightweight JavaScript plugin to display news tickers on a website. The news ticker is a way of showing content in marquee mode either in horizontal or vertical scroll. It is useful to display content like the latest updates and upcoming events.

It saves the site space real estate by occupying less portion of the screen. It also reduces the user effort of scrolling to see more content by keeping on ticking the content display.

In a way it is an older thing. Couple of decades back we cannot see a website without a scrolling ticker. Over a period its eradicated as a bad UI/UX practice. But it is still widely used in news websites and in particular in stock price display. If you use it wisely, it provides good advantages.

The following examples will remind you of the places that require news tickers on screen.

  1. Online news bytes display headlines in a ticker.
  2. Stock prices.
  3. Online shops that show ‘what is new’ on a ticker board.

This tutorial shows a simple news ticker on a webpage. On hovering the ticker box, it stops the content marquee and releases on mouse out.

It will look like a carousal effect but applied to an element with text content.

javascript news ticker
View Demo

News ticker features

  1. Ultra lightweight; Just 2KB.
  2. Plain JavaScript. Standalone and not dependent on any other libraries like JQuery. Of course, if needed you can use it along with JQuery.
  3. Fully Responsive.

Usage

You can integrate this news ticker in a web page in three simple steps.

  1. Include the JavaScript library file.
  2. Ticker content as HTML unordered list in a div with an id.
  3. Call startTicker JavaScript function immediately next to ticker-box div.

STEP 1: Download and include the JavaScript library file.

<script src="news-ticker.js"></script>

STEP 2: Ticker content as HTML unordered list in a div with an id.

<div id="ticker-box"> <ul> <li>First ticker item.</li> <li>Second ticker item.</li> <li>Final ticker item.</li> </ul>
</div>

STEP 3: Call startTicker JavaScript function immediately next to ticker-box div.

This step is to call the library function with reference to the ticker box id attribute.

The startTicker() function has an optional parameter to supply the speed and interval between news contents. The default speed is 5 and the default interval is 500 milliseconds.

<script>startTicker('ticker-box');</script>

[OR]

<script>startTicker('ticker-box', {speed:7, delay:1000});</script>

News ticker JavaScript library code

This library contains functions to enable a news ticker on a web page. The startTicker() function iterates the ticker <li> elements and let it slides horizontally.

It applies styles to change the position of the ticker element based on the speed. The extend() function changes the default speed and interval with the specified option.

function applyStyles(obj, styles) { var property; var styleLength = Object.keys(styles).length; for (var i = 0; i < styleLength; i++) { property = Object.keys(styles)[i]; obj.style[property] = styles[property]; }
} function extend(object1, object2) { for (var attrname in object2) { object1[attrname] = object2[attrname]; } return object1;
} function startTicker(id, param) { var tickerBox = document.getElementById(id); var defaultParam = { speed: 5, delay: 500, rotate: true }; var extendedParam = extend(defaultParam, param); applyStyles(tickerBox, { overflow: "hidden", 'min-height': '40px' }); var ul = tickerBox.getElementsByTagName("ul"); var li = ul[0].getElementsByTagName("li"); applyStyles(ul[0], { padding: 0, margin: 0, position: 'relative', 'list-style-type': 'none' }); for (i = 0; i < li.length; i++) { applyStyles(li[i], { position: 'absolute', 'white-space': 'nowrap', display: 'none' }); } var li_index = 0; var trans_width = tickerBox.offsetWidth; var chunk_width = 1; var iterateTickerElement = function(trans_width) { li[li_index].style.left = trans_width + "px"; li[li_index].style.display = ''; var t = setInterval(function() { if (parseInt(li[li_index].style.left) > -li[li_index].offsetWidth) { li[li_index].style.left = parseInt(li[li_index].style.left) - chunk_width + "px"; } else { clearInterval(t); trans_width = tickerBox.offsetWidth; li_index++; if (li_index == li.length && extendedParam.rotate == true) { li_index = 0; iterateTickerElement(trans_width); } else if (li_index < li.length) { setTimeout(function() { iterateTickerElement(trans_width); }, extendedParam.delay); } } }, extendedParam.speed); tickerBox.onmouseover = function() { clearInterval(t); } tickerBox.onmouseout = function() { iterateTickerElement(parseInt(li[li_index].style.left)); } } iterateTickerElement(trans_width);
}

Note:

  1. Presently the news ticker is available only in a horizontal direction. For the next release, a vertical direction is planned.
  2. Ticker movement can be paused on mouseover.
  3. Contact me, if you have any feature requests or for any special customization needs.

View DemoDownload

↑ Back to Top

Posted on Leave a comment

Remove Duplicates from Array JavaScript

by Vincy. Last modified on August 24th, 2022.

In JavaScript, there are many options to removing duplicates. We shall see them one by one with examples below.

This example provides all those options from easy to complex solutions to achieve this. You can save this into your application’s common client-side assets to use in your projects.

1) Remove duplicates using JavaScript Set

This quick example uses the JavaScript Set class. This class constructs a unique elements array.

If you pass an input array with duplicate elements, the Set removes the duplicate and returns an array of unique elements.

Quick example

// best and simple solution
// when creating a JavaScript Set, it implicitly removes duplicates
const arrayElements = ['a', 'b', 'c', 'a', 'b', 'd'];
console.log(arrayElements);
let uniqueElements = [...new Set(arrayElements)];
// result array after remove is [ 'a', 'b', 'c', 'd' ]
console.log(uniqueElements);

remove duplicates from array javascript

Output


[ 'a', 'b', 'c', 'd' ]

2) Fastest method to remove duplicates from an array

This is the fastest method to remove duplicates from an array.

The removeDuplicates() custom function runs a loop on the input array.

It defines an array seen[] to mark that the element is found already.

It checks if it is already set in the seen[] array during the iteration. If not, it will be added to the resultant unique array.

<html>
<body> <h1>Remove Duplicates from Array JavaScript - fastest method</h1> <script> function removeDuplicates(arrayElements) { var seen = {}; var resultArray = []; var length = arrayElements.length; var j = 0; for (var i = 0; i < length; i++) { var element = arrayElements[i]; if (seen[element] !== 1) { seen[element] = 1; resultArray[j++] = element; } } return resultArray; } const arrayElements = ['a', 'b', 'c', 'a', 'b', 'd']; console.log(arrayElements); uniqueElements = removeDuplicates(arrayElements); // result array after remove is [ 'a', 'b', 'c', 'd' ] console.log(uniqueElements); </script>
</body>
</html>

3) Remove duplicates from an array using filter()

The JavaScript filter is used with an arrow function to narrow down the array output. It filters the array of elements based on their uniqueness.

The filter condition uses JavaScript indexOf() method to compare. The indexOf() always returns the first index of the element. It is regardless of its multiple occurrences in an array.

This filter condition compares the first index with the current index of the original array. If the condition is matched then the arrow function returns the element to the output array. Refer this for filtering an array in PHP of elements to get rid of duplicates.

<html>
<body> <h1>Remove Duplicates from Array JavaScript using filter()</h1> <script> const arrayElements = ['a', 'b', 'c', 'a', 'b', 'd']; console.log(arrayElements); let uniqueElements = arrayElements.filter((element, index) => { return arrayElements.indexOf(element) === index; }); // result array after remove is [ 'a', 'b', 'c', 'd' ] console.log(uniqueElements); </script>
</body>
</html>

4) Remove Duplicates from Array using JavaScript Hashtables

In this method, the JavaScript hashtable mapping is created based on the data type of the input array element. It defines a JavaScript primitive data type object mapping array.

It applies the filter to do the following steps.

  1. It gets the array element’s data type.
  2. If the element is the type one among the primitive array defined, then it applies the filter condition.
  3. Condition checks if the hashtable has an entry as same as the current element’s property. If a match is found, then it returns the current element.
  4. If the array element is not a primitive data type, then the filter will be based on the JavaScript objects’ linear search.
<html>
<body> <h1>Remove Duplicates from Array JavaScript using Hashtables</h1> <script> // uses hash lookups for JavaScrip primitives and linear search for objects function removeDuplicates(arrayElements) { var primitives = { "boolean": {}, "number": {}, "string": {} }, objects = []; return arrayElements .filter(function(element) { var type = typeof element; if (type in primitives) return primitives[type] .hasOwnProperty(element) ? false : (primitives[type][element] = true); else return objects.indexOf(element) >= 0 ? false : objects.push(element); }); } const arrayElements = ['a', 'b', 'c', 'a', 'b', 'd']; console.log(arrayElements); uniqueElements = removeDuplicates(arrayElements); // result array after remove is [ 'a', 'b', 'c', 'd' ] console.log(uniqueElements); </script>
</body>
</html>

5) Remove Duplicates from Array using includes() and push()

This method uses JavaScript forEach() to iterate the input array. It defines an empty array to store the unique elements uniqueElements[].

In each iteration, it checks if the uniqueElements[] array already has the element. It uses JavaScript includes() to do this check.

Once the includes() function returns false, then it will push the current element in to the uniqueElements[].

<html>
<body> <h1>Remove Duplicates from Array JavaScript using includes() and push()</h1> <script> const arrayElements = ['a', 'b', 'c', 'a', 'b', 'd']; console.log(arrayElements); let uniqueElements = []; arrayElements.forEach((element) => { if (!uniqueElements.includes(element)) { uniqueElements.push(element); } }); // result array after remove is [ 'a', 'b', 'c', 'd' ] console.log(uniqueElements); </script>
</body>
</html>

6) Remove Duplicates from Array using reduce()

Like the JavaScript filter() function, the reduce() function also applies conditions to narrow down the input array.

This function has the current element and the previous result returned by the callback of the reduce().

Each callback action pushes the unique element into an array. This array is used in the next callback to apply includes() and push() to remove the duplicates.

<html>
<body> <h1>Remove Duplicates from Array JavaScript using reduce()</h1> <script> const arrayElements = ['a', 'b', 'c', 'a', 'b', 'd']; console.log(arrayElements); let uniqueElements = arrayElements.reduce(function(pass, current) { if (!pass.includes(current)) pass.push(current); return pass; }, []); // result array after remove is [ 'a', 'b', 'c', 'd' ] console.log(uniqueElements); </script>
</body>
</html>

7) Remove Duplicates from Array using JavaScript Sort

It sorts the input array and removes the duplicates by successive elements comparison.

After sorting, the filter functions condition checks if the current and the previous element are not the same. Then, filters the unique array out of duplicates.

<html>
<body> <h1>Remove Duplicates from Array JavaScript using Sort</h1> <script> // sort the JavaScript array, and then // remove each element that's equal to the preceding one function removeDuplicates(arrayElements) { return arrayElements.sort().filter( function(element, index, ary) { return !index || element != ary[index - 1]; }); } const arrayElements = ['a', 'b', 'c', 'a', 'b', 'd']; console.log(arrayElements); uniqueElements = removeDuplicates(arrayElements); // result array after remove is [ 'a', 'b', 'c', 'd' ] console.log(uniqueElements); </script>
</body>
</html>

Output:

Array(6) 0: "a" 1: "b" 2: "c" 3: "a" 4: "b" 5: "d" length: 6
Array(4) 0: "a" 1: "b" 2: "c" 3: "d" length: 4

Download

↑ Back to Top

Posted on Leave a comment

PHP Validate Email using filter_validate_email and regex

by Vincy. Last modified on August 22nd, 2022.

Email validation in PHP can be done in different ways. In general, a website will have client-side validation.

I prefer both client and server-side validation. It is applicable not only for emails but also to all inputs received from the end users. It will make the website more robust.

Validating email or other user inputs is a basic precautionary step before processing.

In this article, we will see how to validate email on the server-side. PHP provides various alternates to validate email with its built-in constants and functions. Some of them are listed below.

Ways to validate email in PHP

  1. Using FILTER_VALIDATE_EMAIL.
  2. Using pattern matching with regular expression.
  3. By validating the domain name from the email address.

The following quick example uses PHP filter FILTER_VALIDATE_EMAIL. It is the best method of validating email in PHP.

Quick example

<?php
$email = '[email protected]';
isValidEmail($email); // using FILTER_VALIDATE_EMAIL - this is the best option to use in PHP
function isValidEmail($email)
{ return filter_var($email, FILTER_VALIDATE_EMAIL) !== false;
}
?>

php validate email

Let us see other methods to validate email using PHP script.

Using FILTER_SANITIZE_EMAIL for input sanitization

The FILTER_SANITIZE_EMAIL is used to clean the email data submitted by the user.

In this example, the $email is hard coded with an example email address. You can supply email input from the form data posted to PHP using GET or POST methods.

It adds a prior step to sanitize the email data before validating its format. For validating the format of the sanitized email data, it uses FILTER_VALIDATE_EMAIL.

filter-sanitize-email.php

<?php
// this script explains the difference between FILTER_SANITIZE_EMAIL and FILTER_VALIDATE_EMAIL // validation is to test if an email is in valid email format and FILTER_VALIDATE_EMAIL should be used.
// sanitization is to clean an user input before using it in the program and FILTER_SANITIZE_EMAIL should be used.
$email = "[email protected]";
$cleanEmail = filter_var($email, FILTER_SANITIZE_EMAIL); // after sanitization use the email and check for valid email or not
if (filter_var($cleanEmail, FILTER_VALIDATE_EMAIL)) { // the email is valid and use it
}
?>

Using pattern matching with regular expression

If you are expecting a regex pattern to validate the email format, this example code will help.

This code has a regex pattern in a variable and is used to validate email with PHP preg_match().

In PHP, the preg_match() is for pattern matching with a given subject that is an email address here.

This code has the validateWithRegex() function to process the PHP email validation. It applies converts the input email string to lower case and trims before applying preg_match().

Then, it returns a boolean true if the match is found for the email regex pattern.

email-regex.php

<?php
validateWithRegex($email); // Using regular expression (regex). If for some reason you want to validate email via a regex use this
// function. The best way to validate is via FILTER_VALIDATE_EMAIL only.
function validateWithRegex($email)
{ $email = trim(strtolower($email)); // the regex I have used is from PHP version 8.1.7 which is used in php_filter_validate_email // reference: https://github.com/php/php-src/blob/PHP-8.1.7/ext/filter/logical_filters.c#L682 $emailRegex = '/^(?!(?:(?:\\x22?\\x5C[\\x00-\\x7E]\\x22?)|(?:\\x22?[^\\x5C\\x22]\\x22?)){255,})(?!(?:(?:\\x22?\\x5C[\\x00-\\x7E]\\x22?)|(?:\\x22?[^\\x5C\\x22]\\x22?)){65,}@)(?:(?:[\\x21\\x23-\\x27\\x2A\\x2B\\x2D\\x2F-\\x39\\x3D\\x3F\\x5E-\\x7E\\pL\\pN]+)|(?:\\x22(?:[\\x01-\\x08\\x0B\\x0C\\x0E-\\x1F\\x21\\x23-\\x5B\\x5D-\\x7F\\pL\\pN]|(?:\\x5C[\\x00-\\x7F]))*\\x22))(?:\\.(?:(?:[\\x21\\x23-\\x27\\x2A\\x2B\\x2D\\x2F-\\x39\\x3D\\x3F\\x5E-\\x7E\\pL\\pN]+)|(?:\\x22(?:[\\x01-\\x08\\x0B\\x0C\\x0E-\\x1F\\x21\\x23-\\x5B\\x5D-\\x7F\\pL\\pN]|(?:\\x5C[\\x00-\\x7F]))*\\x22)))*@(?:(?:(?!.*[^.]{64,})(?:(?:(?:xn--)?[a-z0-9]+(?:-+[a-z0-9]+)*\\.){1,126}){1,}(?:(?:[a-z][a-z0-9]*)|(?:(?:xn--)[a-z0-9]+))(?:-+[a-z0-9]+)*)|(?:\\[(?:(?:IPv6:(?:(?:[a-f0-9]{1,4}(?::[a-f0-9]{1,4}){7})|(?:(?!(?:.*[a-f0-9][:\\]]){7,})(?:[a-f0-9]{1,4}(?::[a-f0-9]{1,4}){0,5})?::(?:[a-f0-9]{1,4}(?::[a-f0-9]{1,4}){0,5})?)))|(?:(?:IPv6:(?:(?:[a-f0-9]{1,4}(?::[a-f0-9]{1,4}){5}:)|(?:(?!(?:.*[a-f0-9]:){5,})(?:[a-f0-9]{1,4}(?::[a-f0-9]{1,4}){0,3})?::(?:[a-f0-9]{1,4}(?::[a-f0-9]{1,4}){0,3}:)?)))?(?:(?:25[0-5])|(?:2[0-4][0-9])|(?:1[0-9]{2})|(?:[1-9]?[0-9]))(?:\\.(?:(?:25[0-5])|(?:2[0-4][0-9])|(?:1[0-9]{2})|(?:[1-9]?[0-9]))){3}))\\]))$/iDu'; if (preg_match($emailRegex, $email) === 1) { return true; } else { return false; }
}
?>

By validating the domain name from the email string

This method is a very simple one for validating email. It validates email by ensuring its host DNS validness.

It uses the PHP checkdnsrr() function to validate DNS by a hostname or the site IP address.

This function returns a boolean true if the host has any DNS records found. And thereby, the email in that host can be considered in a valid format.

It follows the below list of steps.

  1. It extracts the domain name from the email.
  2. It extracts the username prefixed before the @ symbol.
  3. It ensures that the username and domain name are not empty.
  4. It checks if the DNS details are not empty about the host extracted from the input email.

domain-validate-email.php

<?php // simplest custom email validation using email's domain validation
function validateEmail($email)
{ $isEmailValid = FALSE; if (! empty($email)) { $domain = ltrim(stristr($email, '@'), '@') . '.'; $user = stristr($email, '@', TRUE); // validate email's domain using DNS if (! empty($user) && ! empty($domain) && checkdnsrr($domain)) { $isEmailValid = TRUE; } } return $isEmailValid;
}
?>

Download

↑ Back to Top

Posted on Leave a comment

JavaScript localStorage – Simple Guide with Example

by Vincy. Last modified on August 21st, 2022.

This article is for learning how to use JavaScript localStorage to put a string or object into it. This is for storing data in the client browser and use it when the need arises.

Data storage is a critical part of programming. These are the scenarios the localStorage used for adding persistency on the client-side.

  1. To store the session and the unique identity of a guest user to manage the state of his selection.
  2. To store shopping cart selected items on the client-side.
  3. To store language preferences to display content on a multilingual site.
  4. To store user preferences to display data, time and timezone as selected on the client.

Let us see a quick example of using the JavaScript localStorage to store an object. It prepares a JSON object of an array of data and put it into the localStorage.

Quick example

var animalObject = { 'Lion': 'Wild', 'Dog': 'Domestic'
}; // flatten the animal object as a string
animalString = JSON.stringify(animalObject); //store the string into local storage
localStorage.setItem('animals', animalString);

Quick example output

Log this localStorage object into the developer’s browser console to display the following output.

Object from local storage: {Lion: 'Wild', Dog: 'Domestic'}

In a previous tutorial, we used JavaScript localStorage to create a persistent shopping cart.

javascript localstorage howto store object

What is localStorage?

The JavaScript localStorage is the global window object property. It is used to store the data to carry over page-to-page.

It is one of the storage mechanisms coming under the Web Storage API.

It can not replace the server-side solutions providing persistency. But, it is a good mechanism for non-dynamic websites.

It contains a handle to access the local storage space of the browser origin.

Properties

Web Storage API

Web Storage API provides two concepts to store the objects having data in a key: value format.

  1. window.localStorage
  2. window.sessionStorage

Both use different Storage instances and control the actions separately.

This storage object is similar to the JavaScript localStorage. But, it has an expiration time.

It is valid only on the current browser session. When closing and reloading the browser, then the sessionStorage object is elapsed.

The expiration time is the main difference between these two storage concepts.

How to set and get items in JavaScript localStorage?

This example is for learning a basic usage of the JavaScript localStorage object. It performs the following actions on the localStorage about a String item.

  1. To set an item as a key-value pair.
  2. To get the value of an item by key.
  3. To remove an item by key.
  4. To clear the entire localStorage.
  5. To get the key by item index position.

This localStorage class contains functions used to perform the above actions. This program uses these functions with appropriate parameters.

basics.html

<html>
<head>
<title>JavaScript localStorage Example and how to store a JavaScript object</title>
</head>
<body> <script> // set item in localstorage window.localStorage.setItem('king', 'Lion'); console.log("Local Storage Key-Value = " + JSON.stringify(window.localStorage) + "\n"); // get item from JavaScript localStorage window.localStorage.getItem('king'); console.log("Local Storage Value = " + window.localStorage.getItem('king') + "\n"); // to get name of key using index var indexPosition = parseInt(window.localStorage.length) -1; var KeyName = window.localStorage.key(indexPosition); console.log("Local Storage Key = " + KeyName + "\n"); // remove item from JavaScript localStorage window.localStorage.removeItem('king'); // to clear all items from localStorage window.localStorage.clear(); </script>
</body>
</html>

Output

The above program displays the following output. It is for printing the localStorage data, it’s key and value based on the appropriate function calls.

Local Storage Key-Value = {"king":"Lion"} Local Storage Value = Lion Local Storage Key = king

Store JavaScript object in HTML5 browser localStorage

This example is to store an object in the JavaScript localStorage. It proceeds with the following steps to achieve this.

  1. It builds a JSON object to have a property array.
  2. It converts the object into a string using JSON stringify.
  3. Then put the JSON string into the localStorage.

Like the above basic example, it calls the getItem() by object key to get the property mapping.

The retrieved string output from the localStorage is converted back to an object. The example outputs the converted object to the browser console.

index.html

<html>
<head>
<title>JavaScript localStorage Example and how to store a JavaScript object</title>
</head>
<body> <h1>JavaScript localStorage Example and how to store a JavaScript object</h1> <script> // Example: Store JavaScript object in HTML5 browser localStorage var animalObject = { 'Lion' : 'Wild', 'Dog' : 'Domestic', 'Tiger' : 'Wild' }; // flatten the object as a string animalString = JSON.stringify(animalObject); //store the string into local storage localStorage.setItem('animals', animalString); //retrieve the string from local storage var retrievedString = localStorage.getItem('animals'); // parse the string back to an object convertedObject = JSON.parse(retrievedString); console.log('Object from local storage: ', convertedObject); </script>
</body>
</html>

Output

Object from local storage: {Lion: 'Wild', Dog: 'Domestic', Tiger: 'Wild'}

We learned how to use JavaScript localStorage to set a String or an Object and use it later when needed.

↑ Back to Top