Posted on Leave a comment

WooCommerce Stripe Payment Gateway Integration in Easy Steps

by Vincy. Last modified on June 8th, 2022.

Payment gateway integration is an important module in building an eCommerce website. For a WooCommerce store, there are several options to integrate a payment gateway.

A payment gateway is to enable an online payment feature at the end of the e-shopping process. There are numerous payment gateway providers that give secured, authentic payment processes via the eCommerce application.

The below list shows some of the examples payment gateway providers for the WooCommerce store.

  1. PayPal
  2. Stripe
  3. AfterPay
  4. Amazon Pay
  5. PayFast
  6. Square and more…

Stripe is one of the best choices that provides good payment services..

Reasons to have Stripe for WooCommerce

First, we will see why Stripe is the best to have this payment option regardless of WooCommerce. Then, we can see the combined advantages of having Stripe in WooCommerce.

Stripe is one of the most widely used payment gateway providers. It is a worldwide popular solution for card payments. It has several advantages and they are,

  • Ease of integration and use.
  • Reasonable transaction fee and conversion rate.
  • Seamless experience with credit or debit card payments.
  • Secure payment lifecycle with proper webhook registrations.

Merits of integrating Stripe in WooCommerce

  • Accepts all popular credit or debit card payments via web or mobile.
  • Embedded inline Stripe payment elements instead of redirecting. It will reduce drop offs and increase the conversion rates.
  • By using popular WooCommerce Stripe plugins, it results robust solutions for making payments.
  • Possibility for easy upgrading to get latest and additional features.

woocommerce stripe payment

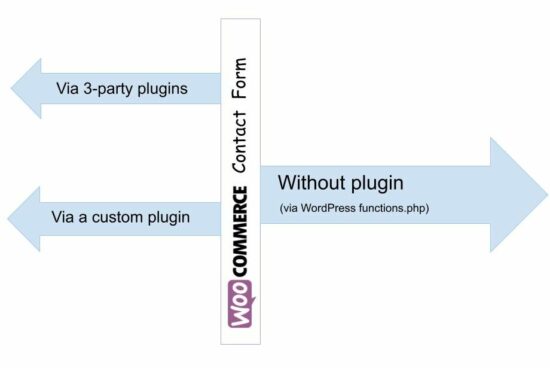
Methods of integrating Stripe in a WooCommerce store

Various plugins are there to integrate a Stripe payment gateway. Three of them are listed below.

  1. WooCommerce Stripe Payment Gateway
  2. Payment Plugins for Stripe WooCommerce
  3. Accept Stripe Payments

The following sections describe these plugins and show how to use them to set up the Stripe payment.

Note: Before starting integration, get the Stripe API keys.

1. WooCommerce Stripe Payment Gateway plugin

This is with the latest possible version and the highest number of active installations. Let’s see its features and advantages below.

Version 6.4.0
Active Installations 900,000+
Last Updated 1 day ago

Features

  • Accepts majority of the card payments.
  • Supports Apple Pay, Google Pay, and Microsoft Pay based on the client.
  • Builds an inline Stripe payment with WooCommerce instead of redirecting to the hosted services.
  • Supports extensions like WooCommerce Subscriptions.
  • Supports connecting Web Payment API to pay via mobile devices.

Advantages

  • Keeps track of customer instances and saves time on successive payments.
  • Allows quick checkout with touch or face authentication with Apple ID.
  • Supports quick payments with a few taps using Web Payment API services.

Steps to integrate

Download this plugin from the official website and unzip it into the WordPress plugin directory. Then, log in to WordPress admin and go to Plugins->Installed Plugins to activate the plugin.

This plugin helps to create a stripe payment in a shopping cart in 2 steps. Click plugin settings and follow the steps below.

  1. Choose test mode and set up the keys (Publishable, Secret key and Webhook secret key).
  2. Configure Express Checkout settings. It also allows customizing the Stripe payment element.

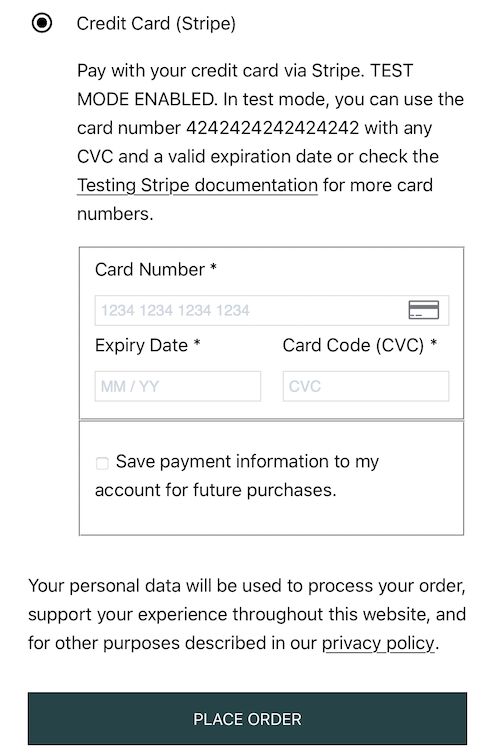
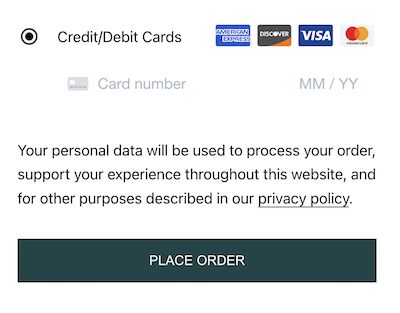
Stripe element in WooCommerce checkout

Once done with the setup, the front-end shop displays the option to checkout with Stripe. The following screenshot shows the Stripe (card only) option on the WooCommerce place-order page.

WooCommerce Stripe

2. Payment Plugins for Stripe WooCommerce

It supports card payments, mobile payments, direct electronic payments like ACH and more.

It requires WordPress version 5.6 or higher. The key information on the plugin state is shown in the below table.

Version 3.3.19
Active Installations 80,000+
Last Updated 2 months ago

Features

  • Supports browser payments like Google Pay and Apple Pay in the product, cart, and checkout pages.
  • Provides 3D secure 2.0.
  • Allows add-ons like WooCommerce Subscriptions, Pre-Orders and Blocks.

Advantages

  • It’s an official Stripe partner by which it has high dependability and trustworthiness.
  • It has less friction and makes easy seamless payments to increase the conversion rate.

Steps to integrate

Download plugin and set it up in the WordPress shop. Go to plugin settings to configure the Stripe keys and more directives.

The settings page contains many tabs to group the configurations. Let’s see some of the configurations of the plugin settings.

API Settings to choose test or live modes.
to set Stripe API keys and webhook settings.
Advanced Settings to switch-on installment-based payments.
to enable event-based tracking. Example: trigger refund on cancellation; put on hold when a dispute is raised.
to enable sending receipts by email.
Credit / Debit Cards to configure Stripe credit card element settings.

Other than the above, the payments tab has configurations related to the different gateways like Apple Pay and all.

This plugin provides many settings to configure. For the first step configure the following settings to confirm that the Stripe payment has been integrated.

  • API key and webhook configuration.
  • Stripe card element fields customization.

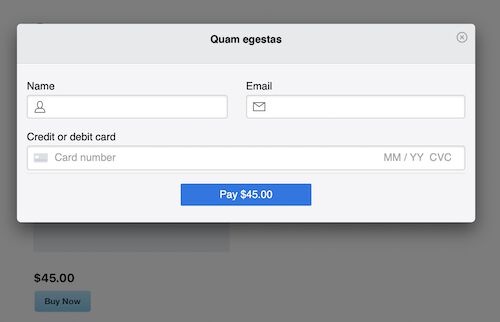
Output Stripe payment option

WooCommerce Stripe Card Element

3. Accept Stripe Payments

It places Stripe’s ‘Buy Now’ button in the UI. It allows purchasing goods or digital products or services. It embeds the Stripe payment element via shortcode.

It requires WordPress version 5.0 or higher and PHP version 5.6 or higher. It is the second recently updated plugin among the three we have taken for comparison.

Version 2.0.63
Active Installations 40,000+
Last Updated 1 week ago

Features

  • Provides a single-tap payment solution with a remember me feature.
  • Keeps track of the transactions in the WordPress admin.
  • Allows selling digital products, media assets and more.
  • Allows branding the WooCommerce shop by showing the website logo in the payment window.
  • Sends email notification to the buyer and the seller.
  • Provides options for future payments with the “Authorize Only” directive.

Advantages

  • Renders a responsive Stripe payment panel.
  • Allows Stripe element’s customization with CSS to match the WooCommerce theme.
  • Gets additional data from the customers using custom fields.
  • Secure payment with 3DS authentication and SCA.

Steps to integrate

Download Accept Stripe Payments plugin from the WordPress official repository. Then activate this plugin and configure it to render the Stripe payment option in the WooCommerce front end.

It allows a WordPress website to sell products without WooCommerce. Follow the below steps to configure a preliminary level of Stripe payment settings.

  • Open plugin settings and configure API keys.
  • Go to Stripe payments -> Products to add ASP products. This step creates the asp-product-shortcode differentiated with the appropriate product id.
  • Create a page or post and map the ASP product to be displayed with a Stripe “Buy Now” button.

This plugin has 4 settings tabs classified by having the configurations of Accept Stripe Payments feature.

  • General settings
  • Email settings
  • Advanced settings
  • Captcha

General Settings

  1. When activating this plugin it creates the ‘Thank you’ and ‘ASP product’ pages. The general settings populate these links.
  2. The product-add action creates the ASP shortcode to be mapped to display the products’ purchase options.
  3. It contains settings to configure price and currency.
  4. To enable Billing Zipcode validation to prevent anonymous billing entries.
  5. Mainly, this tab has the fields to set the Stripe API keys and to toggle between a test or live mode.

Email Settings

  • This is to enable sending order receipts via an email notification.
  • Configure the target address of the buyer and seller to send the receipt.
  • It allows customizing email templates.

Advanced Settings

This tab is used to configure the display element of price, custom fields, terms and more.

  • Price settings – to add currency position, decimal point separator, number format with a thousand separator.
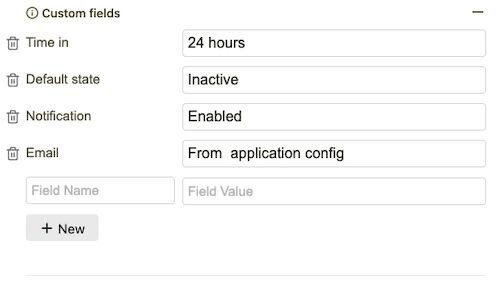
  • Custom Field Settings – to add options to get extra information for buyers.

Captcha

This plugin strongly recommends enabling captcha to prevent malicious attacks.  It provides two types of captcha services.

wordpress stripe buy now

Conclusion

Since, Stripe payment is a widely used solution, demonstrating payment integration may guide novice and expert developers.

In this article, we have seen three Stripe plugins to set up the payment gateway. The majority of them are WooCommerce plugins.

Also, we saw how to accept payments via a WordPress store without the WooCommerce plugin.

I hope, these choices help to enable the Stripe payment on your WooCommerce website. The wide scope of customization will help to create a unique Stripe element for WooCommerce.

↑ Back to Top

Posted on Leave a comment

WordPress WooCommerce Contact Form Plugin with Widget

by Vincy. Last modified on May 31st, 2022.

Earlier we learnt about WordPress widgets and their uses. Also, we saw how to create a custom widget and include them in the frontend template.

This is a continuity of the guide series to create a WooCommerce contact form. This is yet another method to enable a contact form component. It uses WordPress widgets to achieve this.

The contact form widget can be rendered in the WooCommerce UI. It can be rendered in the shop theme’s registered widget area. This article guides how to render a contact form in a default widget area.

Advantages of WordPress widgets

Creating and using widgets for a WordPress site has many advantages. Some of them are listed below.

  • It adds abstraction by segregating a unit of logic from the usual flow.
  • It increases performance and speed by priority-based loading of widgets.
  • It acts as an add-on feature that can be enabled/disabled on a need basis.
  • It adds security by dynamic loading of components and templates.

WordPress contact form plugin for registering the widget

This method creates a WordPress contact form plugin to register the widget instance. This widget is registered for displaying a contact form component in the widget area.

The plugin file creates the custom widget which inherits the WordPress widget class.

The custom widget class method loads the contact form template file reference. It is to get the content from the template HTML and render it into the widget area. Then, the WordPress contact form plugin registers the custom widget.

After registering, this instance can be viewed in the existing widgets components panel.

Widget Component Grid

The following WordPress contact form plugin code shows the sub-class of the WP-Widget.

This plugin class inherits the WP-Widget class and overrides the widget() method. In this method, it constructs and outputs the widget UI HTML.

This plugin registers the widget by WordPress contact form plugin class name. This registration will happen on the init action of the WordPress widget.

<plugin-directory>/contact-form-widget/contact-form-widget.php


<?php
/* * Plugin Name: Contact form Widget * Plugin URI: https://phppot.com * Description: Sidebar widget contact form * Author: Vincy * Author URI: https://phppot.com * Version: 1.0.0 * Slug: content */ class Contact_Form_Widget extends WP_Widget { function __construct() { parent::__construct( 'Form_Widget', 'Contact Form Widget', array( 'description' => 'To render contact form in a default widget area', ) ); } function widget( $args, $instance ) { $contactFormHTML = getContactHTML('template-parts/contact-form' ); echo $args['before_widget']; echo $args['before_title'] . "Contact us" . $args['after_title']; echo $contactFormHTML; echo $args['after_widget']; }
} function register_contact_form_widget() { register_widget( 'Contact_Form_Widget' );
}
add_action( 'widgets_init', 'register_contact_form_widget' );

Contact form template, assets for WooCommerce shop

The theme files have the WooCommerce contact form templates and styles. A child theme is created for this example to do the theme-specific changes.

The child theme’s functions.php returns the WooCommerce contact form template HTML. The getContactHTML() function receives the WordPress template-parts slug and the filename. It uses the get_template_part() function to get the template HTML.

The WordPress contact form plugin file calls this method to grab the content.

<child-theme-directory>/functions.php


<?php /** * Enqueues scripts and styles for front end. * * @return void */
function woocommerce_contact_form_styles()
{ wp_enqueue_style('theme-style', get_stylesheet_directory_uri() . '/style.css'); wp_enqueue_script('contact-form-jquery', 'https://code.jquery.com/jquery-3.6.0.min.js', array(), null); wp_enqueue_script('contact-form-script', get_stylesheet_directory_uri() . '/assets/js/form.js', array(), null);
}
add_action('wp_enqueue_scripts', 'woocommerce_contact_form_styles'); function send_contact_email()
{ $customerName = filter_var($_POST["customer_name"], FILTER_SANITIZE_STRING); $customerEmail = filter_var($_POST["customer_email"], FILTER_SANITIZE_STRING); $customerMessage = filter_var($_POST["customer_message"], FILTER_SANITIZE_STRING); $to = 'Recipient email here'; $subject = 'Product enquiry'; $body = 'The customer details: <br/><br/>'; if (! empty($customerName)) { $body = 'Customer Name:' . $customerName . '<br/>'; $body .= 'Customer Email:' . $customerEmail . '<br/>'; $body .= 'Customer Message:' . '<br/>'; $body .= $customerMessage . '<br/>'; } $headers = array( 'Content-Type: text/html; charset=UTF-8' ); $emailSent = wp_mail($to, $subject, $body, $headers); print $emailSent; exit();
}
add_action("wp_ajax_nopriv_send_contact_email", "send_contact_email"); // Get contact form template and return the HTML response in a variable
function getContactHTML($slug, $name = null)
{ ob_start(); get_template_part($slug, $name); $content = ob_get_contents(); ob_end_clean(); return $content;
}

Also, this file contains the mail sending script with the send_contact_email() function. It mail sending and assets en-queueing scripts will be familiar. Because they are as same as that of creating for the last WooCommerce contact form articles.

This contact form template contains inputs to collect customers’ details and messages.

template-parts/contact-form.php


<?php
/** * Template part for displaying posts * * @link https://developer.wordpress.org/themes/basics/template-hierarchy/ * * @package WordPress * @subpackage Twenty_Twenty_One * @since Twenty Twenty-One 1.0 */ ?>
<div id="woocommerce-contact-form"> <form method="post" id="frmContactForm" action=""> <div class="display-flex"> <input name="customer_name" id="customer_name" placeholder="Name" /><input name="customer_email" id="customer_email" placeholder="Email" /> </div> <div> <textarea name="customer_message" id="customer_message" placeholder="Enquire seller about order, product.."></textarea> </div> <div> <input type="submit" name="send_mail" class="btn-send" value="Send Enquiry" /> </div> <div id="response"></div> </form>
</div>

This is the WordPress default widget area to add the widget component. In this theme, it registers the footer panel as the default widget area. It is the drop area to render the chosen widget from the existing options.

Go to Appearance->widgets via the WordPress admin to this option. But, complete widgetising by using the register_widget() method to see this option.

Add Widget Block

WordPress contact form widget plugin output

The below screenshot is the final output of the WordPress contact form plugin output. Thus, the WooCommerce footer panel displays the contact form component to send enquiry.

Wordpress Contact Form Widget in UI

How to add a widget in the WordPress legacy editor

The above method uses blocks to render the registered contact form widgets. In a legacy editor, it contains a drag and drops area to move the widget components into the default widget area.

By navigating Appearance->Widgets it displays the draggable widget cards in the panel. Also, it shows the drop area to build the widget panel to be displayed on the front end.

lagacy wordpress widget editor

If you want to test this in your widget editor, add the following code in the theme’s functions.php. There are also plugins to restore the legacy editor in the WordPress admin.


<?php
function example_theme_support() { remove_theme_support( 'widgets-block-editor' );
}
add_action( 'after_setup_theme', 'example_theme_support' );

3rd-party WordPress contact form plugin registers widgets

There are existing 3rd-party contact form widgets available. For example, the contact form widget plugin provides an easy-to-use component. It renders an enquiry form in the WooCommerce shop.

It contains 25+ features including a form builder. Instead of creating a custom code, an existing solution is preferable to get a quick output.

Conclusion

We have learned how to create a WordPress contact form plugin that uses widgets to render the HTML. I hope, the procedure is easy to follow and helps to create a custom widget on your own.

All the examples of the WooCommerce contact form cover all implementation methods. It will help to choose one among them on the need of the shop.

↑ Back to Top

Posted on Leave a comment

Create WooCommerce WordPress Contact Form Without Plugin

by Vincy. Last modified on May 26th, 2022.

Creating a WordPress contact form without plugins is easy. In the last two articles, we have seen how to build a WooCommerce contact form with the use of plugins.

Plugins are the right placeholders for having add-on features to a WordPress website. And they have global references that enable/disable the add-ons with configurable directives.

We have already seen the existing plugins for creating the WordPress contact form. Also, we have learned how to create a custom plugin to achieve the same.

Though WordPress plugins are systematic solutions, beginners may prefer an easy way. When I was a beginner, I felt it difficult to understand WordPress plugins initially.

This article is for displaying the WordPress contact form without plugins on a product page. It uses the function.php file of the active WordPress theme.

Steps to create WordPress contact form without plugin

Creating a WordPress contact form without plugins is simple only with 3 steps. These steps render the contact form on the WordPress shop and enable mail sending. The simplicity and the less code are the main advantages of this example.

  1. Create a child theme for the active WordPress theme. Then, have a copy of the parent theme assets be overridden.
  2. Put the contact form HTML, CSS and JavaScript into the child theme.
  3. Hook WordPress action/filter hooks from functions.php. It is to enable the WordPress contact form without plugin.

Step 1: Create a WordPress child theme to have contact form files

The functions.php is the right place to initiate WordPress actions without a plugin. In this example, the WordPress contact two major actions are initiated via this file.

  1. Form rendering by loading the templates and assets.
  2. Mail sending on listening WordPress AJAX request.

The functions.php file is in the WordPress theme directory. Having a child theme is a good practice, instead of changing the parent theme files.

Step 1 shows the file structure of the child theme directory. It contains the contact form HTML with “templates” directory. And also, it contains the cloned files functions.php and style.css.

WordPress Contact Form Theme Files

The style.css has the WordPress contact form styles with the standard style sheet header. And the CSS header includes the following.

  • A unique “Theme  Name”.
  • Parent theme reference with “Template” information.
  • Template URI and etc.

/* Theme Name: Twenty Twenty-Two Child Theme URI: https://phppot.com/twentytwentytwo-child/ Description: Twenty Twenty-Two Child Theme Author: Vincy Author URI: https://phppot.com Template: twentytwentytwo Version: 1.0.0 Tags: contact-form, enquiry-form, product-enquiry Text Domain: twentytwentytwo-child
*/ #woocommerce-contact-form { width: 500px; border: #CCC 1px solid; padding: 25px 5px 25px 25px; border-radius: 3px;
} #woocommerce-contact-form input { border: #CCC 1px solid; width: 50%; padding: 10px; margin: 15px 20px 15px 0px; border-radius: 3px;
} #woocommerce-contact-form textarea { border: #CCC 1px solid; width: 96%; border-radius: 3px; box-sizing: border-box; padding: 10px; margin: 15px 20px 15px 0px;
} .display-flex { display: flex;
} #woocommerce-contact-form input.btn-send { color: #FFF; background: #232323; border-radius: 3px; border: #000 1px solid;
} #response { display: none;
}

Step 2: Build WordPress contact form template HTML with JavaScript assets

This section shows the WordPress contact form template file content. It includes the Name, Email and Message fields to collect from the customers.

It gives a minimal form and is adaptable for adding more fields to the need of a WooCommerce shop.


<h3>Product enquiry</h3>
<div id="woocommerce-contact-form"> <form method="post" id="frmContactForm" action=""> <div class="display-flex"> <input name="customer_name" id="customer_name" placeholder="Name" /><input name="customer_email" id="customer_email" placeholder="Email" /> </div> <div> <textarea name="customer_message" id="customer_message" placeholder="Enquire seller about order, product.."></textarea> </div> <div> <input type="submit" name="send_mail" class="btn-send" value="Send Enquiry" /> </div> <div id="response"></div> </form>
</div>

The JavaScript assets are not a huge bundle, but rather a single file with a single function. It simply handles the form validation to let all the fields be mandatory.

After validation, it calls the WordPress endpoint URL via AJAX. This URL maps the WordPress AJAX endpoint URL by using a .htaccess rule.


$(document).ready(function(e) { // WooCommerce product enquiry form submit event handler $("#frmContactForm").on('submit', function(e) { e.preventDefault(); var name = $('#customer_name').val(); var email = $('#customer_email').val(); var message = $('#customer_message').val(); // Validate all fields in client side if (email == "" || message == "" || name == "") { $("#response").show(); $("#response").text("All fields are required."); } else { $("#response").hide(); $('.btn-send').hide(); $('#loader-icon').show(); // Post form via wp-ajax $.ajax({ url: "/wordpress/send-contact-email/", type: "POST", data: $("#frmContactForm").serialize(), success: function(response) { $("#response").show(); $('#loader-icon').hide(); if (!response) { $('.btn-send').show(); $("#response").html("Problem occurred."); } else { $('.btn-send').hide(); $("#response").html("Thank you for your message.") }; }, error: function() { } }); } });
});

Step 3: Hook WordPress filters and actions from functions.php

The functions.php initiates the WordPress action/filter hooks with the callback functions. It is as similar as we did with the plugins.

It prefixed the WordPress template URI to load the contact form HTML and en-queue the scripts. It uses get_stylesheet_directory_uri() to get the child-theme directory path.

By using  get_template_directory_uri() , it will refer to the parent theme directory path. Then, it will return 404 error on the developer console. It happens on loading the child theme templates and assets with the parent path.

It has three hooks to enable the WordPress contact form without plugin on a WordPress store. Those are,

Hook name Type Function
the_content Filters Receives the current page content and appends the WordPress contact form HTML into it.
wp_enqueue_scripts Actions Enqueues the child theme styles, validation script and jQuery library via CDN.
wp_ajax_nopriv_send_contact_email Actions Calls mail sending script by listening the request with the URL wp-admin/admin-ajax.php?action=send_contact_email

<?php function load_contact_form($contactHTML) { // Load the contact form on a single product page if ( is_product() ){ $template_path = get_stylesheet_directory_uri() . '/templates/contact-form.php'; $contactHTML .= file_get_contents( $template_path); } return $contactHTML; }
// add filter to hook 'the_content' with a plugin functions.
add_filter('the_content', 'load_contact_form'); /** * Enqueues scripts and styles for front end. * * @return void */
function woocommerce_contact_form_styles()
{ if (is_product()) { wp_enqueue_style( 'theme-style', get_stylesheet_directory_uri() . '/style.css' ); wp_enqueue_script('contact-form-jquery', 'https://code.jquery.com/jquery-3.6.0.min.js', array(), null); wp_enqueue_script('contact-form-script', get_stylesheet_directory_uri() . 'assets/js/form.js', array(), null); }
}
add_action('wp_enqueue_scripts', 'woocommerce_contact_form_styles'); function send_contact_email()
{ $customerName = filter_var($_POST["customer_name"], FILTER_SANITIZE_STRING); $customerEmail = filter_var($_POST["customer_email"], FILTER_SANITIZE_STRING); $customerMessage = filter_var($_POST["customer_message"], FILTER_SANITIZE_STRING); $to = 'Recipient email here'; $subject = 'Product enquiry'; $body = 'The customer details: <br/><br/>'; if(!empty($customerName)) { $body = 'Customer Name:' . $customerName . '<br/>'; $body .= 'Customer Email:' . $customerEmail . '<br/>'; $body .= 'Customer Message:' . '<br/>'; $body .= $customerMessage . '<br/>'; } $headers = array('Content-Type: text/html; charset=UTF-8'); $emailSent = wp_mail( $to, $subject, $body, $headers ); print $emailSent; exit;
}
add_action("wp_ajax_nopriv_send_contact_email", "send_contact_email"); 

Conclusion

Thus, we have created a WordPress contact form without any 3rd-party or custom plugins. We have seen how to hook the WordPress filter callbacks. It helped to make the changes in WordPress core behavior.

The hooks made changes to the product page of the shop. It appends a WordPress contact form without plugin using the functions.php file.

The child theme via implementation will give you an idea to repeat the same for any components. For example, member subscription form, social share and more components.

↑ Back to Top

Posted on Leave a comment

How to Create WooCommerce Product Enquiry Form using Custom Plugin

by Vincy. Last modified on May 23rd, 2022.

In the last article I wrote about setting up a WooCommerce product enquiry form using existing third-party plugins. There are many WordPress plugins for having an enquiry form on a WordPress site.

As a developer we can build a WooCommerce product enquiry form custom plugin easily. It will be lightweight, good for enhancement and maintenance, above all fun too.

The 3-party plugins give a massive package with voluminous functionalities and features. They have form builders, email template builders and all.

For having an enquiry form with a few fields, it can be customized simply without third party bundles. It helps to have a tiny and self-manageable code which is best.

If you want to know how to create a WooCommerce contact form with 3-party plugins, see my last article linked.

woocommerce contact form embed

Steps to create a WooCommerce product enquiry form plugin

  1. Create a contact form plugin directory and file.
  2. Design a WooCommerce product enquiry form template.
  3. Create the CSS and JavaScript assets of a plugin.
  4. Load the form templates into the page content.
  5. Enqueue the WordPress plugin assets.
  6. Send product enquiry via WordPress AJAX on form submit.
  7. Hook wp_ajax to send product enquiry mail.

Create a contact form plugin directory and file

Create a directory named “woocommerce-contact-form” in the WordPress plugin directory.

<wordpress-application-root>/wp-content/plugins/

Then, create a file woocommerce-contact-form.php into it with the following plugin header. The header must have the plugin name, URI, author and more details.


/* Plugin Name: WooCommerce Contact Form Plugin URI: https://phppot.com Description: A simple custom enquiry form plugin to a WooCommerce site. It has name, email and message fields to collect data from the customers. Version: 1.0 Author: Vincy Author URI: https://phppot.com */

Design WooCommerce product enquiry form

Create a template file inside the plugin directory as <woocommerce-contact-form>/templates/contact-form.php.

Put this HTML into the file to display a contact form with Name, Email and Message fields.

This template file is loaded into the product page using a WordPress filter hook via this plugin.


<h3>Product enquiry</h3>
<div id="woocommerce-contact-form"> <form method="post" id="frmContactForm" action=""> <div class="display-flex"> <input name="customer_name" id="customer_name" placeholder="Name" /><input name="customer_email" id="customer_email" placeholder="Email" /> </div> <div> <textarea name="customer_message" id="customer_message" placeholder="Enquire seller about order, product.."></textarea> </div> <div> <input type="submit" name="send_mail" class="btn-send" value="Send Enquiry" /> </div> <div id="response"></div> </form>
</div>

Create plugin assets

This plugin uses simple CSS and JavaScript assets. The CSS provides minimal styles to make the enquiry form suit any shop theme.

If you want to change this WooCommerce product enquiry form theme, this CSS file will be useful.


#woocommerce-contact-form { width: 500px; border: #CCC 1px solid; padding: 25px 5px 25px 25px; border-radius: 3px;
} #woocommerce-contact-form input { border: #CCC 1px solid; width: 50%; padding: 10px; margin: 15px 20px 15px 0px; border-radius: 3px;
} #woocommerce-contact-form textarea { border: #CCC 1px solid; width: 96%; border-radius: 3px; box-sizing: border-box; padding: 10px; margin: 15px 20px 15px 0px;
} .display-flex { display: flex;
} #woocommerce-contact-form input.btn-send { color: #FFF; background: #232323; border-radius: 3px; border: #000 1px solid;
} #response { display: none;
}

JavaScript enquiry form validation and submission via AJAX

This script uses jQuery to handle form validation and submit the posted data via AJAX.

All the fields are required to be entered to send the product enquiry from the WooCommerce page.

Once the conditions return true, then the jQuery AJAX will serialize the form data and post it to the server.

All client-side and server-side responses are sent to UI using jQuery .text().


$(document).ready(function(e) { // WooCommerce product enquiry form submit event handler $("#frmContactForm").on('submit', function(e) { e.preventDefault(); var name = $('#customer_name').val(); var email = $('#customer_email').val(); var message = $('#customer_message').val(); // Validate all fields in client side if (email == "" || message == "" || name == "") { $("#response").show(); $("#response").text("All fields are required."); } else { $("#response").hide(); $('.btn-send').hide(); $('#loader-icon').show(); // Post form via wp-ajax $.ajax({ url: "/wordpress/send-contact-email/", type: "POST", data: $("#frmContactForm").serialize(), success: function(response) { $("#response").show(); $('#loader-icon').hide(); if (!response) { $('.btn-send').show(); $("#response").html("Problem occurred."); } else { $('.btn-send').hide(); $("#response").html("Thank you for your message.") }; }, error: function() { } }); } });
});

The AJAX script points to a URL that is mapped with the wp_ajax endpoint via .htaccess.

The send_contact_email action param hooks the wp_ajax action filter in the plugin file.


# BEGIN Shop
<IfModule mod_rewrite.c>
RewriteRule send-contact-email/ /wordpress/wp-admin/admin-ajax.php?action=send_contact_email [L,QSA]
</IfModule>
# END Shop

WooCommerce product enquiry form plugin file

This is the main file that hooks the required action and filter callback of WordPress. These callbacks are to do the following by activating this plugin.

  1. Load the contact form template using ‘the_content’ filter hook.
  2. Enqueue the form.css and form.js files created for this WooCommerce product enquiry form. (Also enqueued the jQuery CDN path).
  3. Hook the wp_ajax_nopriv_* to execute the send_contact_email callback by listening the AJAX request.

The load_contact_form function reads the template content by using PHP file_get_contents() function. It appends the content to the page content on a condition basic.

Before adding the WooCommerce product enquiry form it checks if it is a product page. If so, is_product() returns boolean true.


<?php function load_contact_form($contactHTML) { // Load the contact form on a single product page if ( is_product() ){ $template_path = plugin_dir_path( __FILE__ ) . 'templates/contact-form.php'; $contactHTML .= file_get_contents( $template_path); } return $contactHTML; }
// add filter to hook 'the_content' with a plugin functions.
add_filter('the_content', 'load_contact_form'); /** * Enqueues scripts and styles for front end. * * @return void */
function woocommerce_contact_form_styles()
{ if (is_product()) { wp_enqueue_style('contact-form-style', plugin_dir_url( __FILE__ ) . 'assets/form.css', array(), null); wp_enqueue_script('contact-form-jquery', 'https://code.jquery.com/jquery-3.6.0.min.js', array(), null); wp_enqueue_script('contact-form-script', plugin_dir_url( __FILE__ ) . 'assets/form.js', array(), null); }
}
add_action('wp_enqueue_scripts', 'woocommerce_contact_form_styles'); 

Hook wp_ajax action with the contact email sending callback

The below code is part of the woocommerce_contact_form.php plugin file. It defines a callback send_contact_email().

The WooComerce product enquiry form plugin has the action and filter callbacks. It is called when it receives the wp_ajax request from the following URL.

/wordpress/wp-admin/admin-ajax.php?action=send_contact_email.

It builds the wp_mail() parameters to send the product enquiry to the shop admin or seller. The $to holds the recipient’s address.

It builds the mail body with the data posted via the WooCommerce product enquiry form.

Using wp_mail() is a simple way of sending email via WordPress. It is as similar to PHP mail as it has a one-line code for sending emails. You may configure SMTP to send email via WordPress.

 function send_contact_email()
{ $customerName = filter_var($_POST["customer_name"], FILTER_SANITIZE_STRING); $customerEmail = filter_var($_POST["customer_email"], FILTER_SANITIZE_STRING); $customerMessage = filter_var($_POST["customer_message"], FILTER_SANITIZE_STRING); $to = '[email protected]'; $subject = 'Product enquiry'; $body = 'The customer details: <br/><br/>'; if(!empty($customerName)) { $body = 'Customer Name:' . $customerName . '<br/>'; $body .= 'Customer Email:' . $customerEmail . '<br/>'; $body .= 'Customer Message:' . '<br/>'; $body .= $customerMessage . '<br/>'; } $headers = array('Content-Type: text/html; charset=UTF-8'); $emailSent = wp_mail( $to, $subject, $body, $headers ); print $emailSent; exit;
}
add_action("wp_ajax_nopriv_send_contact_email", "send_contact_email"); 

WooCommence product page with contact form

With all prerequisites and complete coding of the custom plugin, it’s time to enable it.

Go to WordPress admin and navigate via Plugins->Installed Plugins using the left menu.

You may see the ‘WooCommerce Contact Form’ plugin in the installed list. Activate the plugin and visit the product page of the shop.

See the screenshot shown at the beginning of the article. It displays the WooCommerce product enquiry form on a product page.

Conclusion

Thus, we have created a plugin for a WooCommerce product enquiry form with simple code. If you want any customization with this plugin, please let me know in the comments section.

Let us see the other methods of displaying a contact form on a WooCommerce site in the upcoming article.

↑ Back to Top

Posted on Leave a comment

How to Create a WordPress Woocommerce Contact Form

by Vincy. Last modified on May 19th, 2022.

A contact form is an important component of an eCommerce site. It is for letting the customers connect to the sellers. It allows customers to enquire and send their queries on the order and engage with the seller.

The WordPress WooCommerce plugin helps to create your online shop in a few minutes. It is very easy to create a contact form in the WordPress eCommerce shop.

There are plugins available in the market to customize the WooCommerce contact form. All of them give a shortcode or an option to embed forms into a page.

We can also build a custom solution to render the form into a WooCommerce page.

There are many ways to render the WooCommerce contact form in the template files. For example,

  1. by creating a shortcode with theme’s funtions.php
  2. by using custom or existing WordPress plugins.
  3. by creating a widget for displaying the contact form.

This article shows some of the available plugins to integrate a WooCommerce contact form. It also describes how to configure these plugins to render the form in the shop pages.

Reasons for having a contact form in a WooCommerce store

A WooCommerce contact form is essential for the following reasons.

  1. To let customers raise queries, and support tickets.
  2. To allow discussion about purchases.
  3. To encourage customers to add feedback and comments for improving sales.
  4. To enquire about products and orders.

List of Woocommerce contact form plugins

These are the list of WordPress plugins used to create a WooCommerce contact form. Most of them have the free version and are simple to integrate.

Contact form plugin Number of installations Last updated
WPForms 5+ million 2 weeks ago
Contact Form 7 (CF7) 5+ million 3 month ago
Ninja Forms 1+ million 2 months ago
Formidable Pro 300000+ 2 days ago
Simple Basic Contact Form 10000+ 2 months ago
Contact Form by BestWebSoft 80000+ 2 months ago
Gravity Forms 20000 20000+ 2 weeks ago

Install and activate the WooCommerce plugin to turn a WordPress site into an online shop.

Then, integrate any one of the above plugins to render a WooCommerce contact form on the shop.

In the upcoming sections, we will see the usage mechanism of the free plugins among the above list.

Before that, install WordPress and download the WooCommerce plugin to be installed and activated.

How to create a contact form using WPForms?

The WPForms plugin helps to create a WooCommerce contact form in 5 minutes.

There are two steps to display a contact form on a WordPress WooCommerce page.

  • Customize a contact form using WPForms settings.
  • Embed the WooCommerce contact form into an existing or new page.

For customizing the contact form, follow the below steps with the WordPress admin

  • Go to WpForms -> All Forms via the left menu.
  • Choose the contact form title and the template.
  • Construct the form by drag and drop field tools and save the form.
  • Embed the form into an existing or a newly created page.

Embedding the WooCommerce contact form into the shop template is very easy.

  • Choose the contact form to be embedded.
  • Click the “Embed” option above the form editor which is next to the “Save” button.
  • Choose one among the three ways provided as shown below to embed a WooCommerce contact form.

Embed WooCommerce Contact Form

How to create a WooCommerce contact form using CF7?

Contact form 7 is one of the heavily installed forms customization plugins. It helps to customize a WooCommerce contact form in the following aspects.

Install and activate to build a contact form with a wizard-like customization process.

WooCommerce Contact Form7

Step 1: Customize the form template

It covers all possible form fields to be rendered onto a form template. It has these selectable options above the rich-text editor of the form edit window.

Step 2: Customize the email template

Then, it allows for designing an email template. In this, it has the option to build the email header and the body with the subject and other details.

CF7 Mail Template Customization

Step 3: Configuring the acknowledgment message

The acknowledgment messages guide the end-users. It helps to complete submitting the WooCommerce contact form easily. It is for the following purposes.

  • To respond with a success or failure message.
  • To show a help text on entering wrong formatted data into the form.
  • To alert users to enter all mandatory fields.
  • To alert users to accept conditions or select form content if any.

After successful configurations, save the form template. Then, copy the shortcode for rendering this WooCommerce contact form in the front end.

The shortcode is displayed below the contact form title in the editor window. Put this shortcode in the right template where the contact form is expected to be displayed.

Creates forms with WordPress Ninja Forms plugin

Install the Ninja Forms plugin to deploy a contact form template on a WooCommerce page.

After activating the plugin, the WordPress admin will show the menu. Go to Ninja Forms -> Add New to choose the contact form template.

It also allows extensive customization of a WooCommerce contact form. It slides in a panel of form fields with a drag and drops option.

ninja form builder

There are 4 options to set up emails & actions to be performed on submitting the form.

  1. Record submission: Database storage of the submitted form fields.
  2. Email confirmation: Confirmation message to the customer about the message received status.
  3. Email Notification: Notify the admin about the customer’s attempt to contact him or her.
  4. Success message: Acknowledge the customers via the form UI.

form actions setting

Each action has configurable directives to set the following.

  • It allows configuring the confirmation and notification mails’ subject, body and header.
  • It allows setting the acknowledgment message displayed in the UI.
  • It has options to mark some form fields excluded from storing in the database.

It also contains advanced features to restrict users not logging in. Also, it restricts the number of form submissions with a configured limit.

‘Formidable Pro’ form in a WordPress eCommerce website

It has various FREE or PRO templates of WordPress contact forms.

It gives blank forms to customize form templates without subscription or payment.

It is free and capable of customizing the flow by settings the form title, description and the fields.

formidable pro contact form

Like other contact form plugins, this also has the form builder to drag and drop fields.

It has enough free features to build a WooCommerce contact form. Those are,

  • Enable or disable displaying the form title and description above the form fields.
  • Configuring the after-submit behavior. It can be any one of the following.
    • A response text to display a success or error message.
    • A HTML response from a WordPress page.
    • Redirect to a separate page after submission.
  • Enabling Honey pot integrations to safeguard the form from bots and malicious users.
  • Enabling/disabling spam checking with respect to the on-submit token uniqueness using JavaScript.

woocommerce contact form builder formidable pro

After building the WooCommerce contact form, click update to save the changes.

It is also having the “Embed” option to put the form into a WordPress page. The above image shows the “Embed”, “Preview” and “Update” options in the top right corner.

How to use the Simple Basic Contact Form plugin on a WooCommerce page?

The “Simple Basic Contact Form” is too simple to integrate as it is named. Unlike all the above plugins, it has a single-page setting to configure.

Though it doesn’t have a form builder, it provides a long scrollable list of configurations. These are more than enough to set up a useful WooCommerce contact form.

It includes place holder to include additional contents additional with the form fields. Those are,

  • Form description above and below the fields.
  • Help text above the submit button to guide the customers.
  • Markup of the success or failure responses.
  • Custom CSS to let the WooCommerce contact form be in the theme of the shop.
  • Enable captcha or question challenge.
  • Include stop words.

This settings page contains all minimal form fields required for a contact form. These are like Name, Email, Label, Text and more.

After configuring, add the shortcode [simple_contact_form] into a shop page template. It will render the corresponding form UI to allow customers to convey their doubts about the order placed.

Conclusion

With the use of any one of the above plugins, creating a WooCommerce contact form must be easy. It will enable your shop to let your customer enquire about the placed orders and product customization.

These choices help to choose one among them based on the need of your WooCommerce site.

These plugins have a volume of placeholders to configure. Sometimes, there will be a simple form expected to allow customers to enquire.

If you want a sleek solution instead of these complex configurations, then a custom code is best. Let us see how to create a WooCommerce contact form plugin in the next article.

↑ Back to Top

Posted on Leave a comment

Create JavaScript Shopping Cart with Add to Cart Code

by Vincy. Last modified on May 16th, 2022.

Do you want a shopping cart built entirely in JavaScript? With session / storage everything! With no PHP or server-side code, then read on and rock on.

Earlier I have written a lot of PHP shopping cart code using server-side sessions. Now let us see a similar concept on the client-side to build a JavaScript shopping cart.

The Window.sessionStorage is the right solution to create a session-based shopping cart. It is free from PHP or other server-side code, unlike previous eCommerce examples.

What is sessionStorage?

The sessionStorage is one of the standard JavaScript concepts of WebStorage API. It is a client-side session object that tends to set, get and clear data with respect to it. This object’s persistence is based on the browser’s session availability.

How to build a JavaScript shopping cart using sessionStorage?

The JavaScript shopping cart implementation is possible with sessionStorage like as below. The below table shows the mapping of sessionStorage capability with shopping cart features.

  • setItem() – Add to cart from the shopping gallery by referring to the purchased product id. It also is used to edit a cart item by replacing the value array.
  • getItem() – Read and display the cart items by iterating the sessionStorage object array.
  • removeItem() – Remove a single item from the cart by specifying the item index.
  • clear() – Empty the cart by unsetting the sessionStorage instance.

Shopping cart – checkout – payment

This section shows the execution flow of the JavaScript shopping cart code. It covers “add to cart” to check out and to the payment step.

  • Step 1: On “add to cart” action the sessionStorage object builds the purchased item array.
  • Step 2: Then, it gets the buyer’s payment details on a checkout form.
  • Step 3: Can renders payment options like PayPal with the request parameter array. This array contains purchased items and the buyer’s payment details.
  • Step 4: An alternate to step 3, that is, an email checkout. This suits the shopping cart not dealing with instant payment on the flow.

In this tutorial, we will see steps 1 and 2 of a JavaScript shopping cart. You can integrate with the payment options coded with different articles. Example: Integrate PayPal checkout into the eCommerce website.

JavaScript shopping cart example

This example provides bare minimal features of a Javascript shopping cart. It supports performing the “add to cart” and “clear cart” functionalities via JavaScript.

This code also builds and supplies product gallery HTML from JavaScript.

It is a jQuery-based client-side implementation with the use of JavaScript sessionStorage.

HTML code to display shopping cart UI

This HTML code has placeholders to load UI for the following from JavaScript.

When this document is ready, a JavaScript code prepares HTML for the product grid.

In the product grid, it contains inputs to select a quantity and post to perform the “add to cart” operation.

The cart.js handles the client-side code to perform the shopping cart operations. It will be included in this template.


<div class="container"> <!-- Shopping cart table wrapper --> <div id="shopping-cart"> <div class="txt-heading"> <h1>Shopping cart</h1> </div> <a onClick="emptyCart()" id="btnEmpty">Empty Cart</a> <table class="tbl-cart" cellpadding="10" cellspacing="1"> <thead> <tr> <th>Name</th> <th class='text-right' width="10%">Unit Price</th> <th class='text-right' width="5%">Quantity</th> <th class='text-right' width="10%">Sub Total</th> </tr> </thead> <!-- Cart table to load data on "add to cart" action --> <tbody id="cartTableBody"> </tbody> <tfoot> <tr> <td class="text-right">Total:</td> <td id="itemCount" class="text-right" colspan="2"></td> <td id="totalAmount" class="text-right"></td> </tr> </tfoot> </table> </div> <!-- Product gallery shell to load HTML from JavaScript code --> <div id="product-grid"> <div class="txt-heading"> <h1>Products</h1> </div> <div id="product-item-container"></div> </div> </div>

Client-side code to perform JavaScript shopping cart actions

This script performs the following.

  1. Load product gallery from JSON data.
  2. “Add to cart” action to move a product into the cart table.
  3. Load and change the shopping cart status on each cart action.
  4. Update total cart items and total price on each change.
  5. Empty the cart by clearing the session.

Load product gallery from JSON data

The productItem contains the product JSON data. It contains a row of product data with name, price and photo path.

The showProductGallery method iterates this productItem JSON and builds the product gallery HTML.

In this gallery, each product tile contains the option “add to cart”. It moves the selected product to the cart session by clicking the “Add to cart” button.

The JavaScript code uses for each loop to iterate theproductItem JSON.


$(document).ready(function() { var productItem = [{ productName: "FinePix Pro2 3D Camera", price: "1800.00", photo: "camera.jpg" }, { productName: "EXP Portable Hard Drive", price: "800.00", photo: "external-hard-drive.jpg" }, { productName: "Luxury Ultra thin Wrist Watch", price: "500.00", photo: "laptop.jpg" }, { productName: "XP 1155 Intel Core Laptop", price: "1000.00", photo: "watch.jpg" }]; showProductGallery(productItem);
}); function showProductGallery(product) { //Iterate javascript shopping cart array var productHTML = ""; product.forEach(function(item) { productHTML += '<div class="product-item">'+ '<img src="product-images/' + item.photo + '">'+ '<div class="productname">' + item.productName + '</div>'+ '<div class="price">$<span>' + item.price + '</span></div>'+ '<div class="cart-action">'+ '<input type="text" class="product-quantity" name="quantity" value="1" size="2" />'+ '<input type="submit" value="Add to Cart" class="add-to-cart" onClick="addToCart(this)" />'+ '</div>'+ '</div>'; "<tr>"; }); $('#product-item-container').html(productHTML);
} 

“Add to cart” action to move a product into the cart table

This “add to cart” JavaScript handler is a core functionality of the example. This code initiates the JavaScript sessionStorage object.

On clicking the “Add to cart” button on the product tile, this function is invoked.

It reads the product details from the product grid where the clicked “Add to cart” is placed. For example, it gets the product name, quantity and other details.

Using these details, this code prepares the JSON instance of the cart item row. Then, it appends the newly added items to the existing cart sessionStorage object.


function addToCart(element) { var productParent = $(element).closest('div.product-item'); var price = $(productParent).find('.price span').text(); var productName = $(productParent).find('.productname').text(); var quantity = $(productParent).find('.product-quantity').val(); var cartItem = { productName: productName, price: price, quantity: quantity }; var cartItemJSON = JSON.stringify(cartItem); var cartArray = new Array(); // If javascript shopping cart session is not empty if (sessionStorage.getItem('shopping-cart')) { cartArray = JSON.parse(sessionStorage.getItem('shopping-cart')); } cartArray.push(cartItemJSON); var cartJSON = JSON.stringify(cartArray); sessionStorage.setItem('shopping-cart', cartJSON); showCartTable();
}

Empty the cart by clearing the session

This JavaScript shopping cart code contains an option to empty the cart table.

It explicitly clears the sessionStorage instance created to have the cart items.

At the end of both “Add to cart” and the “clear cart” actions, the cart table UI is rebuilt with the latest session data.

The showCartTable function is called for updating the cart table UI and the total count.


function emptyCart() { if (sessionStorage.getItem('shopping-cart')) { // Clear JavaScript sessionStorage by index sessionStorage.removeItem('shopping-cart'); showCartTable(); }
}

Load cart row, item count, the total amount from sessionStorage object

This code displays the logic of showCartTable() to rebuild cart HTML and update UI.

It initiates variables to hold the following data. These are used in the JavaScript shopping cart code.

  • Cart table HTML.
  • A total number of items added to the cart.
  • A total amount of the purchased cart items.

It checks cart sessionStorage and iterates the array if exists. During the iteration, it builds the cart table HTML and computes the total count and price.

The cart sessionStorage data is pushed to the UI via this JavaScript function. It reflects the latest cart state to the end-users.


function showCartTable() { var cartRowHTML = ""; var itemCount = 0; var grandTotal = 0; var price = 0; var quantity = 0; var subTotal = 0; if (sessionStorage.getItem('shopping-cart')) { var shoppingCart = JSON.parse(sessionStorage.getItem('shopping-cart')); itemCount = shoppingCart.length; //Iterate javascript shopping cart array shoppingCart.forEach(function(item) { var cartItem = JSON.parse(item); price = parseFloat(cartItem.price); quantity = parseInt(cartItem.quantity); subTotal = price * quantity cartRowHTML += "<tr>" + "<td>" + cartItem.productName + "</td>" + "<td class='text-right'>$" + price.toFixed(2) + "</td>" + "<td class='text-right'>" + quantity + "</td>" + "<td class='text-right'>$" + subTotal.toFixed(2) + "</td>" + "</tr>"; grandTotal += subTotal; }); } $('#cartTableBody').html(cartRowHTML); $('#itemCount').text(itemCount); $('#totalAmount').text("$" + grandTotal.toFixed(2));
}

JavaScript shopping cart output screenshot

The output will be familiar to whom already have seen my older shopping cart code created in PHP.

It is designed as a single-page shopping cart solution. It shows both the gallery and cart on the same page.

javascript shopping cart output

Persistent JavaScript shopping cart with localStorage instance

The WebStorage API’s sessionStorage will be expired when the browser is closed. This API provides one more storage object which is localStorage.

The localStorage object is similar to sessionStorage. The only difference is that the localStorage keeps data until explicit action.

So, this concept helps to have a persistent cart. That is to retain the customers’ cart items even if they closed the browser.

The source code uses sessionStorage for this JavaScript shopping cart code. Include the following file instead of cart.js if you want to use the localStorage object.

cart-local-storage.js


$(document).ready(function() { var productItem = [{ productName: "FinePix Pro2 3D Camera", price: "1800.00", photo: "camera.jpg" }, { productName: "EXP Portable Hard Drive", price: "800.00", photo: "external-hard-drive.jpg" }, { productName: "Luxury Ultra thin Wrist Watch", price: "500.00", photo: "laptop.jpg" }, { productName: "XP 1155 Intel Core Laptop", price: "1000.00", photo: "watch.jpg" }]; showProductGallery(productItem); showCartTable();
}); function addToCart(element) { var productParent = $(element).closest('div.product-item'); var price = $(productParent).find('.price span').text(); var productName = $(productParent).find('.productname').text(); var quantity = $(productParent).find('.product-quantity').val(); var cartItem = { productName: productName, price: price, quantity: quantity }; var cartItemJSON = JSON.stringify(cartItem); var cartArray = new Array(); // If javascript shopping cart session is not empty if (localStorage.getItem('shopping-cart')) { cartArray = JSON.parse(localStorage.getItem('shopping-cart')); } cartArray.push(cartItemJSON); var cartJSON = JSON.stringify(cartArray); localStorage.setItem('shopping-cart', cartJSON); showCartTable();
} function emptyCart() { if (localStorage.getItem('shopping-cart')) { // Clear JavaScript localStorage by index localStorage.removeItem('shopping-cart'); showCartTable(); }
} function removeCartItem(index) { if (localStorage.getItem('shopping-cart')) { var shoppingCart = JSON.parse(localStorage.getItem('shopping-cart')); localStorage.removeItem(shoppingCart[index]); showCartTable(); }
} function showCartTable() { var cartRowHTML = ""; var itemCount = 0; var grandTotal = 0; var price = 0; var quantity = 0; var subTotal = 0; if (localStorage.getItem('shopping-cart')) { var shoppingCart = JSON.parse(localStorage.getItem('shopping-cart')); itemCount = shoppingCart.length; //Iterate javascript shopping cart array shoppingCart.forEach(function(item) { var cartItem = JSON.parse(item); price = parseFloat(cartItem.price); quantity = parseInt(cartItem.quantity); subTotal = price * quantity cartRowHTML += "<tr>" + "<td>" + cartItem.productName + "</td>" + "<td class='text-right'>$" + price.toFixed(2) + "</td>" + "<td class='text-right'>" + quantity + "</td>" + "<td class='text-right'>$" + subTotal.toFixed(2) + "</td>" + "</tr>"; grandTotal += subTotal; }); } $('#cartTableBody').html(cartRowHTML); $('#itemCount').text(itemCount); $('#totalAmount').text("$" + grandTotal.toFixed(2));
} function showProductGallery(product) { //Iterate javascript shopping cart array var productHTML = ""; product.forEach(function(item) { productHTML += '<div class="product-item">'+ '<img src="product-images/' + item.photo + '">'+ '<div class="productname">' + item.productName + '</div>'+ '<div class="price">$<span>' + item.price + '</span></div>'+ '<div class="cart-action">'+ '<input type="text" class="product-quantity" name="quantity" value="1" size="2" />'+ '<input type="submit" value="Add to Cart" class="add-to-cart" onClick="addToCart(this)" />'+ '</div>'+ '</div>'; "<tr>"; }); $('#product-item-container').html(productHTML);
} 

Security caution

Until the “add to cart” step, the client-side handling is fine. When proceeding with checkout, it is preferable to use server-side middleware.

It is for safety purposes to handle security loopholes. It will do the sanitization, validation of data authenticity and more verification process.

Conclusion

So, we have created a JavaScript shopping cart code using the sessionStorage object. And also, we saw one more option to add the cart item persistency with the localStorage object.

The client-side shopping cart implementation is not a complete solution. But, it has the advantages of minimalism. It will suit the thin static cart available online.

It is suitable for the shops having client-side integrations connected with hosted services.
Download

↑ Back to Top

Posted on Leave a comment

Generate PDF from HTML with JavaScript and Example

by Vincy. Last modified on May 12th, 2022.

Generate PDF from HTML in a browser is one of the most wanted utilities. There are many hosted solutions generating PDF online from the posted source.

When using online tools the required features are not available with one tool. The users have to compromise some of their needs when depending on the online tools.

But, developers like us need not compromise. We can create a custom utility to generate PDF from HTML on our own.

Quick solution

There is a quick solution to generate PDF from an HTML page. The browser’s print wizard has the “Save as PDF” option along with the preview panel.

This JavaScript triggers the browser’s print action. Then, it supplies a particular portion of the HTM to print.


<div class="outer-content"> <div id="pdf-content"> <h2>PDF Page Title</h2> <hr> <p> How to generate a pdf from the <i>UI content</i> is easy. </p> <p> This describes how to <strong>generate pdf from HTML</strong> using programming. </p> </div> <hr> <button id="btn-generate">Generate PDF</button>
</div>

<!DOCTYPE html>
<html lang="en">
<body> <?php require_once __DIR__ . '/template.html'; ?>
</body>
<script> var buttonElement = document.querySelector("#btn-generate"); buttonElement.addEventListener('click', function() { var pdfContent = document.getElementById("pdf-content").innerHTML; var windowObject = window.open(); windowObject.document.write(pdfContent); windowObject.print(); windowObject.close(); });
</script>
</html>

I am sure this is not enough to claim that the PDF generation is implemented 🙂

For creating a full-fledged solution to generate PDF from HTML we have to go for using libraries.

There are popular libraries available in the market to build a PDF generation tool for an application.

In this tutorial, we will see some of the top libraries that support PDF generation. For each library, we will see how-to steps for the integration and development.

Libraries available to Generate PDF from HTML

This section listed the libraries used to generate PDF from HTML in this article. It interlinks the appropriate example code below to land you in the right place.

  1. HTML to PDF
  2. jsPDF
  3. wkHTMLtoPDF
  4. pdfmake

The HTML to pdf and jspdf sections have more than one example. It is to know how to generate PDF from HTML containing complex nodes or containers. Example: HTML tables, image galleries and etc.

1. HTML to PDF

The HTML to pdf library method is a way to generate PDF from HTML. It is a two-step process to get a simple PDF output.

First, get the CDN URL of this library from an authentic source.  Then, follow these two steps to get an output PDF file.

  1. Instantiate html to pdf library class.
  2. Map HTML content to generate and save PDF.

The basic life cycle to generate PDF from HTML using this library is shown in the below flow chart.

generate pdf from html life cycle

Example 1: Generate PDF from HTML containing only text.


<!DOCTYPE html>
<html lang="en">
<head>
<title>Generate PDF from HTML using html to pdf library</title>
<!-- CDN URL - html2pdf library -->
<script src="https://cdnjs.cloudflare.com/ajax/libs/html2pdf.js/0.10.1/html2pdf.bundle.min.js"></script>
</head> <body> <?php require_once __DIR__ . '/template.html'; ?> <script> var buttonElement = document.querySelector("#btn-generate"); buttonElement.addEventListener('click', function() { var pdfContent = document.querySelector("#pdf-content"); html2pdf().from(pdfContent).save(); }); </script>
</body>
</html>

Example 2: Supply library options to override defaults

Unlike the above example, it sends an array of options to generate PDF from HTML. It overrides the default file name, margin, orientation and more defaults as specified.


var pdfContent = document.querySelector("#pdf-content");
var optionArray = { margin: 10, filename: 'output.pdf', jsPDF: { unit: 'in', format: 'letter', orientation: 'portrait' }
}; // html to pdf generation with the reference of PDF worker object
html2pdf().set(optionArray).from(pdfContent).save(); 

In old monolithic method, the html2pdf() accepts the HTML reference and options. To generate PDF from HTML DOM object reference and JSON options are supplied like,


html2pdf(pdfContent, optionArray);

2. jsPDF

To generate PDF from HTML some libraries need document definition of the markup. The jsPDF is popularly known for its feature of getting the HTML input in any format.

For example, it is capable of accepting HTML in the following formats.

  1. HTML markup.
  2. HTML file input data.
  3. HTML element object with the reference of selectors.

Example 1: Equivalent alternative solution to generate PDF from HTML

This example creates a basic usage reference of jsPDF to generate PDF from HTML template.  It includes an external template source in the UI container.

The JavaScript maps an event handler to the “Generate PDF” button found in the HTML template.

On clicking the button, the script initiates jsPDF with the appropriate PDF specification. It uses .html() handling of the jsPDF library tp generate PDF from HTML object supplied as an argument.

This hander defines a callback function that executes the HTML to PDF conversion. It saves or opens the generated PDF document in the callback.


<!DOCTYPE html>
<html>
<head>
<title>jsPDF Example</title>
<script src="https://cdnjs.cloudflare.com/ajax/libs/jquery/3.3.1/jquery.min.js"></script>
<script src="https://cdnjs.cloudflare.com/ajax/libs/jspdf/2.5.1/jspdf.umd.min.js"></script>
<script src="https://cdnjs.cloudflare.com/ajax/libs/html2canvas/1.4.1/html2canvas.min.js"></script>
</head>
<body> <?php require_once __DIR__ . '/template.html'; ?> <script> var buttonElement = document.querySelector("#btn-generate"); buttonElement.addEventListener('click', function() { const { jsPDF } = window.jspdf; var doc = new jsPDF("p", "pt", 'a4'); var pdfContent = document.querySelector("#pdf-content"); // Generate PDF from HTML using right id-selector doc.html(pdfContent, { callback: function(doc) { doc.save("download.pdf"); }, x: 10, y: 19 }); }); </script>
</body>
</html>

Example 2: Generate multipage PDF from HTML page

The jsPDF library is one of the best libraries used to generate PDF from HTML on the client-side. We have seen more examples in previous articles.

This example is for generating a multipage document from lengthy HTML to PDF format.

It uses the jsPDF’s page handlers like addPage, setPage, insertPage and more.

It calculates the PDF page content height and width and split the HTML source content. It creates chunks of page content from the HTML markup.

It calculates the total pages to paginate split chunks of HTML to PDF multi-page document. The addPage() generates a page instance to render the page content chunk into it.

It loops through the same process to generate PDF from HTML containing long content.


<!doctype html>
<HTML>
<HEAD>
<TITLE>Generate multi-page PDF from HTML - jsPDF</TITLE>
<script src="https://code.jquery.com/jquery-2.1.3.js"></script>
<script src="https://cdnjs.cloudflare.com/ajax/libs/jspdf/1.3.3/jspdf.min.js"></script>
<script src="https://cdnjs.cloudflare.com/ajax/libs/html2canvas/1.4.1/html2canvas.min.js"></script>
<style>
.description { font-size: 2em; line-height: 4;
}
</style>
</HEAD>
<BODY> <div class="outer-content"> <div id="pdf-content"> <img src="cherry.jpeg" /> <p class="description">Donec id leo quis felis vehicula bibendum sit amet ut tellus. Sed sagittis aliquet rhoncus. Pellentesque vulputate nunc ultricies, egestas augue ac, ullamcorper dui. Etiam diam mauris, molestie in purus a, venenatis pretium leo. Sed id metus eleifend, scelerisque neque id, posuere arcu. Nunc cursus et dui quis fringilla. In in turpis feugiat diam porttitor tempus. In hendrerit diam dolor, id pellentesque ante volutpat a. Nam tortor sapien, semper ut justo et, accumsan imperdiet sem. Sed euismod nunc vitae dolor porttitor ullamcorper. Donec sed lacinia dui. Nunc sed suscipit erat. Phasellus euismod ultrices velit, hendrerit tempor diam elementum ut.</p> <hr> </div> <button id="btn-generate">Generate PDF</button> </div> </BODY>
<script>
$(document).ready(function(){ $("#btn-generate").click(function(){ var htmlWidth = $("#pdf-content").width(); var htmlHeight = $("#pdf-content").height(); var pdfWidth = htmlWidth + (15 * 2); var pdfHeight = (pdfWidth * 1.5) + (15 * 2); var doc = new jsPDF('p', 'pt', [pdfWidth, pdfHeight]); var pageCount = Math.ceil(htmlHeight / pdfHeight) - 1; html2canvas($("#pdf-content")[0], { allowTaint: true }).then(function(canvas) { canvas.getContext('2d'); var image = canvas.toDataURL("image/png", 1.0); doc.addImage(image, 'PNG', 15, 15, htmlWidth, htmlHeight); for (var i = 1; i <= pageCount; i++) { doc.addPage(pdfWidth, pdfHeight); doc.addImage(image, 'PNG', 15, -(pdfHeight * i)+15, htmlWidth, htmlHeight); } doc.save("output.pdf"); }); });
});
</script>
</HTML>

generate pdf from html output

3. wkHTMLtoPDF

It is a command-line tool to generate PDFs from HTML. Find the latest suitable release. Then, install this library before running the command in the terminal.

It requires supplying a sanitized HTML source to create a PDF output.

After installation, add the library path to the system classpath. Then, run the following command.


wkhtmltopdf sanitised_html_source_path output.pdf

The best practice is to read the remote page content and sanitize the HTML. Then write the sanitized content into a local HTML to pass it to the PDF generation command. The PHP cURL post will be best to read the remote content compared to the file_get_contents().

It provides a C library to get used to it via programming.

If you want to execute the command via a program, the PHP exec() function may help.

There is a third-party interface to generate PDF from HTML using the wkHTMLtoPDF. Visit the Github page to install the PHP library used to content HTML to PDF.

This code shows the command to install this library into your vendor directory.


composer require mikehaertl/phpwkhtmltopdf

This simple usage example may initiate to start with this PHP library to generate PDF from HTML.


<?php
use mikehaertl\wkhtmlto\Pdf; $pdf = new Pdf('html-source-file.html'); if (!$pdf->saveAs('output.pdf')) { $error = $pdf->getError(); // return error to the request handler
}

4. pdfmake

The pdfmake library has both client-side and server-side integrations. Both methods generate PDF from HTML by accessing the element content from JavaScript.

Installation

This example uses pdfmake CDN URL to import dependencies. The documentation has alternate methods of installing and integrating the library.

For example, it gives npm commands to download node_modules with required dependencies.

Client-side integration

This example uses the pdfmake’s client-side method to generate PDF from HTML objects.

It accesses HTML element content from JavaScript and prepares the document definition object.

The document definition can supply the following types of content.

  1. Text,
  2. Multi-column text,
  3. Styles,
  4. Images

The HTML contains a heading, text, and image content. The docDefinition object is built with the content of these HTML elements.

Images will be supplied as encoded binary data. In this example, the JavaScript getDataUrl() converts the image into a binary data URL.

Then the pdfmake.createPDF() handler code generate PDF from HTML. The below code opens the HTML to PDF output in the browser screen. The pdfmake library also allows to print, and download the PDF document.


<!DOCTYPE html>
<html>
<head>
<title>PDFMake Example</title>
<script src="https://cdnjs.cloudflare.com/ajax/libs/pdfmake/0.2.5/pdfmake.min.js"></script>
<script src="https://cdnjs.cloudflare.com/ajax/libs/pdfmake/0.2.5/vfs_fonts.min.js"></script>
</head>
<body> <div class="outer-content"> <h2 id="heading">PDF Page Title</h2> <div id="pdf-content">How to generate a pdf from the UI content description and example. </div> <img src="cherry.jpeg" id="image-preview" /> <hr> <button id="btn-generate">Generate PDF</button> </div> <script> var buttonElement = document.querySelector("#btn-generate"); buttonElement.addEventListener('click', function() { var pdfHeading = document.querySelector("#heading").innerText; var pdfContent = document.querySelector("#pdf-content").innerText; var pdfImage = getDataUrl(document.querySelector("#image-preview")); var docDefinition = { content: [ { text: pdfHeading, style: 'heading' }, { text: pdfContent, style: 'vspace' }, { image: pdfImage } ], styles: { vspace: { lineHeight: 3 }, heading: { fontSize: 18, lineHeight: 2 } } }; pdfMake.createPdf(docDefinition).open(); }); function getDataUrl(imgSource) { const canvas = document.createElement('canvas'); const context = canvas.getContext('2d'); canvas.width = imgSource.width; canvas.height = imgSource.height; context.drawImage(imgSource, 0, 0); return canvas.toDataURL('image/jpeg'); } </script>
</body>
</html> 

Conclusion

Thus, we have seen various methods to generate PDF from HTML source code or files. I hope the usage examples of the libraries may give choices to enable PDF generation.

Share your thoughts about the PDF generation concept we have seen. Also, share your comments on the example codes to generate PDF from HTML.

↑ Back to Top

Posted on Leave a comment

PHP CURL Post and Get request with example

by Vincy. Last modified on May 6th, 2022.

PHP cURL is a library that allows clients to access a remote server via a URL. It sends HTTP requests to the endpoint from a different application or component.

It allows inter-application hits to get a response over the network. This mechanism is useful to work with PHP RESTful services, API interactions, and etc.

There are many use case scenarios where PHP cURL post is exactly suited. For example,

  1. Extracting content from a webpage.
  2. Preparing feed from external sources.
  3. SDK-free API’s direct access methods.

This quick example gives a straightforward code to implement a PHP cURL post.

Quick example


<?php
$postParameter = array( 'name' => 'Jane', 'dateOfBirth' => '1974-8-17'
); $curlHandle = curl_init('http://domain-name/endpoint-path');
curl_setopt($curlHandle, CURLOPT_POSTFIELDS, $postParameter);
curl_setopt($curlHandle, CURLOPT_RETURNTRANSFER, true); $curlResponse = curl_exec($curlHandle);
curl_close($curlHandle); 

Apart from this, we will see more use case examples of PHP cURL post requests in the upcoming sections.

Part 1 – Basics of PHP cURL

The following are the steps to perform a basic PHP cURL request-response cycle.

  • Initialize cURL session.
  • Set cURL options.
  • Execute request.
  • Close session.

How to configure PHP cURL?

PHP contains libcurl library to let the environment work with cURL. This library will be enabled by default.

If not, do the following steps to enable PHP cURL module in your environment.

  1. Open PHP configuration file php.ini
  2. Check for the extension=php_curl.dll initiation.
  3. Remove the semicolon (;) at the beginning of the above line.
  4. Restart the Apache server.

Set PHP cURL POST requests – Alternate methods

There are many ways to send PHP cURL post parameters.

  1. JSON format.
  2. HTTP query string.
  3. POST array format.

JSON format:

 <?php curl_setopt($ch, CURLOPT_POSTFIELDS, "{key1:value1,key2:value2}");
?>

HTTP query string:

 <?php curl_setopt($ch, CURLOPT_POSTFIELDS, "key1=value1&key2=value2"); ?>

PHP cURL POST array format

The CURLOPT_POSTFIELDS may have a PHP array to pass the parameters to the endpoint.

 <?php curl_setopt($ch, CURLOPT_HTTPHEADER, array('Content-Type: multipart/form-data'); curl_setopt($ch, CURLOPT_POSTFIELDS, array("key1"=>"value1", "key2"=>"value2"); ?>

Set cURL header options

To set PHP cURL header, the CURLOPT_HTTPHEADER constant is used. A cURL header can have more information. The following keys are some of the examples to add PHP cURL header options.

  • Accept-Encoding
  • Cache-Control
  • Host
  • Content-Type
  • Accept-Language
  • User-Agent

This program sets the cURL header options to set the content type. There are options to send custom headers also. It is to send non-standard key-value pairs. Use prefix X- to send non-standard headers. Example,


curl_setopt($ch, CURLOPT_HTTPHEADER, array( 'X-key: value'
));

The CURLOPT_HEADER constant is set with boolean true. It is for allowing the header information attached with the return response.


<?php
$url = "http://domain-name/endpoint-path"; $curl = curl_init($url);
curl_setopt($curl, CURLOPT_URL, $url);
curl_setopt($curl, CURLOPT_RETURNTRANSFER, true); $headers = array( "X-Custom-Header: header-value", "Content-Type: application/json"
);
curl_setopt($curl, CURLOPT_HTTPHEADER, $headers);
curl_setopt($curl, CURLOPT_HEADER, true);
$response = curl_exec($curl);
curl_close($curl);
echo $response; 

Part 2 – Example use cases

With some basic knowledge, it will be easy to understand the following examples. It deals with some of the use case scenarios of PHP cURL post or get request methods.

HTTP POST form data

PHP cURL allows posting parameters to the server. It uses any one of the methods we discussed earlier to post parameters via cURL.

The following cURL script shows how to post an array to an endpoint URL. The CURLOPT_POST and the CURLOPT_POSTFIELDS are to send the values via PHP cURL post.


<?php
$url = 'http://domain-name/endpoint-path'; $curl = curl_init($url);
curl_setopt($curl, CURLOPT_POST, true);
curl_setopt($curl, CURLOPT_RETURNTRANSFER, true); $data = "name=jane&age=23"; curl_setopt($curl, CURLOPT_POSTFIELDS, $data); $result = curl_exec($curl);
curl_close($curl);
?>

PHP cURL POST to upload file

It is also possible to upload files to the server via PHP cURL post. The below code shows how to upload an image file to the server.

It prepares the object with the file data. It uses PHP curl_file_create() function to prepare the file post content.

By sending the ‘fileParam’ bundle in this way, the endpoint code can access it via $_FILES[] array.


<?php
$url = 'https://domain-name/path-to-endpoint/php-curl-post-file-endpoint.php'; if (function_exists('curl_file_create')) { $fileContent = curl_file_create("cherry.jpeg", 'image/jpeg');
} else { $fileContent = '@' . realpath("cherry.jpeg", 'image/jpeg');
} $data = array('fileParam'=> $fileContent); $curl = curl_init($url);
curl_setopt($curl, CURLOPT_RETURNTRANSFER, true);
curl_setopt($curl, CURLOPT_POST,true);
curl_setopt($curl, CURLOPT_POSTFIELDS, $data);
$result=curl_exec ($curl);
curl_close ($curl); print $result;
?>

Put the following endpoint code in the server. Then hit the endpoint via the above cURL script. The PHP curl post request sends the file input to this endpoint. This PHP code accesses the uploaded file from the $_FILES array.

php-curl-post-file-endpoint.php


<?php
$targetDir = 'uploads';
if ($_FILES["fileParam"]["tmp_name"] != "") { $tmp_name = $_FILES["fileParam"]["tmp_name"]; // basename() may prevent filesystem traversal attacks; // further validation/sanitation of the filename may be appropriate $name = basename($_FILES["fileParam"]["name"]); if(move_uploaded_file($tmp_name, $targetDir . "/" . $name)) { print "Image uploaded."; } else { print "Image upload failed."; } }
?>

HTTP GET request to grab a webpage

In the cURL request, the default method is GET. This program calls the server via cURL with the default GET request method.

Unlike PHP cURL POST, it sends data as the query string. To pass parameters to a GET request, it should be built as part of the URL.

It grabs the HTML of the website specified as the cURL endpoint. It prints the response and renders the target website’s HTML in the browser.


<?php
$url = 'http://domain-name/endpoint-path'; $curl = curl_init($url);
curl_setopt($curl, CURLOPT_URL, $url);
curl_setopt($curl, CURLOPT_HEADER, false);
curl_setopt($curl, CURLOPT_RETURNTRANSFER, true); $response = curl_exec($curl);
curl_close($curl);
print $response; 

Grab website HTML via cURL and write to a file

Instead of printing the website layout to the browser, it can also be written into a file.

This code creates a filehandle and writes the cURL HTML response into a file. It uses the file handle as the reference.

It will be useful if you want to download and save the website HTML into the server permanently.


<?php
$url = 'http://domain-name/endpoint-path';
$file = fopen("site-content.html", "w"); $curl = curl_init($url);
curl_setopt($curl, CURLOPT_FILE, $file); curl_setopt($curl, CURLOPT_URL, $url);
curl_setopt($curl, CURLOPT_HEADER, false); curl_exec($curl);
curl_close($curl);
fclose($file); 

The PHP file_get_contents() function is also used to grab the content of the target URL.

But, the server configuration should allow reading the content by using this method.

PHP CURL post and receive JSON data

This example shows how to send a PHP cURL post in JSON format. It also receives the cURL response in the format of JSON.

This code guides creating API services to get requests and send responses in JSON format.


<?php
$url = 'https://domain-name/path/php-curl-post-endpoint-json.php';
$data = array( "first_name" => "Jane", "last_name" => "Mclane", "email" => "[email protected]", "addresses" => array( "address1" => "21/A", "city" => "Los Angels", "country" => "USA", "phone" => "555-1212", "pincode" => "82312" )
);
$encodedData = json_encode($data);
$curl = curl_init($url);
$data_string = urlencode(json_encode($data));
curl_setopt($curl, CURLOPT_RETURNTRANSFER, true);
curl_setopt($curl, CURLOPT_CUSTOMREQUEST, "POST");
curl_setopt( $curl, CURLOPT_HTTPHEADER, array('Content-Type:application/json'));
curl_setopt($curl, CURLOPT_POST, true);
curl_setopt($curl, CURLOPT_POSTFIELDS, $encodedData);
$result = curl_exec($curl);
curl_close($curl);
print $result; 

This code prepares the JSON response by setting the content-type using PHP header(). It sets the application/json as the content type.

php-curl-post-endpoint-json.php


<?php
header("Content-Type:application/json");
$data = file_get_contents('php://input');
print $data; 

Handle redirects (HTTP 301,302)

The CURLOPT_FOLLOWLOCATION is set to true to perform the 3XX redirect via PHP cURL.

During the redirect, the cURL will send a GET request on successive redirects. To change this, the CURLOPT_POSTREDIR has to be set.

This program sets CURL_REDIR_POST_ALL to send PHP cURL POST requests on successive attempts.

It limits the number of redirects by using the CURLOPT_MAXREDIRS constant.


<?php
$url = 'http://domain/path';
$data = array( "first_name" => "Jane", "last_name" => "Mclane"
);
$encodedData = json_encode($data);
$curl = curl_init($url);
$data_string = urlencode(json_encode($data));
curl_setopt($curl, CURLOPT_RETURNTRANSFER, true);
curl_setopt($curl, CURLOPT_HEADER, true); curl_setopt($curl, CURLOPT_POSTFIELDS, $encodedData); curl_setopt($curl, CURLOPT_POSTREDIR, CURL_REDIR_POST_ALL);
curl_setopt($curl, CURLOPT_FOLLOWLOCATION, true);
curl_setopt($curl,CURLOPT_MAXREDIRS, 3);
$result = curl_exec($curl);
$info = curl_getinfo($curl);
curl_close($curl);
print "<PRE>";
print_r($info);
print_r($result); 

This program will return more information as shown below.

  • Redirects count.
  • Time to redirect.
  • A header with the 3XX status.

php curl post 3xx redirect

Writing cURL error logs into a file

Keeping logs is a best practice for audit purposes. When the site is live, sometimes the logs are very useful for debugging also.

Since it is a remote call, logging cURL errors into a file will help to analyze and fix the issue.

This code guides how to log the error that occurred during the PHP cURL post. It uses PHP curl_error() function to


<?php
$logFileHandle = fopen("log/curl-error-log.txt", 'a+');
$curl = curl_init("http://domain_name/path");
if(curl_exec($curl) === false)
{ $date = date("m/d/Y"); $errorMessage = curl_error($curl); $curlError = $date . ' Error: ' . $errorMessage . "\n\n";
}
curl_close($curl);
fwrite($logFileHandle, $curlError);
fclose($logFileHandle);

Write cURL log using CURLOPT_STDERR constant

There is an alternate method to log the PHP cURL error into a file. The CURLOPT_STDERR writes the error message with the reference of the file handle.


<?php
$logFileHandle = fopen("log/curl-error-log.txt", 'a+');
$curl = curl_init("http://domain_name/path");
curl_setopt($curl, CURLOPT_HEADER, false);
curl_setopt($curl, CURLOPT_VERBOSE, true);
curl_setopt($curl, CURLOPT_FILE, $logFileHandle);
curl_setopt($curl, CURLOPT_STDERR, $logFileHandle);
curl_exec($curl);
curl_close($curl);
fclose($logFileHandle); 

This program will return the following output.
php curl error log

Part 3 – Creating PHP cURL script to extract images from a website

In this part of the article, we are going to create a end-to-end cURL component. It will do the following to achieve grabbing images from a webpage.

  1. Create API service to instantiate DOM to load response.
  2. Create cURL service to instantiate, configure and execute requests.
  3. Read cURL response and load it into the DOM object.
  4. Get the image source URL by accessing the DOM object.
  5. Create a photo gallery by using the PHP cURL response array.

API service class to initiate cURL and create DOM object

This GrabImageAPI class creates PHP DOMDocument instants to load the site HTML.

The constructor initiates cURL and grabs the complete HTML response of the URL. Then, it loads this response into the DOM object.

With the reference of the object, the getWebsiteImage() gets the image source URLs.

This function reads all images by using getElementsByTagName(). By iterating the image data array, it prepares the JSON bundle of image URLs.

Service/GrabImageAPI.php


<?php
namespace Phppot\Service; use \Phppot\Service\CurlService;
use DOMDocument; class GrabImageAPI
{ private $dom; public function __construct($url) { require_once __DIR__ . '/CurlService.php'; $curlService = new CurlService($url); $siteHTML = $curlService->executeCurl(); $this->dom = new DOMDocument(); @$this->dom->loadHTML($siteHTML); } function getWebsiteImage() { // Parse DOM to get Images $images = $this->dom->getElementsByTagName('img'); $imageSourceURL = array(); for ($i = 0; $i < $images->length; $i ++) { $image = $images->item($i); $src = $image->getAttribute('src'); if(filter_var($src, FILTER_VALIDATE_URL)) { $imageSourceURL[] = $src; } } $imageSourceJSON = json_encode($imageSourceURL); return $imageSourceJSON; }
} 

Create cURL service to perform routine life cycle operations

This class is nothing but for performing basic curl operations we have seen at the beginning.

The GrabImageAPI constructor includes this service and creates the cURL instance.

Service/CurlService.php


<?php
namespace Phppot\Service; class CurlService
{ private $curl; private $endpoint; private $response; function __construct($url) { $this->endpoint = $url; $this->curl = curl_init($this->endpoint); } function setCurlOption() { curl_setopt($this->curl, CURLOPT_HEADER, 0); curl_setopt($this->curl, CURLOPT_RETURNTRANSFER, 1); curl_setopt($this->curl, CURLOPT_FOLLOWLOCATION, 1); } function executeCurl() { $this->setCurlOption(); $this->response = curl_exec($this->curl); curl_close($this->curl); return $this->response; }
}

Trigger API to grab images via PHP cURL post

This code will hit the API to grab images via PHP cURL post. It requires the API class reference on which it creates the dynamic image gallery using cURL.

This code is useful to create a gallery widget for your external shop independently.

php-curl-grab-image.php


<?php
namespace Phppot; use \Phppot\Service\GrabImageAPI; require_once __DIR__ . '/Service/GrabImageAPI.php';
$url = "https://domain-name-here/";
$imageSourceArray = array();
try { // Call image grab PHP cURL script $grabImageAPI = new GrabImageAPI($url); // Get image source array in JSON format via PHP cURL $imageSource = $grabImageAPI->getWebsiteImage(); $imageSourceArray = json_decode($imageSource, true);
} catch (Exception $e) { // Handle API request failure $statusMsg = $e->getMessage(); print $statusMsg; exit;
} // Iterate response and form image gallery in UI
foreach($imageSourceArray as $imageSource) { ?> <img src="<?php echo $imageSource; ?>" style="width: 300px; margin: 20px;" /> <?php } 

Conclusion

Hope this article helps you to know a deep knowledge about PHP cURL post and other request methods.

The short and end-to-end examples might be useful to create a cURL component for your application.

I welcome your comments to continue giving more value-adds to the learners.
Download

↑ Back to Top

Posted on Leave a comment

Bootstrap Pagination Example in PHP

by Vincy. Last modified on April 27th, 2022.

Bootstrap gives built-in UI components to build websites easier. Here we go with Bootstrap pagination implementation in a project.

Pagination is an essential component of web pages listing voluminous data. It will guide how PHP pagination helps to navigate among pages of batched results.

Quick example

See this example shows a static Bootstrap pagination HTML. By knowing this structure, it is simple then to load and loop through the dynamic result.

<html>
<head>
<title>Quick example - Bootstrap pagination</title>
<link href="https://cdn.jsdelivr.net/npm/[email protected]/dist/css/bootstrap.min.css" rel="stylesheet" integrity="sha384-EVSTQN3/azprG1Anm3QDgpJLIm9Nao0Yz1ztcQTwFspd3yD65VohhpuuCOmLASjC" crossorigin="anonymous">
</head>
<body>
<nav aria-label="Page navigation example"> <ul class="pagination"> <li class="page-item"><a class="page-link" href="#">Previous</a></li> <li class="page-item"><a class="page-link" href="#">1</a></li> <li class="page-item active"><a class="page-link" href="#">2</a></li> <li class="page-item"><a class="page-link" href="#">3</a></li> <li class="page-item"><a class="page-link" href="#">Next</a></li> </ul>
</nav>
</body>
</html>

It renders the pagination links like,

bootstrap pagination links

Bootstrap pagination in PHP with database

If you are looking for a Bootstrap pagination script with PHP and MySQL database, then get started. In this article, we are going to implement a Bootstrap-enabled PHP pagination.

It is used to read page results from the database. Then it allows page-to-page navigation using the Bootstrap nav links. This example renders pagination with or without previous and next links.

It uses a recommended CDN URL to load Bootstrap CSS for the pagination components.

Follow the below steps to add pagination for a list in PHP.

  1. Create the database structure and load sample data.
  2. Configure and map the database results to the pagination component.
  3. Compute variables like start, limit and current page number to generate pagination links.
  4. Highlight the current page and among the clickable pagination links.

File structure

The below screenshot shows the file structure of the bootstrap pagination example. It shows a clear way of building the pagination component in PHP. This simple structure makes the learners understand the code flow easily.

Database Script

The below script is used to add data to the database. Import this SQL to have the table structure and sample data. It will help to see the pagination result on the screen while running this example.

structure.sql

 --
-- Database: `bootstrap_pagination`
-- -- -------------------------------------------------------- --
-- Table structure for table `tbl_product`
-- CREATE TABLE `tbl_product` ( `id` int(11) NOT NULL, `product_name` varchar(255) NOT NULL, `price` varchar(255) NOT NULL, `model` varchar(255) NOT NULL
) ENGINE=InnoDB DEFAULT CHARSET=utf8mb4; --
-- Dumping data for table `tbl_product`
-- INSERT INTO `tbl_product` (`id`, `product_name`, `price`, `model`) VALUES
(1, 'GIZMORE Multimedia Speaker with Remote Control, Black', '€15.72', '2020'),
(2, 'Black Google Nest Mini', '€41.11', '2021'),
(3, 'Black Digital Hand Band, Packaging Type: Box', '€21.77', '2019'),
(4, 'Lenovo IdeaPad 3 Intel Celeron N4020 14\'\' HD ', '€356.59', '2021'),
(5, 'JBL Airpods', '€27.81', '2020'),
(6, 'Black Google Nest Mini', '€41.11', '2021'),
(7, 'Black Digital Hand Band, Packaging Type: Box', '€21.77', '2019'),
(8, 'Lenovo IdeaPad 3 Intel Celeron N4020 14\'\' HD ', '€356.59', '2021'),
(9, 'Dell New Inspiron 3515 Laptop', '€537.48', '2021'); --
-- Indexes for dumped tables
-- --
-- Indexes for table `tbl_product`
--
ALTER TABLE `tbl_product` ADD PRIMARY KEY (`id`); --
-- AUTO_INCREMENT for dumped tables
-- --
-- AUTO_INCREMENT for table `tbl_product`
--
ALTER TABLE `tbl_product` MODIFY `id` int(11) NOT NULL AUTO_INCREMENT, AUTO_INCREMENT=11;

Designing HTML page with Bootstrap styles

This HTML page shows the database results with a bootstrap pagination navbar. It includes no external CSS. This design completely depends on Bootstrap CSS.

It connects PHP model to fetch the database results. This HTML has the embedded PHP loop to iterate the results. It displays the database results in a tabular view with a limited number of rows as configured.

It shows a dropdown to choose pagination styles. This example provides two types of pagination navbar with or without the previous next links.

The page links and style type are passed to the page URL. These params are used to build the Bootstrap pagination navbar using Common.php file.

index.php


<?php
namespace Phppot; use Phppot\DataSource;
require_once __DIR__ . '/lib/Question.php';
$question = new Question();
$result = $question->getAllProducts();
?>
<html>
<head>
<title>Product</title>
<meta charset="utf-8">
<meta name="viewport" content="width=device-width, initial-scale=1, shrink-to-fit=no">
<link href="https://cdn.jsdelivr.net/npm/[email protected]/dist/css/bootstrap.min.css" rel="stylesheet" integrity="sha384-EVSTQN3/azprG1Anm3QDgpJLIm9Nao0Yz1ztcQTwFspd3yD65VohhpuuCOmLASjC" crossorigin="anonymous">
<script src="assets/js/product.js"></script>
</head>
<body> <div class="container"> <div class="container pt-5"> <h2 class="text-center heading py-3">Bootstrap Pagination</h2> <table class="table table-bordered" id="table"> <tr> <th>SL.No</th> <th>Product Name</th> <th class="text-end">Price</th> <th>Model</th> </tr> <?php $questions = $result; if (is_array($questions)) { for ($i = 0; $i < count($questions) - 1; $i ++) { ?> <tr> <td><?php echo $questions[$i]["id"];?></td> <td><?php echo $questions[$i]["product_name"];?></td> <td class="text-end"><?php echo $questions[$i]["price"];?></td> <td><?php echo $questions[$i]["model"];?></td> </tr> <?php }}?> </table> </div> </div> <div class="container"> <div class="container py-3"> <div class="row"> <div class="col-md-3 text-left"> <select class="form-select d-inline-block" name="navyOp" id="select" onchange="change_url(this.value);"> <option value="">Bootstrap Pagination Style</option> <option value="prev-next-link" <?php if (! empty($_GET['type']) && $_GET['type'] == "prev-next-link") { echo "selected"; } ?>>With previous next</option> <option value="number-link" <?php if (! empty($_GET['type']) && $_GET['type'] == "number-link") { echo "selected"; } ?>>With numbers</option> </select> </div> <div class="col-md-9 text-right"> <nav aria-label="Page navigation example"> <ul class="pagination float-end " id="previous-next"> <?php echo $result["perpage"];?> </ul> </nav> </div> </div> </div> </div>
</body>
</html>

Pass pagination style via Javascript

This simple JavaScript function is to pass the chosen pagination style to the URL. On changing the dropdown value, it calls the JavaScript change_url() by passing the chosen style.

assets/js/product.js

 function change_url(val) { window.location.href = "index.php?type=" + val;
}

Show pagination results via PHP

This is the PHP model class that contains functions to get paginated results.

The getAllProducts() function is initially called to prepare the SQL query. It sets the pagination start and limit parameters for the query.

It uses the per page limit from the config file. It computes the starting point by using the current page number from the URL query string.

It prepares the parameters used to show Bootstrap pagination to the browser. Those are,

  1. Total record count – to calculate the number of pages to create the links.
  2. Per page limit – as configured in the config file to set the pagination loop limit.
  3. Base URL – to set the base URL with a query string to append the pagination parameters.

With the above parameters the getAllProducts() functions calls the showperpage() function in Common.php.

Question.php

 &lt;?php
namespace Phppot; use Phppot\DataSource;
use Phppot\Common;
use Phppot\Config; class Question
{ private $conn; function __construct() { require_once 'DataSource.php'; require_once 'Common.php'; require_once 'Config.php'; $this-&gt;conn = new DataSource(); $this-&gt;common = new Common(); $this-&gt;config = new Config(); } public function getAllProducts() { $sql = &quot;SELECT * FROM tbl_product&quot;; $perpage = $this-&gt;config::PER_PAGE_LIMIT; $currentPage = 1; if (isset($_GET['pageNumber'])) { $currentPage = $_GET['pageNumber']; } $startPage = ($currentPage - 1) * $perpage; $href = &quot;index.php?&quot;; if (! empty($_GET['type']) &amp;&amp; $_GET['type'] == &quot;prev-next-link&quot;) { $href = $href . &quot;type=prev-next-link&amp;&quot;; } else { $href = $href . &quot;type=number-link&amp;&quot;; } if ($startPage &lt; 0) { $startPage = 0; } $query = $sql . &quot; limit &quot; . $startPage . &quot;,&quot; . $perpage; $result = $this-&gt;conn-&gt;select($query); if (! empty($result)) { $count = $this-&gt;conn-&gt;getRecordCount($sql); $result[&quot;perpage&quot;] = $this-&gt;common-&gt;showperpage($count, $perpage, $href); } return $result; }
}
?&gt;

Application configuration

This config file defines the constant to set the per-page limit. This is to have a uniform limit to show the number of records across the application.

Config.php

 <?php namespace Phppot; class Config { const PER_PAGE_LIMIT = '2'; } ?>

Create Bootstrap pagination links in HTML using PHP

This Common PHP class includes the Bootstrap pagination-related functions.

It prepares the unordered pagination link list in a Bootstrap nav container.

The pagination() function receives the $count, $perpage and $href parameters. It uses $href as the base URL. It gets the current page from the query string.

It prepares the pagination URL by connecting the base URL and the pagination parameters.

If the pagination loop index points to the current page, then no link will be provided to that particular instance. And also, it highlights that instance to mark as an active page.

It displays the previous and next links on a conditional basis. This condition is based on the selected option of the Bootstrap pagination UI style chosen from the dropdown.

This example contains shortened pagination links. It helps to have a good look even if there are more pages. It avoids horizontal scrolling or wrapping.

Common.php


<?php
namespace Phppot; use Phppot\Config; class Common
{ private $conn; function __construct() { require_once 'DataSource.php'; require_once 'Config.php'; $this->conn = new DataSource(); $this->config = new Config(); } function pagination($count, $perpage, $href) { $output = ''; $perpage = $this->config::PER_PAGE_LIMIT; $srOnly = "visually-hidden"; if (! empty($_GET['type']) && $_GET['type'] == "prev-next-link") { $srOnly = ""; } if (! isset($_REQUEST["pageNumber"])) $_REQUEST["pageNumber"] = 1; if ($perpage != 0) $pages = ceil($count / $perpage); // if pages exists after loop's lower limit if ($pages > 1) { if ($_REQUEST["pageNumber"] > 1) { $previousPage = $_REQUEST["pageNumber"] - 1; $output = $output . '<li class="page-item ' . $srOnly . '"><a href="' . $href . 'pageNumber=' . $previousPage . '"class="page-link text-dark">Previous</a></li>'; } else { $output = $output . '<li class="page-item ' . $srOnly . '" disabled><a href=""class="page-link text-dark">Previous</a></li>'; } if (($_REQUEST["pageNumber"] - 3) > 0) { $output = $output . '<li class="page-item "><a href="' . $href . 'pageNumber=1" class="page-link text-dark">1</a></li>'; } if (($_REQUEST["pageNumber"] - 3) > 1) { $output = $output . '<span class="mx-1">...</span>'; } // Loop for provides links for 2 pages before and after current page for ($i = ($_REQUEST["pageNumber"] - 2); $i <= ($_REQUEST["pageNumber"] + 2); $i ++) { if ($i < 1) continue; if ($i > $pages) break; if ($_REQUEST["pageNumber"] == $i) $output = $output . '<li class="page-item active"><a class="page-link" id=' . $i . '>' . $i . '</a></li>'; else $output = $output . '<li class="page-item"><a href="' . $href . "pageNumber=" . $i . '" class="page-link text-dark">' . $i . '</a></li>'; } // if pages exists after loop's upper limit if (($pages - ($_REQUEST["pageNumber"] + 2)) > 1) { $output = $output . '<span class="mx-1">...</span>'; } if (($pages - ($_REQUEST["pageNumber"] + 2)) > 0) { if ($_REQUEST["pageNumber"] == $pages) $output = $output . '<li class="page-item"><a id=' . ($pages) . ' class="page-link text-dark">' . ($pages) . '</a></li>'; else $output = $output . '<li class="page-item"><a href="' . $href . "pageNumber=" . ($pages) . '" class="page-link text-dark">' . ($pages) . '</a></li>'; } if ($_REQUEST["pageNumber"] < $pages) { $nextPage = $_REQUEST["pageNumber"] + 1; $output = $output . '<li class="page-item ' . $srOnly . '"><a href="' . $href . 'pageNumber=' . $nextPage . '"class="page-link text-dark">Next</a></li>'; } else { $output = $output . '<li class="page-item ' . $srOnly . '" disabled><a href=""class="page-link text-dark">Next</a></li>'; } } return $output; } // function calculate total records count and trigger pagination function function showperpage($count, $per_page = "3", $href) { $perpage = $this->pagination($count, $per_page, $href); return $perpage; }
}
?>

Output: Bootstrap Pagination

The below screenshot shows the output of this Bootstrap pagination example. It displays with an amazing select option with an HTML dropdown.

bootstrap pagination

Download

↑ Back to Top

Posted on Leave a comment

Project management tool for freelancers – Cazny

by Vincy. Last modified on April 18th, 2022.

Here is Cazny a project management tool for freelancers and am happy to share it with you. It is a feature-packed, hosted, and ready-to-use software. It enables you to better project management and saves your precious time.

It is an exclusive tool for freelancers to manage the full lifecycle of a project. The proposal, contract, client CRM, project, task, timesheet, invoices, and payment are the broad areas catered to.

cazny freelancer project management tool

Among all the good things Cazny has, one thing that I wish to highlight is the UI/UX design. All it will take is just 5 minutes to start using it to the fullest of its capability.

A spreadsheet will not help you to scale your business. You start as a freelancer, progress to creating a tiny team, then you graduate to become a freelance agency. You need an all-in-one tool and that is Cazny.

You definitely need a good tool to embark and succeed on this journey. Cazny will be a trustable subordinate for you. It will not be an overhead definitely.

It is brought to you with ritually followed design principles. Best-in-class security, ease of use, and analytical information are core features of Cazny.

Why Cazny?

If you answer “Yes” to any of the below questions, then Cazny is an option for you. If you say “Yes”, multiple times, then it is high time you start using Cazny.

  • Are you expecting to manage projects, clients, invoices, and payments in a single place?
  • Are you looking for a real-time connector that relates your freelancer’s projects, clients, invoices, and payments?
  • Do you expect to hire a flawless assistant to manage your running projects and tasks?
  • Do you have all your business data spread over assorted spreadsheets?
  • Do you frequently smash your head to get basic stats about the currently running projects?
  • Do you still use the age-old practice of unorganized email threads to manage projects?
  • Do you depend on anybody to know the open tasks of your projects?
  • Does it take an hour to get your income for the financial year?
  • Are you looking for a graphical presentation of your payment statistics?
  • Are you using multiple online software for client records, project-task management, invoicing, etc?

All the above questions have one magic answer, that is, Cazny. Go deeper into this article to see what is Cazny and how it is going to play a major role in your business.

How did it evolve?

When there is a boom in the number of running projects, management itself becomes a big project. My freelancing business is getting better by every day. As a freelancer, I struggled to deal with management work in parallel with the development and delivery.

We built software to help manage my day-to-day administrative activities. It got me out of this management struggle and saved me precious billable hours. It not only has relieved but also helped to scale up my freelance business.

Before Cazny I used to accept only a couple of projects in parallel. Now I have a team and do 10+ projects in parallel. See, what my clients are saying about my work. It became possible with the help of Cazny.

currently running projects

What is inside Cazny?

I have written more than 100 ‘what is inside’ tables of content for different products and projects. But here it will be a huge list if I add bullets for everything inside Cazny.

Let me present you a shrunk version of the list with key functionality.

Key features

  1. One unified software for all the needs of a freelancer for management
  2. Client CRM
  3. Flexible task management
  4. Timesheet log
  5. Income analytics
  6. Invoice generation
  7. Sales automation and payment tracking

Other features

  1. Custom fields
  2. Multi-language
  3. Simple search and advanced filters
  4. Connecting entities for relevancy
  5. Data security

Free signup and easy membership creation

Cazny allows you to signup for free with unlimited access to all features.

cazny signup

Members can subscribe at any moment within the trial period.

Project management with client CRM and tasks

This section describes the heart of this project management tool.

The complete tool goes around with these three core entities client, project, and task. The other entities of the project management tool are dependent on these primary assets.

client list add

Project scheduling with timesheet

Timesheet log is a critical component of a freelancer’s earnings. In my earlier days of being a freelancer, I lost income because of unorganized timesheet records.

All we need is a good tool and basic discipline. Cazny’s timesheet module is intuitive and easy to record task activities.

project timesheet

Invoice for payments

As a freelancer, you can survive without a management tool for all the features but one. A professional invoice is a key to building your brand as a freelancer and continuing business with a client.

Cazny has an intuitive, WYSIWYG editor for generating invoices. It populates and drops down the dependent client/project data to generate data.

It is highly customizable to suit your business. It has more options that are too user-friendly in the context of invoice generation. Example,

  1. Preview invoice.
  2. Generate and download PDF.
  3. Share invoice to a client with just a click of a button.
  4. Email invoice from within the tool.

invoice template

Sales automation and payment tracking

Payments tracking at their best with Cazny both by data tables and graphs. Comparatively, the payment graph view helps freelancers to have a quick bird’s eye view of the income.

This is one of my long-time issues of searching for payment data manually on emails to calculate the income at the stage. Combined with filter, data table and charts, income analysis is just a breeze with Cazny.

payment table graph

More features of Cazny

All functionality uses rich features to provide a good user experience.

Custom fields

For each freelancer, the client, project, and task have unique columns. This project management tool is designed with minimal and most wanted fields.

If you need additional fields, this feature helps you to add more. It contains add, edit, and remove options on each entity.

custom field

Multi-language implementation

The multi-language implementation is made across the site. It is configurable by every member to suit your preference. For public pages, the language can be specified by choosing the option in the header dropdown.

The member can choose their language on the account settings page. Based on this selection, the application framework loads the content. Now you can manage your projects in your own native language.

Common search and criteria based filter

Cazny provides an efficient search feature. It has two types of filters to search among the project management tool.

  1. A simple keyword-based common search filter.
  2. A Field-specific criteria-based filter form.

Search is very quick and seamless.

project search filter

Connecting entities for relevancy

It is all about loading relevant data based on the parent entity. This is to load,

  • Clients by member
  • Projects by clients
  • Tasks by projects
  • Timesheet by tasks
  • Invoice to clients
  • Payments by project, invoices

Data security

It assures for security and protection of member-submitted data. It follows global norms and state-of-the-art tech to protect your data. Architected and developed be members with good experience. Also, a third-party security audit is conducted to ascertain the quality of the software.

Conclusion

As a seasoned freelancer with an agency, we built Cazny for our internal purposes. This has helped us to scale up our business by freeing up our valuable time from administrative activities.

We are launching the tool to you in the belief that it will save your precious time and allow you to focus more on billable hours. Please leave your feedback in the comments section.

↑ Back to Top