Posted on Leave a comment

Convert CSV to Excel xlsx in Python

5/5 – (1 vote)

Problem Formulation

💡 Challenge: Given a CSV file. How to convert it to an excel file in Python?
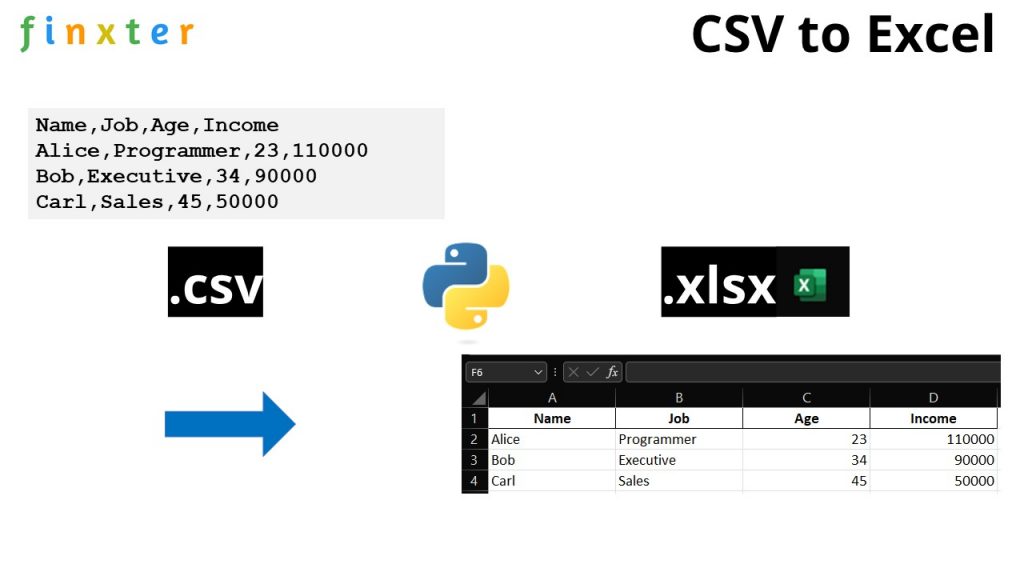
csv to excel in Python

We create a folder with two files, the file csv_to_excel.py and my_file.csv. We want to convert the CSV file to an excel file so that after running the script csv_to_excel.py, we obtain the third file my_file.csv in our folder like so:

All methods discussed in this tutorial show different code snippets to put into csv_to_excel.py so that it converts the CSV to XLSX in Python.

Method 1: 5 Easy Steps in Pandas

The most pythonic way to convert a .csv to an .xlsx (Excel) in Python is to use the Pandas library.

  1. Install the pandas library with pip install pandas
  2. Install the openpyxl library that is used internally by pandas with pip install openpyxl
  3. Import the pandas libray with import pandas as pd
  4. Read the CSV file into a DataFrame df by using the expression df = pd.read_csv('my_file.csv')
  5. Store the DataFrame in an Excel file by calling df.to_excel('my_file.xlsx', index=None, header=True)
import pandas as pd df = pd.read_csv('my_file.csv')
df.to_excel('my_file.xlsx', index=None, header=True)

Note that there are many ways to customize the to_excel() function in case

  • you don’t need a header line,
  • you want to fix the first line in the Excel file,
  • you want to format the cells as numbers instead of strings, or
  • you have an index column in the original CSV and want to consider it in the Excel file too.

If you want to do any of those, feel free to read our full guide on the Finxter blog here:

🌍 Tutorial: Pandas DataFrame.to_excel() – An Unofficial Guide to Saving Data to Excel

Also, we’ve recorded a video on the ins and outs of this method here:

Let’s have a look at an alternative to converting a CSV to an Excel file in Python:

Method 2: Modules csv and openpyxl

To convert a CSV to an Excel file, you can also use the following approach:

  • Import the csv module
  • Import the openpyxl module
  • Read the CSV file into a list of lists, one inner list per row, by using the csv.reader() function
  • Write the list of lists to the Excel file by using the workbook representation of the openpyxl library.
  • Get the active worksheet by calling workbook.active
  • Write to the worksheet by calling worksheet.append(row) and append one list of values, one value per cell.

The following function converts a given CSV to an Excel file:

import csv
import openpyxl def csv_to_excel(csv_filename, excel_filename): # Read CSV file csv_data = [] with open(csv_filename) as f: csv_data = [row for row in csv.reader(f)] # Write to Excel file workbook = openpyxl.workbook.Workbook() worksheet = workbook.active for row in csv_data: worksheet.append(row) workbook.save(excel_filename) if __name__ == "__main__": csv_to_excel("my_file.csv", "my_file.xlsx")

This is a bit more fine-granular approach and it allows you to modify each row in the code or even write additional details into the Excel worksheet.

Where to Go From Here?

Enough theory. Let’s get some practice!

Coders get paid six figures and more because they can solve problems more effectively using machine intelligence and automation.

To become more successful in coding, solve more real problems for real people. That’s how you polish the skills you really need in practice. After all, what’s the use of learning theory that nobody ever needs?

You build high-value coding skills by working on practical coding projects!

Do you want to stop learning with toy projects and focus on practical code projects that earn you money and solve real problems for people?

🚀 If your answer is YES!, consider becoming a Python freelance developer! It’s the best way of approaching the task of improving your Python skills—even if you are a complete beginner.

If you just want to learn about the freelancing opportunity, feel free to watch my free webinar “How to Build Your High-Income Skill Python” and learn how I grew my coding business online and how you can, too—from the comfort of your own home.

Join the free webinar now!

Posted on Leave a comment

Extract File Name From the Path, No Matter What the os/path Format

Summary: os.path.basename(path) enables us to get the file name from the path, no matter what the os/path format. Another workaround is to use the ntpath module, which is equivalent to os.path.


✨Problem: How to extract the filename from a path, no matter what the operating system or path format is?

For example, let’s suppose that you want all the following paths to return demo.py:

➤ C:\Users\SHUBHAM SAYON\Desktop\codes\demo.py
➤ /home/username/Desktop/codes/demo.py
➤ /home/username/Desktop/../demo.py

Expected Output in each case:

demo.py

Recommended: How To Get The Filename Without The Extension From A Path In Python?

Let us dive into the solutions without further delay.

❖ Method 1: Using os.path.basename

os.path.basename is a built-in method of the os module in Python that is used to derive the basename of a file from its path. It accepts the path as an input and then returns the basename of the file. Thus, to get the filename from its path, this is exactly the function that you would want to use.

Example 1: In Windows

import os
file_path = r'C:\Users\SHUBHAM SAYON\Desktop\codes\demo.py'
print(os.path.basename(file_path)) # OUTPUT: demo.py

Example 2: In Linux

Caution: If you use the os.path.basename() function on a POSIX system in order to get the basename from a Windows-styled path, for example: “C:\\my\\file.txt“, the entire path will be returned.

Tidbit: os.path.basename() method actually uses the os.path.split() method internally and splits the specified path into a head and tail pair and finally returns the tail part. 

❖ Method 2: Using the ntpath Module

The ntpath module can be used to handle Windows paths efficiently on other platforms. os.path.basename function does not work in all the cases, like when we are running the script on a Linux host, and you attempt to process a Windows-style path, the process will fail.

This is where the ntpath module proves to be useful. Generally, the Windows path uses either the backslash or the forward-slash as a path separator. Therefore, the ntpath module, equivalent to the os.path while running on Windows, will work for all the paths on all platforms.

In case the file ends with a slash, then the basename will be empty, so you can make your own function and deal with it:

import ntpath def path_foo(path): head, tail = ntpath.split(path) return tail or ntpath.basename(head) paths = [r'C:\Users\SHUBHAM SAYON\Desktop\codes\demo.py', r'/home/username/Desktop/codes/demo.py', r'/home/username/Desktop/../demo.py']
print([path_foo(path) for path in paths]) # ['demo.py', 'demo.py', 'demo.py']

❖ Method 3: Using pathlib.Path()

If you are using Python 3.4 or above, then the pathlib.Path() function of the pathlib module is another option that can be used to extract the file name from the path, no matter what the path format. The method takes the whole path as an input and extracts the file name from the path and returns the file name.

from pathlib import Path
file_path = r'C:\Users\SHUBHAM SAYON\Desktop\codes\demo.py'
file_name = Path(file_path).name
print(file_name) # demo.py

Note: The .name property followed by the pathname is used to return the full name of the final child element in the path, regardless of whatever the path format is and regardless of whether it is a file or a folder.

💡Bonus Tip: You can also use Path("File Path").stem to get the file name without the file extension.

Example:

from pathlib import Path
file_path = r'C:\Users\SHUBHAM SAYON\Desktop\codes\demo.py'
file_name = Path(file_path).stem
print(file_name) # demo

❖ Method 4: Using split()

If you do not intend to use any built-in module to extract the filename irrespective of the OS/platform in use, then you can simply use the split() method.

Example:

import os
file_path = r'C:\Users\SHUBHAM SAYON\Desktop\codes\demo.py'
head, tail = os.path.split(file_path)
print(tail) # demo.py

Explanation: In the above example os.path.split() method is used to split the entire path string into head and tail pairs. Here, tail represents/stores the ending path name component, which is the base filename, and head represents everything that leads up to that. Therefore, the tail variable stores the name of the file that we need.

➤ A Quick Recap to split():
split() is a built-in method in Python that splits a string into a list based on the separator provided as an argument to it. If no argument is provided, then by default, the separator is any whitespace.

Learn more about the split() method here.

Alternatively, for more accurate results you can also use a combination of the strip() and split() methods as shown below.

file_path = r'C:\Users\SHUBHAM SAYON\Desktop\codes\demo.py'
f_name = file_path.strip('/').strip('\\').split('/')[-1].split('\\')[-1]
print(f_name)
# demo.py

Explanation: The strip method takes care of the forward and backward slashes, which makes the path string fullproof against any OS or path format, and then the split method ensures that the entire path string is split into numerous strings within a list. Lastly, we will just return the last element from this list to get the filename.

❖ Method 5: Using Regex

If you have a good grip on regular expressions then here’s a regex specific solution for you that will most probably work on any OS.

import re
file_path = r'C:\Users\SHUBHAM SAYON\Desktop\codes\\'
def base_name(path): basename = re.search(r'[^\\/]+(?=[\\/]?$)', path) if basename: return basename.group(0) paths = [r'C:\Users\SHUBHAM SAYON\Desktop\codes\demo.py', r'/home/username/Desktop/codes/demo.py', r'/home/username/Desktop/../demo.py']
print([base_name(path) for path in paths]) # ['demo.py', 'demo.py', 'demo.py']

Do you want to master the regex superpower? Check out my new book The Smartest Way to Learn Regular Expressions in Python with the innovative 3-step approach for active learning: (1) study a book chapter, (2) solve a code puzzle, and (3) watch an educational chapter video.

Conclusion

To sum thungs up, you can use one of the following methods to extract the filename from a given path irrespective of the OS/path format:

  • os.path.basename('path')
  • ntpath.basename()
  • pathlib.Path('path').name
  • os.path.split('path')
  • using regex

Please stay tuned and subscribe for more interesting articles!


To become a PyCharm master, check out our full course on the Finxter Computer Science Academy available for free for all Finxter Premium Members:

Posted on Leave a comment

The Ultimate Guide to Installing Ghostscript

In this article we explore how to install Ghostscript on numerous different platforms and operating systems.

What is Ghostcript? Why install it?

What is Ghostscript, and why would we want to install it? To understand this we should first learn about Postscript.

Postscript

Postscript is a page description language geared towards desktop publishing documents.

If you want really professional-looking typesetting, layout, and graphics in your documents, desktop publishing software is what you use.

It was first created at Adobe Systems starting in 1982. As a language, it is similar to Python in that documents contain human-readable and writable commands in the language that can be parsed by an interpreter to get something done.

In the case of Python, text files containing Python commands can be parsed by the Python interpreter to create any kind of program imaginable.

In the case of Postscript, files containing Postscript commands can be parsed by a Postscript interpreter to render professional-looking documents, either to the screen or to a printer.

In addition, the PDF format is an extension of the Postscript language which adds more functionality and is now one of the most commonly used document formats.

Ghostscript

Ghostscript is a free open-source interpreter to render Postscript and PDF documents.

One of the reasons you might want to install it is to use a program that requires it.

Even without a program that needs it, installing Ghostscript can be useful:

⭐ Ghostscript can be used to modify PDF documents, such as converting PDF to images, or extracting text, among other things.

Even better, since Ghostscript provides a language-binding API, Ghostscript functions can be implemented in other languages, allowing us to write our own programs for modifying PDF documents. Supported languages are C#, Java, and Python.

Checking if Ghostscript is Already Installed

You may already have Ghostscript installed – your system may have come with it, or it may have been installed in support of a program you have installed. So save yourself some effort and check first.

Checking for Ghostscript on Windows

  1. Press Windows+R to open the “Run” box.   
  2. In the “Run” box type “cmd”.   
  3. A command line window opens.   
  4. In the command line window type “GSWIN64 -h” if your system is 64 bit (most machines these days), or “GSWIN32 -h” if your system is 32 bit (older machines). If Ghostscript is installed you will see Ghostscript help information. If you see an error then Ghostscript is not installed.   
  5. Type “exit” to close the command line window.

Checking for Ghostscript on Mac

  1. In the Finder, open the /Applications/Utilities folder, then double-click Terminal.   
  2. In the terminal window type “gs -h”. If Ghostscript is installed you will see Ghostscript help information. If you see an error then Ghostscript is not installed.       
  3. In the Terminal app on your Mac, choose Terminal > Quit Terminal.

Checking for Ghostscript on Linux

  1. Open a terminal window. How to do this varies depending on which distribution of Linux you are using.   
  2. In the terminal window type “gs -h”. If Ghostscript is installed you will see Ghostscript help information. If you see an error then Ghostscript is not installed.

Installing Ghostscript on Windows

  1. Go to the Ghostscript download page at https://www.ghostscript.com/releases/gsdnld.html    
  2. There are two license versions available: Affero GPL (AGPL), and commercial. Review the license information at https://artifex.com/licensing/. For casual use most users will chose AGPL.   
  3. Choose 64 bit or 32 bit depending on your system.   
  4. Download your choice by clicking on the chosen link.   
  5. The installer program will download.   
  6. The downloaded program will be gsxxxxw64.exe or gsxxxxw32.exe. The ‘xxxx’ will be numbers indicating the release version. The most current version as of this writing is 9.55.0, so the installer program would be gs9550w64.exe for the 64 bit version.   
  7. Double-click the downloaded installer program.   
  8. Follow the prompts to do the installation.

Installing Ghostscript on Unix

Use this for any UNIX-based machine, so this should work for Mac or Linux.

Most UNIX systems have much easier ways of installing Ghostscript, so you will almost certainly not need to do this.

However, if you have trouble with those easier approaches you might try this as a backup.

This method usually works, but sometimes it does not, and then you need to do some troubleshooting to figure out why (the configure file might not be configured properly for your system, for example).

Also note that you will need to make sure that compiling software for Linux or Mac is installed on your system, which is beyond the scope of this article. So choose this approach as a last resort.

  1. Go to the Ghostscript download page and download the source code version. As of this writing this file is ghostscript-9.55.0.tar.gz   
  2. Move this file to some folder where you want to work.   
  3. Unarchive the downloaded file. Usually your system will be configured to do so by double-clicking the file. If not, you can unarchive using this command in the terminal: tar -xzf ghostscript-9.55.0.tar.gz. The file will unpack into sub-directories and files.   
  4. In the terminal go to the top unpacked sub-directory.   
  5. Run the configure file by typing ./configure in your terminal. This will review your system and get ready to compile the code.   
  6. Compile the code by typing make in your terminal.   
  7. Install the compiled code by typing this: sudo make install

Here are the commands for ease of copy&paste:

tar -xzf ghostscript-9.55.0.tar.gz
./configure
make
sudo make install

Installing Ghostscript on Mac

The easiest way to install Ghostscript on Mac is to use the Homebrew or Macports systems. These are package management systems for Mac that make available to the Mac the wide world of Unix open-source software.

In these systems, much of the configuring is done for you by others so that downloading and installing software is as easy as a single command, just like downloading an app for the Mac is as simple as clicking an icon in the Mac App Store.

What programs are available depends on what has been prepared by others for the system.

Fortunately, Ghostscript is available for these systems.

Setting up these systems is beyond the scope of this article. This page has a nice summary of those systems (and of the Fink system, another package management system). Follow their respective links to learn more about each system.

Install Ghostscript using Homebrew using the following command:

brew install ghostscript

Install Ghostscript using Macports using the following command:

sudo port install ghostscript

Installing Ghostscript on Ubuntu

It is often most intuitive to install software on Ubuntu using the GUI-based software application.

This accesses the repositories of extensive software available for Ubuntu.

However, it is often the fastest to do a command line install. Do so for Ghostscript as follows:

sudo apt install ghostscript

Installing Ghostscript on Other Debian-based Distributions

There are many distributions that, like Ubuntu, are based on Debian.

Many also have GUI applications for installing software, and often these can be used to install Ghostscript. But like Ubuntu, it is often the fastest to use the command line install.

The command is still the same:

sudo apt install ghostscript

Installing Ghostscript on Centos 7, and Other Red Hat/ Fedora-based Distributions

Centos 7 is a free version of the Red Hat Linux distribution, without Red Hat branding or technical support from Red Hat.

Fedora is the “bleeding-edge” freely available distribution in the Red Hat family of distributions that serves as the development foundation for the more robust and stable Red Hat distribution.

Since these are all in the same distribution family, they are all most quickly updated by the same command. The many other distributions in this family are also most quickly updated by the same command.

The command is:

sudo yum install ghostscript

Installing Ghostscript for Anaconda

If you are a data scientist more comfortable with data analysis in Anaconda than you are comfortable with OS management, you can still make sure you have ghostscript through Anaconda.

Open the Anaconda command line interface and enter the following command to install Ghostscript:

conda install -c conda-forge ghostscript

Installing Ghostscript in Google Colab

Ghostscript can even be installed in Google Colab.

Cells in Colab are in-effect like the Python shell. Therefore users can use the exclamation mark to submit OS shell commands, then enter the command to install Ghostscript.

The OS behind Colab operates like Ubuntu, so the installation command mirrors that of Ubuntu. Therefore, to install Ghostscript enter the following command in a Colab cell:

!apt get install ghostscript

Conclusion

Ghostscript is a free open-source interpreter that renders Postscript and PDF documents either to the screen or to a printer.

Ghostscript can also be used to process or modify such documents.

Even better, because Ghostscript includes a language-binding API, programmers can use it to write programs in other languages to modify PDF documents.

Supported languages are C#, Java, and Python.

As you can see, Ghostscript is available on many different platforms and operating systems. We have exhibited commands to install Ghostscript on many of these various platforms.

We hope you have found this helpful, and we wish you happy coding!


Posted on Leave a comment

Announcing Phone Link, the next evolution of cross-device experiences for your Windows PC and Android phone

Phone Link, formerly known as Your Phone, brings your Android phone and your Windows PC closer together.

Today we are thrilled to announce the evolution of Your Phone app as Phone Link.  We introduced the Your Phone experience more than three years ago, allowing you to keep your smartphone in your pocket and still be able to access your photos and texts on your computer. Since then, we have enabled more capabilities, such as the ability to filter notifications on your Windows PC, make and receive phone calls even when your phone is out of reach, and use your Android mobile apps on your Windows PC.

As part of this evolution, we’re now introducing a brand-new interface that brings notifications upfront to help you be confident that you’re not missing out on anything.  With the new tabbed navigation, all the important capabilities and content from your phone are still right at your fingertips. And we have also made improvements to make set-up even easier.  With the next update of Windows 11, you will also be able to set-up Phone Link during your set-up with your new PC with the ease of scanning a QR code.

We see this experience as more than just bringing your phone into your PC but as a bridge between the two devices, so we are renaming the app to Phone Link. And to further celebrate this connection between your two devices, we have also renamed the mobile companion app from Your Phone Companion to Link to Windows for all Android users. We’re bringing both apps together with the same icon too.

User interface

Phone Link has updated design for Windows 11

In our journey to make it easier for customers to get to the content that matters to them, we saw a great opportunity with the recent release of Windows 11 to also refresh the app design.  We carefully updated our controls, color palette, and overall look and feel to deliver a native app experience on the new Windows 11 OS.  New app design changes include rounded corners, fresh illustrations and updated iconography.

User interface

Phone Link is reaching more customers around the world

Recently we took an exciting step in unlocking this cross-device functionality for a brand new market. Phone Link is now available in China thanks to a partnership with HONOR, making these experiences now available on HONOR Magic V, Magic 4 series and Magic 3 series devices, with more to come.

This is in addition to our existing partnerships with Surface Duo and Samsung to integrate deeply and provide an even better experience on these devices beyond what’s possible on other Android devices. Recently, in partnership with Samsung, we’ve made it easier to launch the apps you were recently using on your phone and continue using them on the PC. This brings the mobile and PC worlds closer by allowing you to jump to the Office desktop and web experiences for files you were viewing on your Office mobile app.

Phone and desktop

Get started with Phone Link on your PC

We want to express how excited we are to share the evolution of our Phone Link and Link to Windows experiences and thank all our customers for joining us on this journey thus far. The journey doesn’t stop here, we’ll continue to bring more cross-device experiences to Windows through Phone Link. If you haven’t tried it yet, now is the best time to dive in.  Start your cross-device journey here: aka.ms/phonelink.

Posted on Leave a comment

Using Fedora 33 with Microsoft’s WSL2

If you’re like me, you may find yourself running Windows for a variety of reasons from work to gaming. Sure you could run Fedora in a virtual machine or as a container, but those don’t blend into a common windows experience as easily as the Windows Subsystem for Linux (WSL). Using Fedora via WSL will let you blend the two environments together for a fantastic development environment.

Prerequisites

There are a few basics you’ll need in order to make this all work. You should be running Windows 10, and have WSL2 installed already. If not, check out the Microsoft documentation for instructions, and come back here when you’re finished. Microsoft recommends setting wsl2 as the distro default for simplicity. This guide assumes you’ve done that.

Next, you’re going to need some means of unpacking xz compressed files. You can do this with another WSL-based distribution, or use 7zip.

Download a Fedora 33 rootfs

Since Fedora doesn’t ship an actual rootfs archive, we’re going to abuse the one used to generate the container image for dockerhub. You will want to download the tar.xz file from the fedora-cloud GitHub repository. Once you have the tar.xz, uncompress it, but don’t unpack it. You want to end up with something like fedora-33-datestamp.tar. Once you have that, you’re ready to build the image.

Composing the WSL Fedora build

I prefer to use c:\distros, but you can choose nearly whatever location you want. Whatever you choose, make sure the top level path exists before you import the build. Now open a cmd or powershell prompt, because it’s time to import:

 
wsl.exe --import Fedora-33 c:\distros\Fedora-33 $HOME\Downloads\fedora-33.tar

You will see Fedora-33 show up in wsl’s list

 
PS C:\Users\jperrin> wsl.exe -l -v
  NAME                   STATE           VERSION
  Fedora-33                 Stopped         2

From here, you can start to play around with Fedora in wsl, but we have a few things we need to do to make it actually useful as a wsl distro.

 
wsl -d Fedora-33

This will launch Fedora’s wsl instance as the root user. From here, you’re going to install a few core packages and set a new default user. You’re also going to need to configure sudo, otherwise you won’t be able to easily elevate privileges if you need to install something else later.

 
dnf update
dnf install wget curl sudo ncurses dnf-plugins-core dnf-utils passwd findutils

wslutilites uses curl and wget for things like VS Code integration, so they’re useful to have around. Since you need to use a Copr repo for this, you want the added dnf functionality.

Add your user

Now it’s time to add your user, and set it as the default.

 
useradd -G wheel yourusername
passwd yourusername

Now that you’ve created your username and added a password, make sure they work. Exit the wsl instance, and launch it again, this time specifying the username. You’re also going to test sudo, and check your uid.

 
wsl -d Fedora-33 -u yourusername
$id -u
1000
$ sudo cat /etc/shadow

Assuming everything worked fine, you’re now ready to set the default user for your Fedora setup in Windows. To do this, exit the wsl instance and get back into Powershell. This Powershell one-liner configures your user properly:

 
Get-ItemProperty Registry::HKEY_CURRENT_USER\Software\Microsoft\Windows\CurrentVersion\Lxss\*\ DistributionName | Where-Object -Property DistributionName -eq Fedora-33  | Set-ItemProperty -Name DefaultUid -Value 1000

Now you should be able to launch WSL again without specifying a user, and be yourself instead of root.

Customize!

From here, you’re done getting the basic Fedora 33 setup running in wsl, but it doesn’t have the Windows integration piece yet. If this is something you want, there’s a Copr repo to enable. If you choose to add this piece, you’ll be able to run Windows apps directly from inside your shell, as well as integrate your Linux environment easily with VS Code. Note that Copr is not officially supported by Fedora infrastructure. Use packages at your own risk

 
dnf copr enable trustywolf/wslu

Now you can go configure your terminal, setup a Python development environment, or however else you want to use Fedora 33. Enjoy!

Posted on Leave a comment

Windows search bar: The one stop for answers, now with Bing Visual Search

Every day, we have questions. Search engines, apps, digital voice assistants, or phones are usually our go-to places to find answers.

You may already know that you can use the search bar in Windows – found on your PC taskbar – to find things like an app, setting, or a file you’ve been working on.

But did you know it can also find answers to questions like…

What’s the weather like in Paris? What’s the score of the Leicester City match? How do you unzip a file?

Windows brings all these searches together in one place. It’s easy to find and easy to use.

Screenshot of Windows search home, pulled up in lower left hand corner of Windows home screen

You don’t have to scroll through a long list of results, you don’t have to open a browser, and you don’t have to leave whatever application you’re in. With a couple of keystrokes, you can find your answers.

Screenshot showing conversion of 5 pound sterling to 5.91 euro in search

“The goal was to enable search in Windows to bring the web to where you are,” says Alexander Campbell, a senior program manager working on search. “People spend a lot of time on the web and in browsers. We saw an opportunity to help people save time in Windows by bringing convenient, fast web results directly to the search bar in Windows. Stay on task and in your flow, just by hitting the Windows key or clicking on the search box.”

It’s also a convenient place to start a search that leads to a website. From the search bar in Windows, you can quickly type and navigate to a URL, without having to open a browser first.

“We have a search experience that gives you quick answers, web results and helps you start your web task. It’s amazing what you can do with it,” he adds.

Screenshot showing Reddit URL in search results

Every day it gets more useful: a full web search experience powered by the intelligence of Bing. You can search for quick calculations, music videos, movie trailers, sports scores, stock prices, movie times, weather forecasts and much more. Results turn up right in the taskbar. If you want to see more, you can open the results in your browser.

Screenshot showing Boston to Seattle flight status results

“The search bar in Windows gives you the quick info you need with none of the distraction,” Campbell says. “In the middle of an essay? It’s easy to jump in, check a fact and then get back to your work.”

The Windows and Bing teams worked together to bring a true web search experience into Windows, just like what you’d expect in a browser, into the search bar. And the teams continue to improve the search capability thanks to your feedback and Bing innovation.

Screenshot showing search results of how to zip files

The search bar is also the best place to go when you need to get things done on your Windows 10 device. Let’s say you need to download an app, Search can find it for you fast. For example, type “download microsoft to-do” or “download solitaire” and get an install link in the results preview. It’s also an easy way to get Tech Help answers to common questions, like “how do I connect a printer” or “how do I unzip files.”

Screenshot showing search results for "download microsoft to-do"

And now, in addition to entering a text search, you can search with an image by taking a screenshot. This feature is rolling out to users in the U.S. first with international markets to follow shortly after. (You need the Windows 10 May 2019 Update or newer to see this.)

Simply click the Bing Visual Search button in the bottom right corner and snip any part of your screen to search the web using the image.

GIF showing how Visual Search works, using searching for a blue couch as an example, with similar results popping up after sniping a screenshot of the couch

“Visual search is a new way of searching,” says Ravi Yada, product lead for Bing Visual Search. “There are a lot of things you can’t describe in words to get good enough results. By using an image as input for search, Bing can help you search what you see.”

Bing added camera-based searches in 2017, and made visual search features available in the Windows Photos App, Microsoft Edge, the Bing App and on Android phones through Microsoft Launcher. With the latest releases of Windows, you can use Windows Search to snip any part of your screen and search.

Screenshot of a bright orange flower with a pulldown menu in the Photos app, showing the choice to click on similar results

Screenshot of Bing results of Visual Search on photo of bright orange flower

“We found people also wanted to search with screenshots, so we brought searching with screen snips to the Windows search bar,” says Nektarios Ioannides, Bing Image Search lead.

For instance, if you’re planning your wardrobe for winter and you want inspiration from what your favorite celebs are wearing? You’ll find similar results. Or you might be shopping for furniture and see a sofa you like. Snip it and use it to comparison shop with Visual Search results [1].

Aside from finding similar products, Visual Search can recognize landmarks, flowers, celebrities, animals. It also recognizes text in images, so you can copy or search it [2].

“Search is evolving. We’re still expanding the breadth of capabilities,” Ioannides says. “It’s cool to see the growth and excitement it generates, especially as we move into a world where using our eyes to search becomes more common.”

For developers, there’s an API to incorporate Visual Search within products and apps they create.

“Search in Windows is now more intelligent than ever at getting you where you want to go, saving steps and time,” Campbell says. “We can’t wait to see how you use it.”

Let us know your feedback and what you want to see next by clicking the “Feedback” button in the top right corner of the search experience.

Eager to try this yourself? If you’re reading this on a device running Windows 10 May 2019 Update or newer, click on the following examples:

[1] Shopping results are only available to users in the United States and United Kingdom.

[2] This is available in English for now.

Posted on Leave a comment

Managing JBoss EAP/Wildfly using Jcliff

Systems management can be a difficult task. Not only does one need to determine what the end state should be but, more importantly, how to ensure systems attain and remain at this state. Doing so in an automated fashion is just as critical, because there may be a large number of target instances. In regard to enterprise Java middleware application servers, these instances are typically configured using a set of XML based files. Although these files may be manually configured, most application servers have a command-line based tool or set of tools that abstracts the end user from having to worry about the underlying configuration. WebSphere Liberty includes a variety of tools to manage these resources, whereas JBoss contains the jboss-cli tool.

Although each tool accomplishes its utilitarian use case as it allows for proper server management, it does fail to adhere to one of the principles of automation and configuration management: idempotence. Ensuring the desired state does not equate to executing the same action with every iteration. Additional intelligence must be introduced. Along with idempotence, another core principle of configuration management is that values be expressed declaratively and stored in a version control system.

Jcliff is a Java-based utility that is built on top of the JBoss command-line interface and allows for the desired intent for the server configuration to be expressed declaratively, which in turn can be stored in a version control system. We’ll provide an overview of the Jcliff utility including inherent benefits, installation options, and several examples showcasing the use.

The problem space

Before beginning to work with Jcliff, one must be cognizant of the underlying JBoss architecture. The configuration of the JBoss server can be expressed using Dynamic Model Representation (DMR) notation. The following is an example of DMR:

{ "system-property" => { "foo" => "bar", "bah" => "gah" } } 

The DMR example above describes several Java system properties that will be stored within the JBoss configuration. These properties can be added using the JBoss CLI by executing the following command:

/system-property=foo:add(value=bar) /system-property=bah:add(value=gah) 

The challenge is that the same commands cannot be executed more than once. Otherwise, an error similar to the following is produced.

{ "outcome" => "failed", "failure-description" => "WFLYCTL0212: Duplicate resource [(\"system-property\" => \"foo\")]", "rolled-back" => true } 

Where Jcliff excels is that it includes the necessary intelligence to determine the current state of the JBoss configuration and then applying the appropriate configurations necessary. This is critical to adopting proper configuration management when working with JBoss.

Installing Jcliff

With a baseline understanding of Jcliff, let’s discuss the methods in which one can obtain the utility. First, Jcliff can be built from source from the project repository, given that it’s a freely open source project. Alternatively, Jcliff can be installed using popular software packaging tools in each of the primary operating system families.

Linux (rpm)

Jcliff can be consumed on a Linux package when capable of consuming an rpm using a package manager.

First, install the yum repository:

$ cat /etc/yum.repos.d/jcliff.repo [jcliff] baseurl = http://people.redhat.com/~rpelisse/jcliff.yum/ gpgcheck = 0 name = JCliff repository 

Once this repository has been added, JCliff can be installed by using Yum or Dnf:

Using yum:

$ sudo yum install jcliff 

Or using dnf:

$ sudo dnf install jcliff 

Manual installation

Jcliff can also be installed manually without the need to leverage a package manager. This is useful for those on Linux distributions that cannot consume rpm packages. Simply download and unpack the archive from the release artifact from the project repository.

$ curl -O \ https://github.com/bserdar/jcliff/releases/download/v2.12.1/jcliff-2.12.1-dist.tar.gz $ tar xzvf jcliff-2.12.1-dist.tar.gz 

Place the resulting Jcliff folder in the destination of your choosing. This location is known as JCLIFF_HOME. Add this environment variable and add it to the path as described below:

$ export JCLIFF_HOME=/path/to/jcliff-2.12.1/ $ export PATH=${JCLIFF_HOME}/bin:${PATH} 

At this point, you should be able to execute the jcliff command.

OSX

While users on OSX can take advantage of the manual installation option, those making use of the brew package manager can use this tool as well.

Execute the following commands to install Jcliff using Brew:

$ brew tap redhat-cop/redhat-cop $ brew install redhat-cop/redhat-cop/jcliff 

Windows

Fear not, Windows users; you can also make use of Jcliff without having to compile from source. Windows, in the same vein as OSX, does not have an official package manager, but Chocolatey has been given this role.

Execute the following command to install Jcliff using Chocolatey:

$ choco install jcliff 

Using Jcliff

With Jcliff properly installed on your machine, let’s walk through a simple example to demonstrate the use of the tool. As discussed previously, Jcliff makes use of files that describe the target configuration. At this point, you may have questions like: What is the format of these configurations, and where do I begin?

Let’s take a simple example and look into adding a new system property to the JBoss configuration. Launch an instance of JBoss and connect using the JBoss command-line interface:

$ /bin/jboss-cli.sh --connect [standalone@localhost:9990 /] ls /system-property [standalone@localhost:9990 /] 

Now, use Jcliff to update the configuration. First, we’ll need to create a Jcliff rule. The rule resembles DMR format and appears similar to the following:

$ cat jcliff-prop { "system-property" => { "jcliff.enabled" => "true", } } 

Then we can simply ask JCliff to run this script against our JBoss server:

$ jcliff jcliff-prop Jcliff version 2.12.4 2019-10-02 17:03:40:0008: /core-service=platform-mbean/type=runtime:read-attribute(name=system-properties) 2019-10-02 17:03:41:0974: /system-property=jcliff.enabled:add(value="true") 

Use the JBoss CLI to verify the changes have been applied.

$ “${JBOSS_HOME}/bin/jboss-cli.sh” --connect --command=/system-property=jcliff.enabled:read-resource { "outcome" => "success", "result" => {"value" => "true"} } 

To demonstrate how Jcliff handles repetitive executions, run the previous Jcliff command again. Inspect the output.

$ jcliff jcliff-prop Jcliff version 2.12.4 2019-10-02 17:05:34:0107: /core-service=platform-mbean/type=runtime:read-attribute(name=system-properties) 

Notice that only 1 command was executed against the JBoss server instead of two? This action was a result of assessing the current state within JBoss and determining that no action was necessary to reach the desired state. Mission accomplished.

Next steps

Although the preceding scenario was not overly complex, you should now have the knowledge necessary to understand the capabilities and functionality of the Jcliff utility as well as the benefits afforded through declarative configurations and automation. When building out enterprise-grade systems, however, Jcliff would not be executed manually. You would want to integrate the utility into a proper configuration management tool that employs many of the automation and configuration principles described earlier. Fortunately, Jcliff has been integrated into several popular configuration management tools.

In an upcoming article, we’ll provide an overview of the configuration management options available with Jcliff, along with examples that will allow you to quickly build out enterprise-grade confidence with Jcliff.

Share

The post Managing JBoss EAP/Wildfly using Jcliff appeared first on Red Hat Developer.

Posted on Leave a comment

4 tips for better tmux sessions

The tmux utility, a terminal multiplexer, lets you treat your terminal as a multi-paned window into your system. You can arrange the configuration, run different processes in each, and generally make better use of your screen. We introduced some readers to this powerful tool in this earlier article. Here are some tips that will help you get more out of tmux if you’re getting started.

This article assumes your current prefix key is Ctrl+b. If you’ve remapped that prefix, simply substitute your prefix in its place.

Set your terminal to automatically use tmux

One of the biggest benefits of tmux is being able to disconnect and reconnect to sesions at wilI. This makes remote login sessions more powerful. Have you ever lost a connection and wished you could get back the work you were doing on the remote system? With tmux this problem is solved.

However, you may sometimes find yourself doing work on a remote system, and realize you didn’t start a session. One way to avoid this is to have tmux start or attach every time you login to a system with in interactive shell.

Add this to your remote system’s ~/.bash_profile file:

if [ -z "$TMUX" ]; then tmux attach -t default || tmux new -s default fi

Then logout of the remote system, and log back in with SSH. You’ll find you’re in a tmux session named default. This session will be regenerated at next login if you exit it. But more importantly, if you detach from it as normal, your work is waiting for you next time you login — especially useful if your connection is interrupted.

Of course you can add this to your local system as well. Note that terminals inside most GUIs won’t use the default session automatically, because they aren’t login shells. While you can change that behavior, it may result in nesting that makes the session less usable, so proceed with caution.

Use zoom to focus on a single process

While the point of tmux is to offer multiple windows, panes, and processes in a single session, sometimes you need to focus. If you’re in a process and need more space, or to focus on a single task, the zoom command works well. It expands the current pane to take up the entire current window space.

Zoom can be useful in other situations too. For instance, imagine you’re using a terminal window in a graphical desktop. Panes can make it harder to copy and paste multiple lines from inside your tmux session. If you zoom the pane, you can do a clean copy/paste of multiple lines of data with ease.

To zoom into the current pane, hit Ctrl+b, z. When you’re finished with the zoom function, hit the same key combo to unzoom the pane.

Bind some useful commands

By default tmux has numerous commands available. But it’s helpful to have some of the more common operations bound to keys you can easily remember. Here are some examples you can add to your ~/.tmux.conf file to make sessions more enjoyable:

bind r source-file ~/.tmux.conf \; display "Reloaded config"

This command rereads the commands and bindings in your config file. Once you add this binding, exit any tmux sessions and then restart one. Now after you make any other future changes, simply run Ctrl+b, r and the changes will be part of your existing session.

bind V split-window -h bind H split-window

These commands make it easier to split the current window across a vertical axis (note that’s  Shift+V) or across a horizontal axis (Shift+H).

If you want to see how all keys are bound, use Ctrl+B, ? to see a list. You may see keys bound in copy-mode first, for when you’re working with copy and paste inside tmux. The prefix mode bindings are where you’ll see ones you’ve added above. Feel free to experiment with your own!

Use powerline for great justice

As reported in a previous Fedora Magazine article, the powerline utility is a fantastic addition to your shell. But it also has capabilities when used with tmux. Because tmux takes over the entire terminal space, the powerline window can provide more than just a better shell prompt.

Screenshot of tmux powerline in git folder

If you haven’t already, follow the instructions in the Magazine’s powerline article to install that utility. Then, install the addon using sudo:

sudo dnf install tmux-powerline

Now restart your session, and you’ll see a spiffy new status line at the bottom. Depending on the terminal width, the default status line now shows your current session ID, open windows, system information, date and time, and hostname. If you change directory into a git-controlled project, you’ll see the branch and color-coded status as well.

Of course, this status bar is highly configurable as well. Enjoy your new supercharged tmux session, and have fun experimenting with it.


Photo by Pamela Saunders on Unsplash.