MPD, as the name implies, is a Music Playing Daemon. It can play music but, being a daemon, any piece of software can interface with it and play sounds, including some CLI clients.
One of them is called ncmpcpp, which is an improvement over the pre-existing ncmpc tool. The name change doesn’t have much to do with the language they’re written in: they’re both C++, but ncmpcpp is called that because it’s the NCurses Music Playing ClientPlus Plus.
Installing MPD and ncmpcpp
The ncmpmpcc client can be installed from the official Fedora repositories with DNF directly with
The most painless way to set up MPD is to run it as a regular user. The default is to run it as the dedicated mpd user, but that causes all sorts of issues with permissions.
Before we can run it, we need to create a local config file that will allow it to run as a regular user.
To do that, create a subdirectory called mpd in ~/.config:
$ mkdir ~/.config/mpd
copy the default config file into this directory:
$ cp /etc/mpd.conf ~/.config/mpd
and then edit it with a text editor like vim, nano or gedit:
$ nano ~/.config/mpd/mpd.conf
I recommend you read through all of it to check if there’s anything you need to do, but for most setups you can delete everything and just leave the following:
db_file "~/.config/mpd/mpd.db" log_file "syslog"
At this point you should be able to just run
$ mpd
with no errors, which will start the MPD daemon in the background.
Using ncmpcpp
Simply run
$ ncmpcpp
and you’ll see a ncurses-powered graphical user interface in your terminal.
Press 4 and you should see your local music library, be able to change the selection using the arrow keys and press Enter to play a song.
Doing this multiple times will create a playlist, which allows you to move to the next track using the > button (not the right arrow, the > closing angle bracket character) and go back to the previous track with <. The + and – buttons increase and decrease volume. The Q button quits ncmpcpp but it doesn’t stop the music. You can play and pause with P.
You can see the current playlist by pressing the 1 button (this is the default view). From this view you can press i to look at the information (tags) about the current song. You can change the tags of the currently playing (or paused) song by pressing 6.
Pressing the \ button will add (or remove) an informative panel at the top of the view. In the top left, you should see something that looks like this:
[------]
Pressing the r, z, y, R, x buttons will respectively toggle the repeat, random, single, consume and crossfade playback modes and will replace one of the – characters in that little indicator to the initial of the selected mode.
Pressing the F1 button will display some help text, which contains a list of keybindings, so there’s no need to write a complete list here. So now go on, be geeky, and play all your music from your terminal!
Being able to collaborate on task remotely is an increasing need in today’s world. Contributing to Open Source project ? Working remotely ? tmate is a tmux fork that makes it easy to share a terminal session with others. It can save you hours of lonely debugging or programming.
tmate, being a tmux fork, supports all of tmux features and configuration. Also tmux and tmate can co-exist on the same system. To learn more about tmux, you can read the following article
tmate is available in the Fedora repository, making it really easy to install.
$ sudo dnf install tmate
$ tmate
Connecting to ssh.tmate.io… Note: clear your terminal before sharing readonly access web session read only: https://tmate.io/t/ro-F2aK7T ssh session read only: ssh [email protected] web session: https://tmate.io/t/H5rPw ssh session: ssh [email protected]
After starting tmate, different ways to share your session will be available. You have the choice between ssh (read-only, read-write) or web (read-only, read-write).
The web client is known to have a few issues and is still work in progress, for example the tmux key bindings are not yet supported.
On the host running tmate, you start a new pane by hitting “Ctrl+b, c”. The new pane will then be available with anyone connected to your session.
You can easily keep track of how many clients are connected to your session, using the tmate control pane. To access it hit “Ctrl+b, 0 (zero)” you will then see something like this.
A mate has joined (109.95.145.251) -- 1 client currently connected
A mate has left (109.95.145.251) -- 0 client currently connected
A mate has joined (109.95.145.251) -- 1 client currently connected
To close a session you can simply close tmate“Ctrl+c, Ctrl+d“.
Running your own server
By default tmate is using a remote server hosted on tmate.io. If you prefer you have the possibility to run your own server. For convenience a container image is provided and instruction are available on tmate.io.
It is important to remember that sharing your terminal session in read-write mode will give full access to your system to the connected client. So make sure you trust the persons you sharing you session with or use the read-only mode.
Large files like logs or source code can run into the thousands of lines. That makes navigating them difficult, particularly from the terminal. Additionally, most terminal emulators have a scrollback buffer of only a few hundred lines. That can make it impossible to browse large files in the terminal using utilities which print to standard output like cat, head and tail. In the early days of computing, programmers solved these problems by developing utilities for displaying text in the form of virtual “pages” — utilities imaginatively described as pagers.
Pagers offer a number of features which make text file navigation much simpler, including scrolling, search functions, and the ability to feature as part of a pipeline of commands. In contrast to most text editors, some terminal pagers do not require loading the entire file for viewing, which makes them faster, especially for very large files.
In the modern era of Linux computing, terminal emulators are more sophisticated than ever. They offer support for a kaleidoscope of colors, terminal resizing, as well as a host of other features to make parsing text on screen easier and more efficient. Terminal pagers have undergone a similar evolution, from extremely simple UNIX utilities like pg and more, to sophisticated programs with a wide range of features, covering any number of use cases. With this in mind, we’ve put together a list of some of the most popular terminal paging utilities — more or less.
More
more is one of the earliest pagers, initially featured in version 3.0 BSD. The first implementation of more was written in 1978 by Daniel Halbert. Since then, more has become a ubiquitous feature of many operating systems, including Windows, OS/2, MacOS and most linux distributions.
more is a very lightweight utility. The version featured in util-linux runs to just under 2100 lines of C. However, this small footprint comes at a price. Most versions of more feature relatively limited functionality, with no support for backwards scroll or search. Commands are similarly stripped back: press enter to scroll one line, or space to scroll one page. Some other useful commands include:
Press v while reading to open the current file in your default terminal editor.
‘/pattern‘ let’s you search for the next occurrence of pattern.
:n and :p will open the next and previous files respectively when more is called with more than one file as arguments
Less
less was initially conceived as a successor to more, addressing some of its limitations. Building on the functionality of more, less adds a number of useful features including backwards scroll, backwards search. It is also more amenable to window resizing.
Navigation in less is similar to more, though less borrows a few useful commands from the vi editor as well. Users can navigate the document using the familiar home row navigational keys. A glance at the man page for less reveals a fairly rich repertoire of available commands. Some particularly useful examples include:
?pattern lets you search backwards in the file for pattern
&pattern shows only lines which feature pattern. This is particularly useful for those who find themselves issuing $ grep pattern | less regularly.
Calling less with the -s (–sqeueeze-blank-lines) flag allows you to view text files with large gaps. Multiple newline characters are reduced to single breaks.
s filename, called from within the program, saves input to filename (if input is a pipe).
Alternatively, calling less with the -o filename flag will save the input of less to filename.
With this enhanced functionality comes a little extra weight. The version of less that ships with Fedora at the time of writing clocks in at around 25000 lines of source code. Granted, for all but the most storage constrained systems, this is a non-issue. Besides, less is more than more.
Most
While less aims to expand on the existing capabilities of more, most takes a different approach. Rather than expanding on the traditional single file view, most gives users the ability to split their view into “windows.” Each window contains different files in different viewing modes. Significantly, most takes into account the width of its input text. The default viewing mode doesn’t wrap text (-S in less), a feature particularly useful when dealing with “wide” files. While these design decisions might represent a significant departure from tradition for some users, the end result is very powerful.
In addition to the navigation commands offered by more, most uses intuitive mnemonics for file navigation. For example, t moves to the top of a file, and b moves to the bottom. As a result, users unfamiliar with vi and its descendants will find most to be refreshingly simple.
The distinguishing feature of most is its ability to split windows and contexts quickly and easily. For example, one could open two distinct text files using the following:
$ most textFile1.txt textFile2.txt
In order to split the screen horizontally, use the key combos Ctrl+x, 2 or Ctrl+w, 2. The command :n will open the next file argument in a given window, offering a split screen view of two files:
If you turn wrap off in one window, it does not affect the behavior of other windows. The \ character indicates a wrap or fold, while the $ character indicates that the file extends past the limitations of the current window.
pspg
Those who work with SQL databases often need to be able to examine the contents of our databases at a glance. The command line interfaces for many popular open source DBMS’s, such as MySQL and PostGreSQL, use the system default pager to view outputs that don’t fit on a single screen. Utilities like more and less are designed around the idea of presenting text files, but for more structured data, leave something to be desired. Naive text paginating programs have no concept of broad, tabular data, which can be frustrating when dealing with large queries.
pspg attempts to address this by offering users the ability to freeze columns while viewing, sort data in situ, and colourize output. While pspg was intended initially to serve as a pager replacement for psql specifically, the program also supports the viewing of CSV data, and is a suitable drop-in replacement for mysql and pgcli.
Vim
In a modern, technicolor terminal, the idea of endless pages of drab grey on black text can feel like something of an anachronism. The syntax highlighting options offered by powerful text editors like vim can be useful for browsing source code. Furthermore, the search functions offered by vim vastly outclass the competition. With this in mind, vim ships with a shell script less.sh that lets vim serve as a replacement for conventional pagers.
To set vim as the default pager for man pages, add the following to your shell’s config (such as ~/.bashrc if using the default bash shell):
Alternatively, to set vim as the default pager system-wide, locate the less.sh script. (You can find it at /usr/share/vim/vim81/macros/ on current Fedora systems.) Export this location as the variable PAGER to set it as default, or under an alias to invoke it explicitly.
A drop-down terminal lets you tap a key and quickly enter any command on your desktop. Often it creates a terminal in a smooth way, sometimes with effects. This article demonstrates how it helps to improve and speed up daily tasks, using drop-down terminals like Yakuake, Tilda, Guake and a GNOME extension.
Yakuake
Yakuake is a drop-down terminal emulator based on KDE Konsole techonology. It is distributed under the terms of the GNU GPL Version 2. It includes features such as:
Smoothly rolls down from the top of your screen
Tabbed interface
Configurable dimensions and animation speed
Skinnable
Sophisticated D-Bus interface
To install Yakuake, use the following command:
$ sudo dnf install -y yakuake
Startup and configuration
If you’re runnign KDE, open the System Settings and go to Startup and Shutdown. Add yakuake to the list of programs under Autostart, like this:
It’s easy to configure Yakuake while running the app. To begin, launch the program at the command line:
$ yakuake &
The following welcome dialog appears. You can set a new keyboard shortcut if the standard one conflicts with another keystroke you already use:
Now click the menu button, and the following help menu appears. Next, select Configure Yakuake… to access the configuration options.
You can customize the options for appearance, such as opacity; behavior, such as focusing terminals when the mouse pointer is moved over them; and window, such as size and animation. In the window options you’ll find one of the most useful options is you use two or more monitors: Open on screen: At mouse location.
Using Yakuake
The main shortcuts are:
F12 = Open/Retract Yakuake
Ctrl+F11 = Full Screen Mode
Ctrl+) = Split Top/Bottom
Ctrl+( = Split Left/Right
Ctrl+Shift+T = New Session
Shift+Right = Next Session
Shift+Left = Previous Session
Ctrl+Alt+S = Rename Session
Below is an example of Yakuake being used to split the session like a terminal multiplexer. Using this feature, you can run several shells in one session.
Tilda
Tilda is a drop-down terminal that compares with other popular terminal emulators such as GNOME Terminal, KDE’s Konsole, xterm, and many others.
It features a highly configurable interface. You can even change options such as the terminal size and animation speed. Tilda also lets you enable hotkeys you can bind to commands and operations.
To install Tilda, run this command:
$ sudo dnf install -y tilda
Startup and configuration
Most users prefer to have a drop-down terminal available behind the scenes when they login. To set this option, first go to the app launcher in your desktop, search for Tilda, and open it.
Next, open up the Tilda Config window. Select Start Tilda hidden, which means it will not display a terminal immediately when started.
Next, you’ll set your desktop to start Tilda automatically. If you’re using KDE, go to System Settings > Startup and Shutdown > Autostart and use Add a Program.
If you’re using GNOME, you can run this command in a terminal:
When you run for the first time, a wizard shows up to set your preferences. If you need to change something, right click and go to Preferences in the menu.
You can also create multiple configuration files, and bind other keys to open new terminals at different places on the screen. To do that, run this command:
$ tilda -C
Every time you use the above command, Tilda creates a new config file located in the ~/.config/tilda/ folder called config_0, config_1, and so on. You can then map a key combination to open a new Tilda terminal with a specific set of options.
Using Tilda
The main shortcuts are:
F1 = Pull Down Terminal Tilda (Note: If you have more than one config file, the shortcuts are the same, with a diferent open/retract shortcut like F1, F2, F3, and so on)
F11 = Full Screen Mode
F12 = Toggle Transparency
Ctrl+Shift+T = Add Tab
Ctrl+Page Up = Go to Next Tab
Ctrl+Page Down = Go to Previous Tab
GNOME Extension
The Drop-down Terminal GNOME Extension lets you use this useful tool in your GNOME Shell. It is easy to install and configure, and gives you fast access to a terminal session.
Then select Install to install the extension on your system.
Once you do this, there’s no reason to set any autostart options. The extension will automatically run whenever you login to GNOME!
Configuration
After install, the Drop Down Terminal configuration window opens to set your preferences. For example, you can set the size of the terminal, animation, transparency, and scrollbar use.
If you need change some preferences in the future, run the gnome-shell-extension-prefs command and choose Drop Down Terminal.
Using the extension
The shortcuts are simple:
` (usually the key above Tab) = Open/Retract Terminal
F12 (customize as you prefer) = Open/Retract Terminal
The tmux utility, a terminal multiplexer, lets you treat your terminal as a multi-paned window into your system. You can arrange the configuration, run different processes in each, and generally make better use of your screen. We introduced some readers to this powerful tool in this earlier article. Here are some tips that will help you get more out of tmux if you’re getting started.
This article assumes your current prefix key is Ctrl+b. If you’ve remapped that prefix, simply substitute your prefix in its place.
Set your terminal to automatically use tmux
One of the biggest benefits of tmux is being able to disconnect and reconnect to sesions at wilI. This makes remote login sessions more powerful. Have you ever lost a connection and wished you could get back the work you were doing on the remote system? With tmux this problem is solved.
However, you may sometimes find yourself doing work on a remote system, and realize you didn’t start a session. One way to avoid this is to have tmux start or attach every time you login to a system with in interactive shell.
Add this to your remote system’s ~/.bash_profile file:
if [ -z "$TMUX" ]; then tmux attach -t default || tmux new -s default fi
Then logout of the remote system, and log back in with SSH. You’ll find you’re in a tmux session named default. This session will be regenerated at next login if you exit it. But more importantly, if you detach from it as normal, your work is waiting for you next time you login — especially useful if your connection is interrupted.
Of course you can add this to your local system as well. Note that terminals inside most GUIs won’t use the default session automatically, because they aren’t login shells. While you can change that behavior, it may result in nesting that makes the session less usable, so proceed with caution.
Use zoom to focus on a single process
While the point of tmux is to offer multiple windows, panes, and processes in a single session, sometimes you need to focus. If you’re in a process and need more space, or to focus on a single task, the zoom command works well. It expands the current pane to take up the entire current window space.
Zoom can be useful in other situations too. For instance, imagine you’re using a terminal window in a graphical desktop. Panes can make it harder to copy and paste multiple lines from inside your tmux session. If you zoom the pane, you can do a clean copy/paste of multiple lines of data with ease.
To zoom into the current pane, hit Ctrl+b, z. When you’re finished with the zoom function, hit the same key combo to unzoom the pane.
Bind some useful commands
By default tmux has numerous commands available. But it’s helpful to have some of the more common operations bound to keys you can easily remember. Here are some examples you can add to your ~/.tmux.conf file to make sessions more enjoyable:
bind r source-file ~/.tmux.conf \; display "Reloaded config"
This command rereads the commands and bindings in your config file. Once you add this binding, exit any tmux sessions and then restart one. Now after you make any other future changes, simply run Ctrl+b, r and the changes will be part of your existing session.
bind V split-window -h bind H split-window
These commands make it easier to split the current window across a vertical axis (note that’s Shift+V) or across a horizontal axis (Shift+H).
If you want to see how all keys are bound, use Ctrl+B, ? to see a list. You may see keys bound in copy-mode first, for when you’re working with copy and paste inside tmux. The prefix mode bindings are where you’ll see ones you’ve added above. Feel free to experiment with your own!
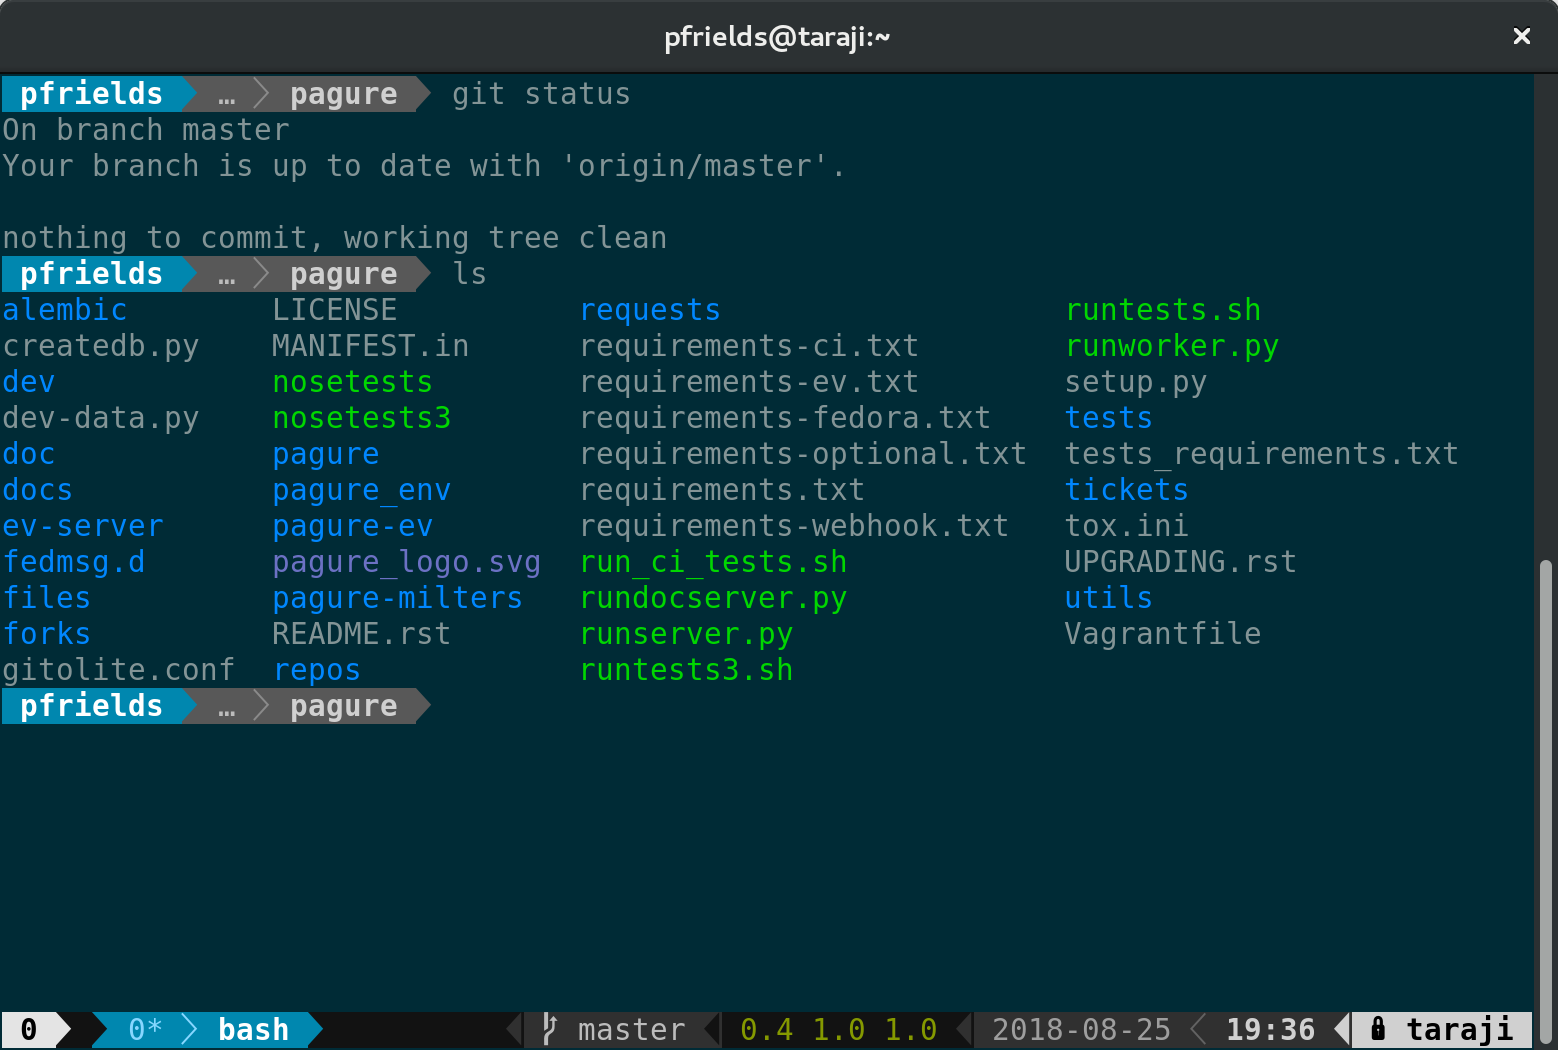
Use powerline for great justice
As reported in a previous Fedora Magazine article, the powerline utility is a fantastic addition to your shell. But it also has capabilities when used with tmux. Because tmux takes over the entire terminal space, the powerline window can provide more than just a better shell prompt.
Now restart your session, and you’ll see a spiffy new status line at the bottom. Depending on the terminal width, the default status line now shows your current session ID, open windows, system information, date and time, and hostname. If you change directory into a git-controlled project, you’ll see the branch and color-coded status as well.
Of course, this status bar is highly configurable as well. Enjoy your new supercharged tmux session, and have fun experimenting with it.
Many Linux users think that working in a terminal is either too complex or boring, and try to escape it. Here is a fix, though — four great open source apps for your terminal. They’re fun and easy to use, and may even brighten up your life when you need to spend a time in the command line.
No More Secrets
This is a simple command line tool that recreates the famous data decryption effect seen in the 1992 movie Sneakers. The project lets you compile the nms command, which works with piped data and prints the output in the form of messed characters. Once it does so, you can press any key, and see the live “deciphering” of the output with a cool Hollywood-style effect.
This GIF animation briefly shows the No More Secrets effect
Installation instructions
A fresh Fedora Workstation system already includes everything you need to build No More Secrets from source. Just enter the following command in your terminal:
git clone https://github.com/bartobri/no-more-secrets.git cd ./no-more-secrets make nms make sneakers ## Optional sudo make install
The sneakers command is a little bonus for those who remember the original movie, but the main hero is nms. Use a pipe to redirect any Linux command to nms, like this:
systemctl list-units --type=target | nms
Once the text stops flickering, hit any key to “decrypt” it. The systemctl command above is only an example — you can replace it with virtually anything!
Lolcat
Here’s a command that colorizes the terminal output with rainbows. Nothing can be more useless, but boy, it looks awesome!
Let your Linux command output look jolly!
Installation instructions
Lolcat is a Ruby package available from the official Ruby Gems hosting. So, you’ll need the gem client first:
sudo dnf install -y rubygems
And then install Lolcat itself:
gem install lolcat
Again, use the lolcat command in for piping any other command and enjoy rainbows (and unicorns!) right in your Fedora terminal.
Chafa
Zoom out your terminal view to increase resolution for Chafa
Chafa is a command line image converter and viewer. It helps you enjoy your images without leaving your lovely terminal. The syntax is very straightforward:
chafa /path/to/your/image
You can throw almost any sort of image to Chafa, including JPG, PNG, TIFF, BMP or virtually anything that ImageMagick supports — this is the engine that Chafa uses for parsing input files. The coolest part is that Chafa can also show very smooth and fluid GIF animations right inside your terminal!
Installation instructions
Chafa isn’t packaged for Fedora yet, but it’s quite easy to build it from source. First, get the necessary build dependencies:
Next, clone the code or download a snapshot from the project’s Github page and cd to the Chafa directory. After that, you’re ready to go:
git clone https://github.com/hpjansson/chafa ./autogen.sh make sudo make install
Large images can take a while to process at the first run, but Chafa caches everything you load with it. Next runs will be nearly instantaneous.
Browsh
Browsh is a fully-fledged web browser for the terminal. It’s more powerful than Lynx and certainly more eye-catching. Browsh launches the Firefox web browser in a headless mode (so that you can’t see it) and connects it with your terminal with the help of special web extension. Therefore, Browsh renders all rich media content just like Firefox, only in a bit pixelated style.
Fedora Magazine still looks awesome in Browsh
Installation instructions
The project provides packages for various Linux distributions, including Fedora. Install it this way:
After that, launch the browsh command and give it a couple of seconds to load up. Press Ctrl+L to switch focus to the address bar and start browsing the Web like you never did before! Use Ctrl+Q to get back to your terminal.
For some people, the terminal can be scary. But a terminal is more than just a black screen to type in. It usually runs a shell, so called because it wraps around the kernel. The shell is a text-based interface that lets you run commands on the system. It’s also sometimes called a command line interpreter or CLI. Fedora, like most Linux distributions, comes with bash as the default shell. However, it isn’t the only shell available; several other shells can be installed. This article focuses on the Z Shell, or zsh.
Bash is a rewrite of the old Bourne shell (sh) that shipped in UNIX. Zsh is intended to be friendlier than bash, through better interaction. Some of its useful features are:
Programmable command line completion
Shared command history between running shell sessions
Spelling correction
Loadable modules
Interactive selection of files and folders
Zsh is available in the Fedora repositories. To install, run this command:
$ sudo dnf install zsh
Using zsh
To start using it, just type zsh and the new shell prompts you with a first run wizard. This wizard helps you configure initial features, like history behavior and auto-completion. Or you can opt to keep the rc file empty:
First-run wizard
If you type 1 the configuration wizard starts. The other options launch the shell immediately.
Note that the user prompt is % and not $ as with bash. A significant feature here is the auto-completion that allows you to move among files and directories with the Tab key, much like a menu:
Using the auto-completion feature with the cd command
Another interesting feature is spelling correction, which helps when writing filenames with mixed cases:
Auto completion performing spelling correction
Making zsh your default shell
Zsh offers a lot of plugins, like zsh-syntax-highlighting, and the famous “Oh my zsh” (check out its page here). You might want to make it the default, so it runs whenever you start a session or open a terminal. To do this, use the chsh (“change shell”) command:
$ chsh -s $(which zsh)
This command tells your system that you want to set (-s) your default shell to the correct location of the shell (which zsh).